I Turned Our Lawn Into a Meadow
And it’s been awesome.
Lawn conversion season is just around the corner, and as I’ve been dreaming about the season to come and the edits I’d like to make in our former-front-lawn-turned-meadow, I’ve been reflecting on how it started and how it’s evolved.
2026 will be the sixth year for these plantings (I can hardly believe it!) and each year I’ve learned so many new things and experienced so many delightful moments and surprises.
I’m also realizing I’ve never really documented or shared the evolution of this not-so-new-anymore garden. My hope in doing so today is that it might inspire you to tackle your own lawn conversion project by demonstrating first and foremost that perfection or “doing it all at once” isn’t the goal.
Forward motion is what matters most, while embracing the lessons that come along the way.
Let’s dig in.
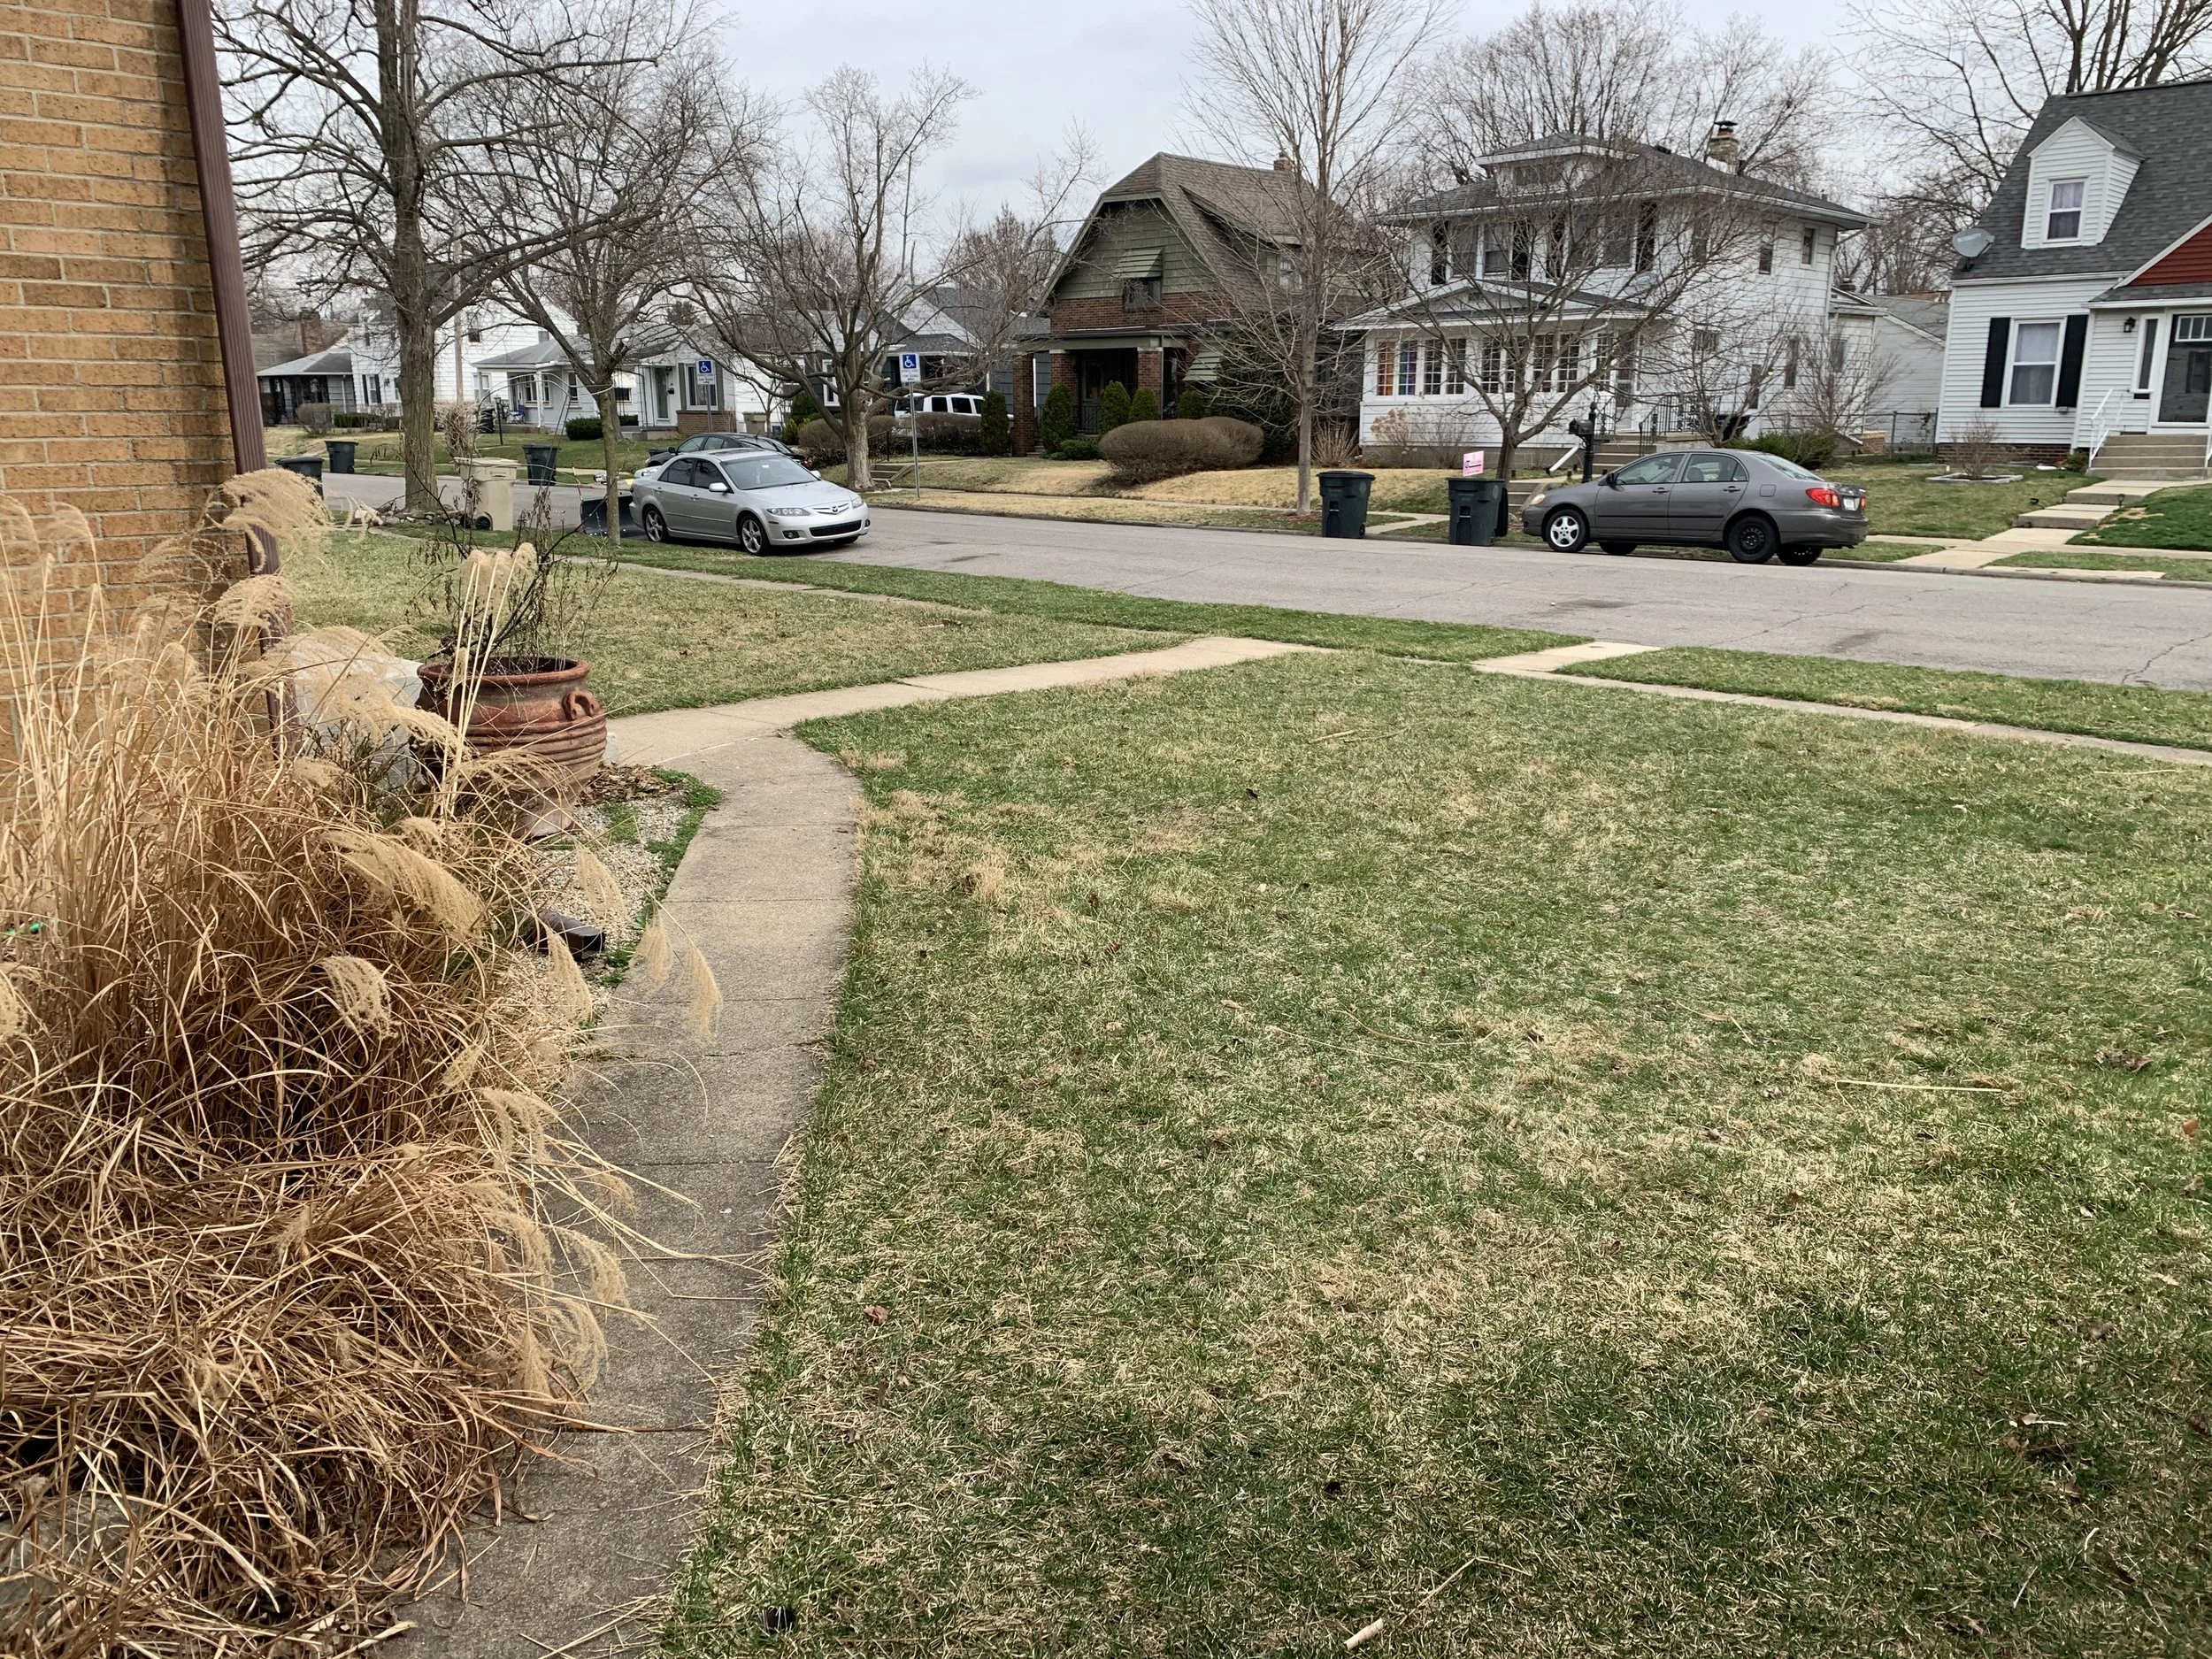
Early 2021, shortly after we moved in, our landscape looked like any other on our street: wall to wall lawn right up to the house, with a few overgrown and weedy “foundation plantings” up near the front.
We moved back to South Bend in late 2020, touching down with my parents for a few months until we could get our bearings. We found a house we loved in a neighborhood on the northwest side of South Bend, and moved in early the next year.
It was a blank canvas, full of potential. From the moment the snow melted, I was itching to get outside and begin creating a new garden.
I knew I wanted to remove most of the turf, and I’ll confess I didn’t really have “a plan” per say. For me, gardening - especially planting design - is driven mostly by intuition, feeling, and long periods of observation. I think some of the best gardens reveal themselves over time as they grow and mature with the gardener.
After a solid day of work, the first planting section has been carved out and the old plants along the edge of the house have been removed.
I started with a small border along the front of the lawn, near the top of the berm, with the sidewalk below. I hand dug this section, shaking off as much soil as I could before moving the old turf to the backyard to decompose. That was a project for later.
Digging turf by hand really only “works” on this scale, because it’s a very physical process, and it creates a heavy and hefty amount of debris to manage afterward. I hadn’t yet purchased a wheelbarrow, and I can’t tell you how many trips I made to the back garden with a bucket of heavy turf.
I sure did sleep well afterwards, and my lower back was not happy.
But, it got done.
The first perennials shortly after planting, just beginning to establish. I didn’t mulch - something I wish I’d done, and would strongly recommend to help with water retention and weed management.
Often I see folks work from the house out toward the street when creating new gardens. I’m curious why this might be? I can’t speak for anyone else, but in my case, I wanted the first plantings to be up front, visible, and accessible to passers-by. I wanted this little strip to make a statement.
I also wanted to create a green buffer between the sidewalk and what would become the upper garden - something to “insulate” the new plantings above as they came into form further down the road.
Most of the plants in this first iteration were divisions borrowed from my childhood garden at my parent’s. Only a few were new purchases, and at least half of those were plugs, the remnants of some of our very first lawn conversion projects through Botany.
Today, maybe 50% of these initial plants are still going strong some five years later. Many of the others just didn’t make it or were moved to a better-suited location.
This is all part of the process. Remember, perfection isn’t the aim here.
The process is the point.
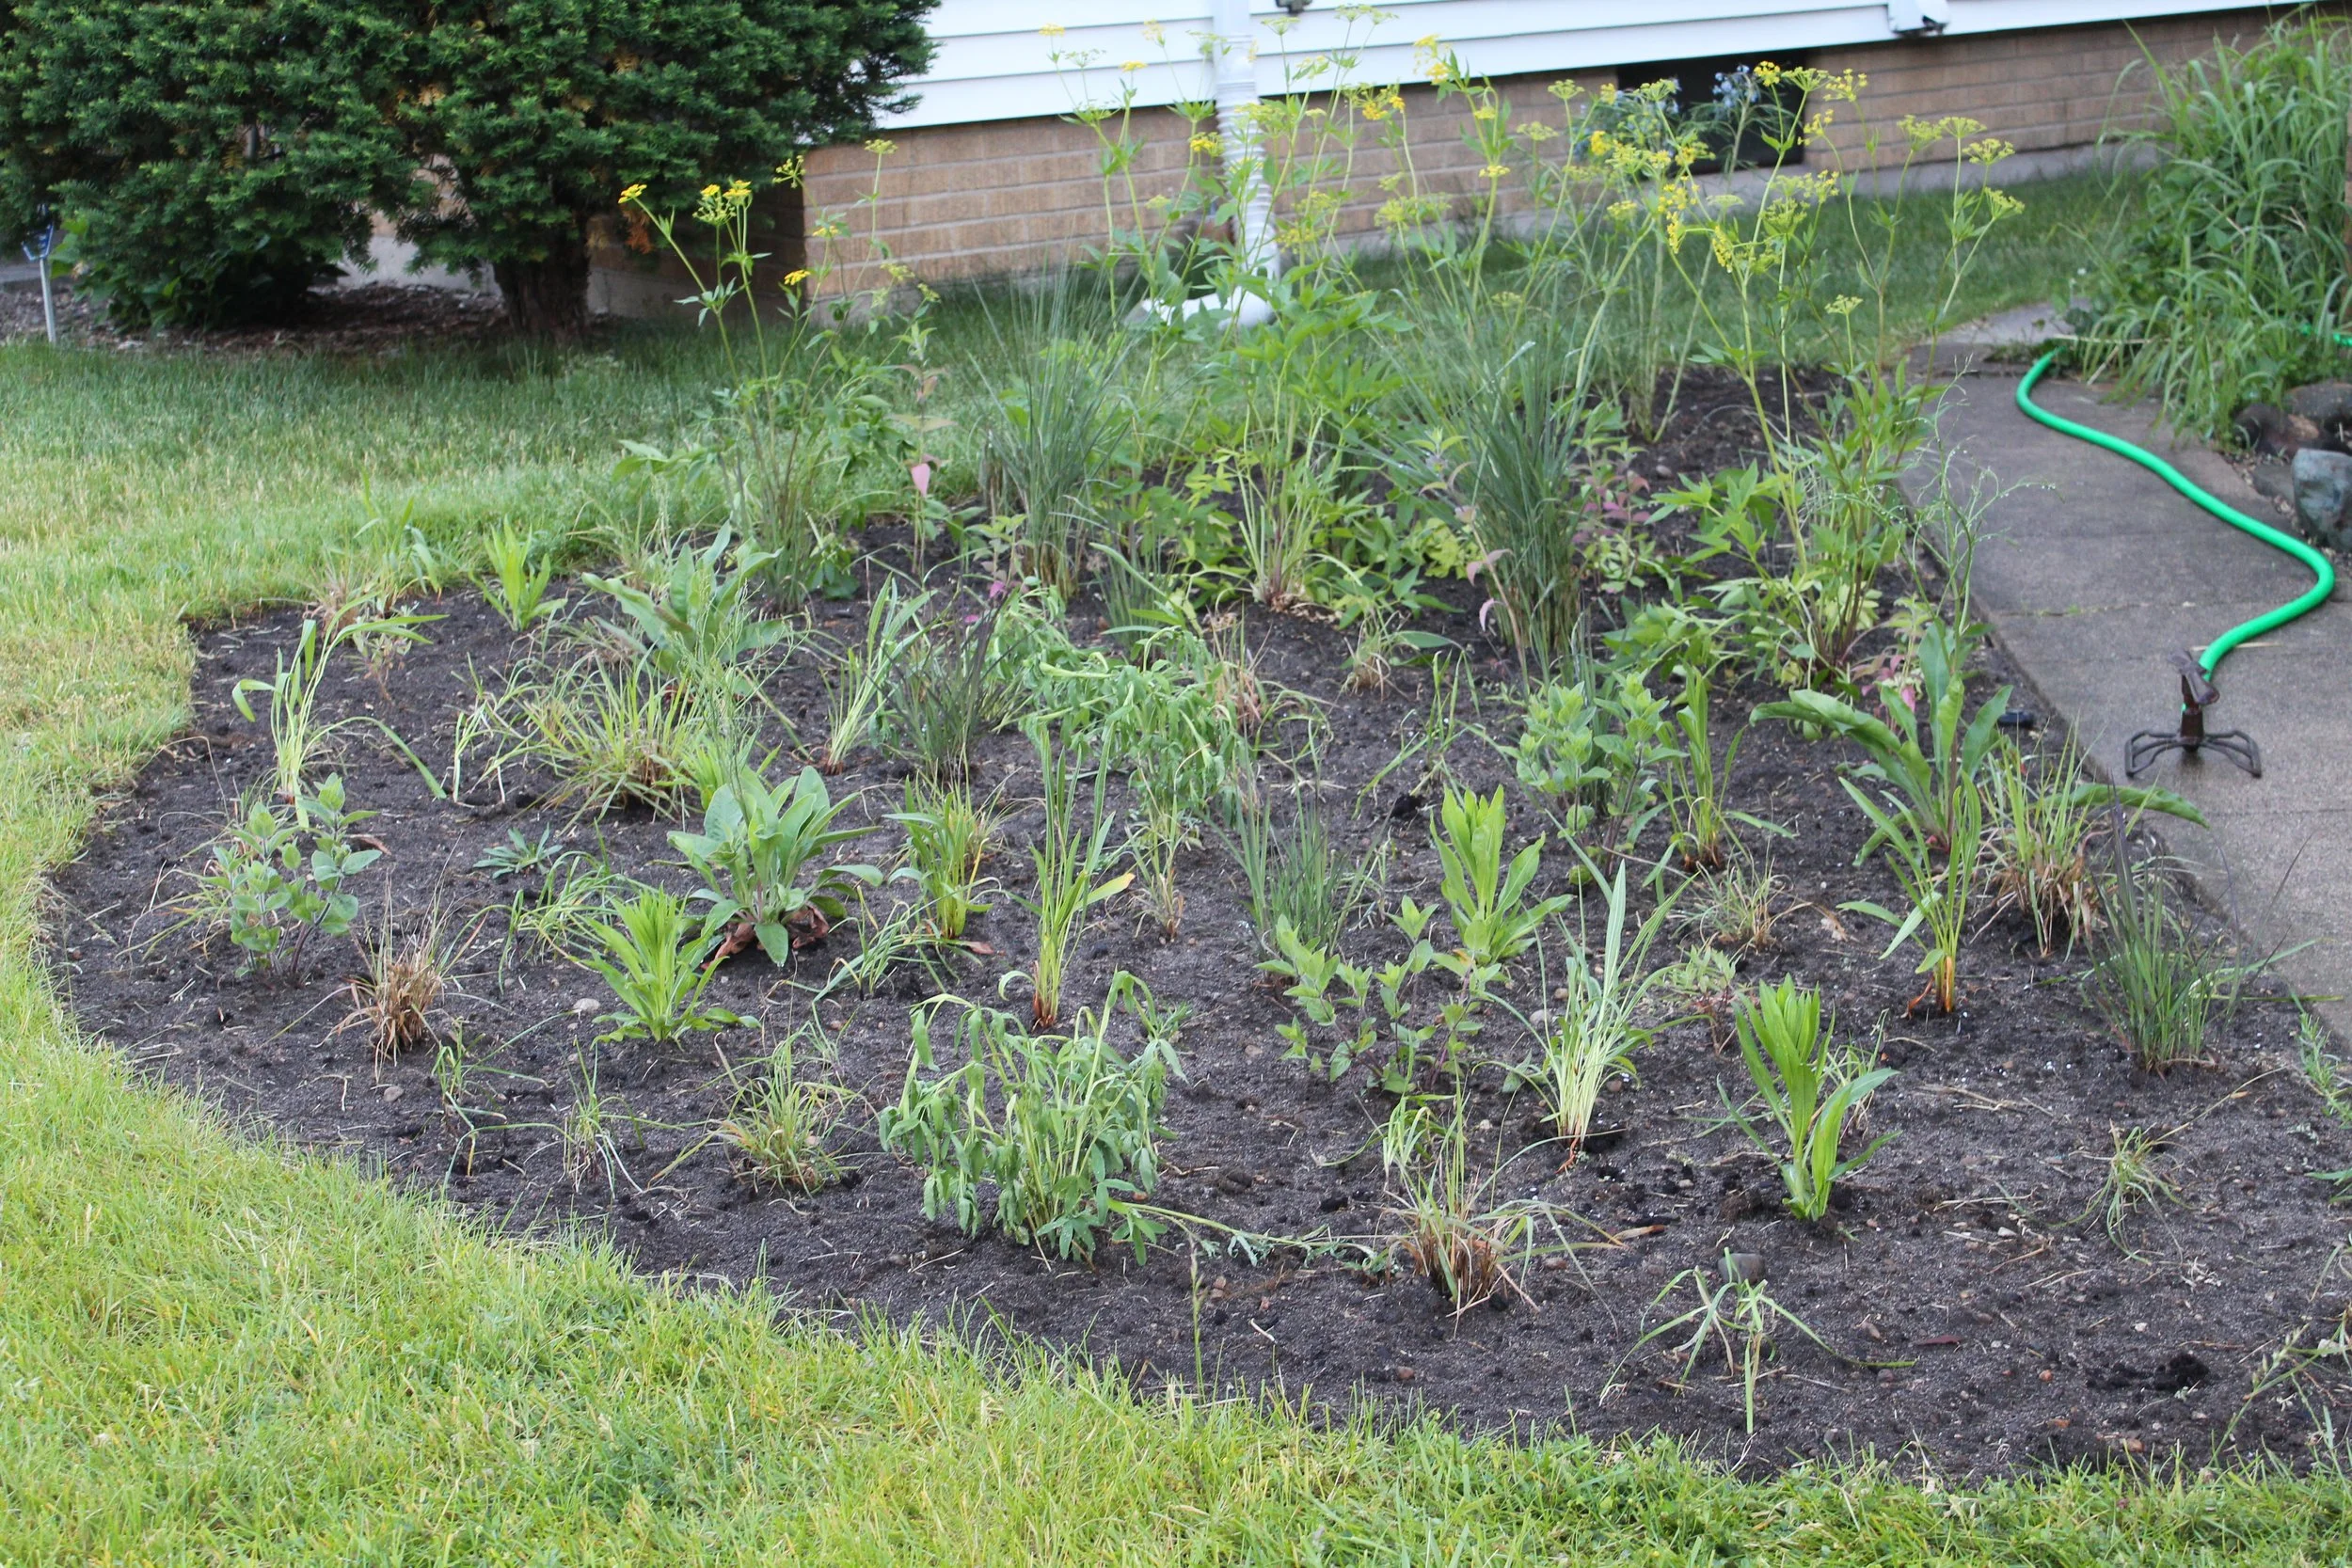
Phase 2 of the meadow, shortly after planting in mid 2021. Notice the sprinkler: always water immediately after planting to help things settle in.
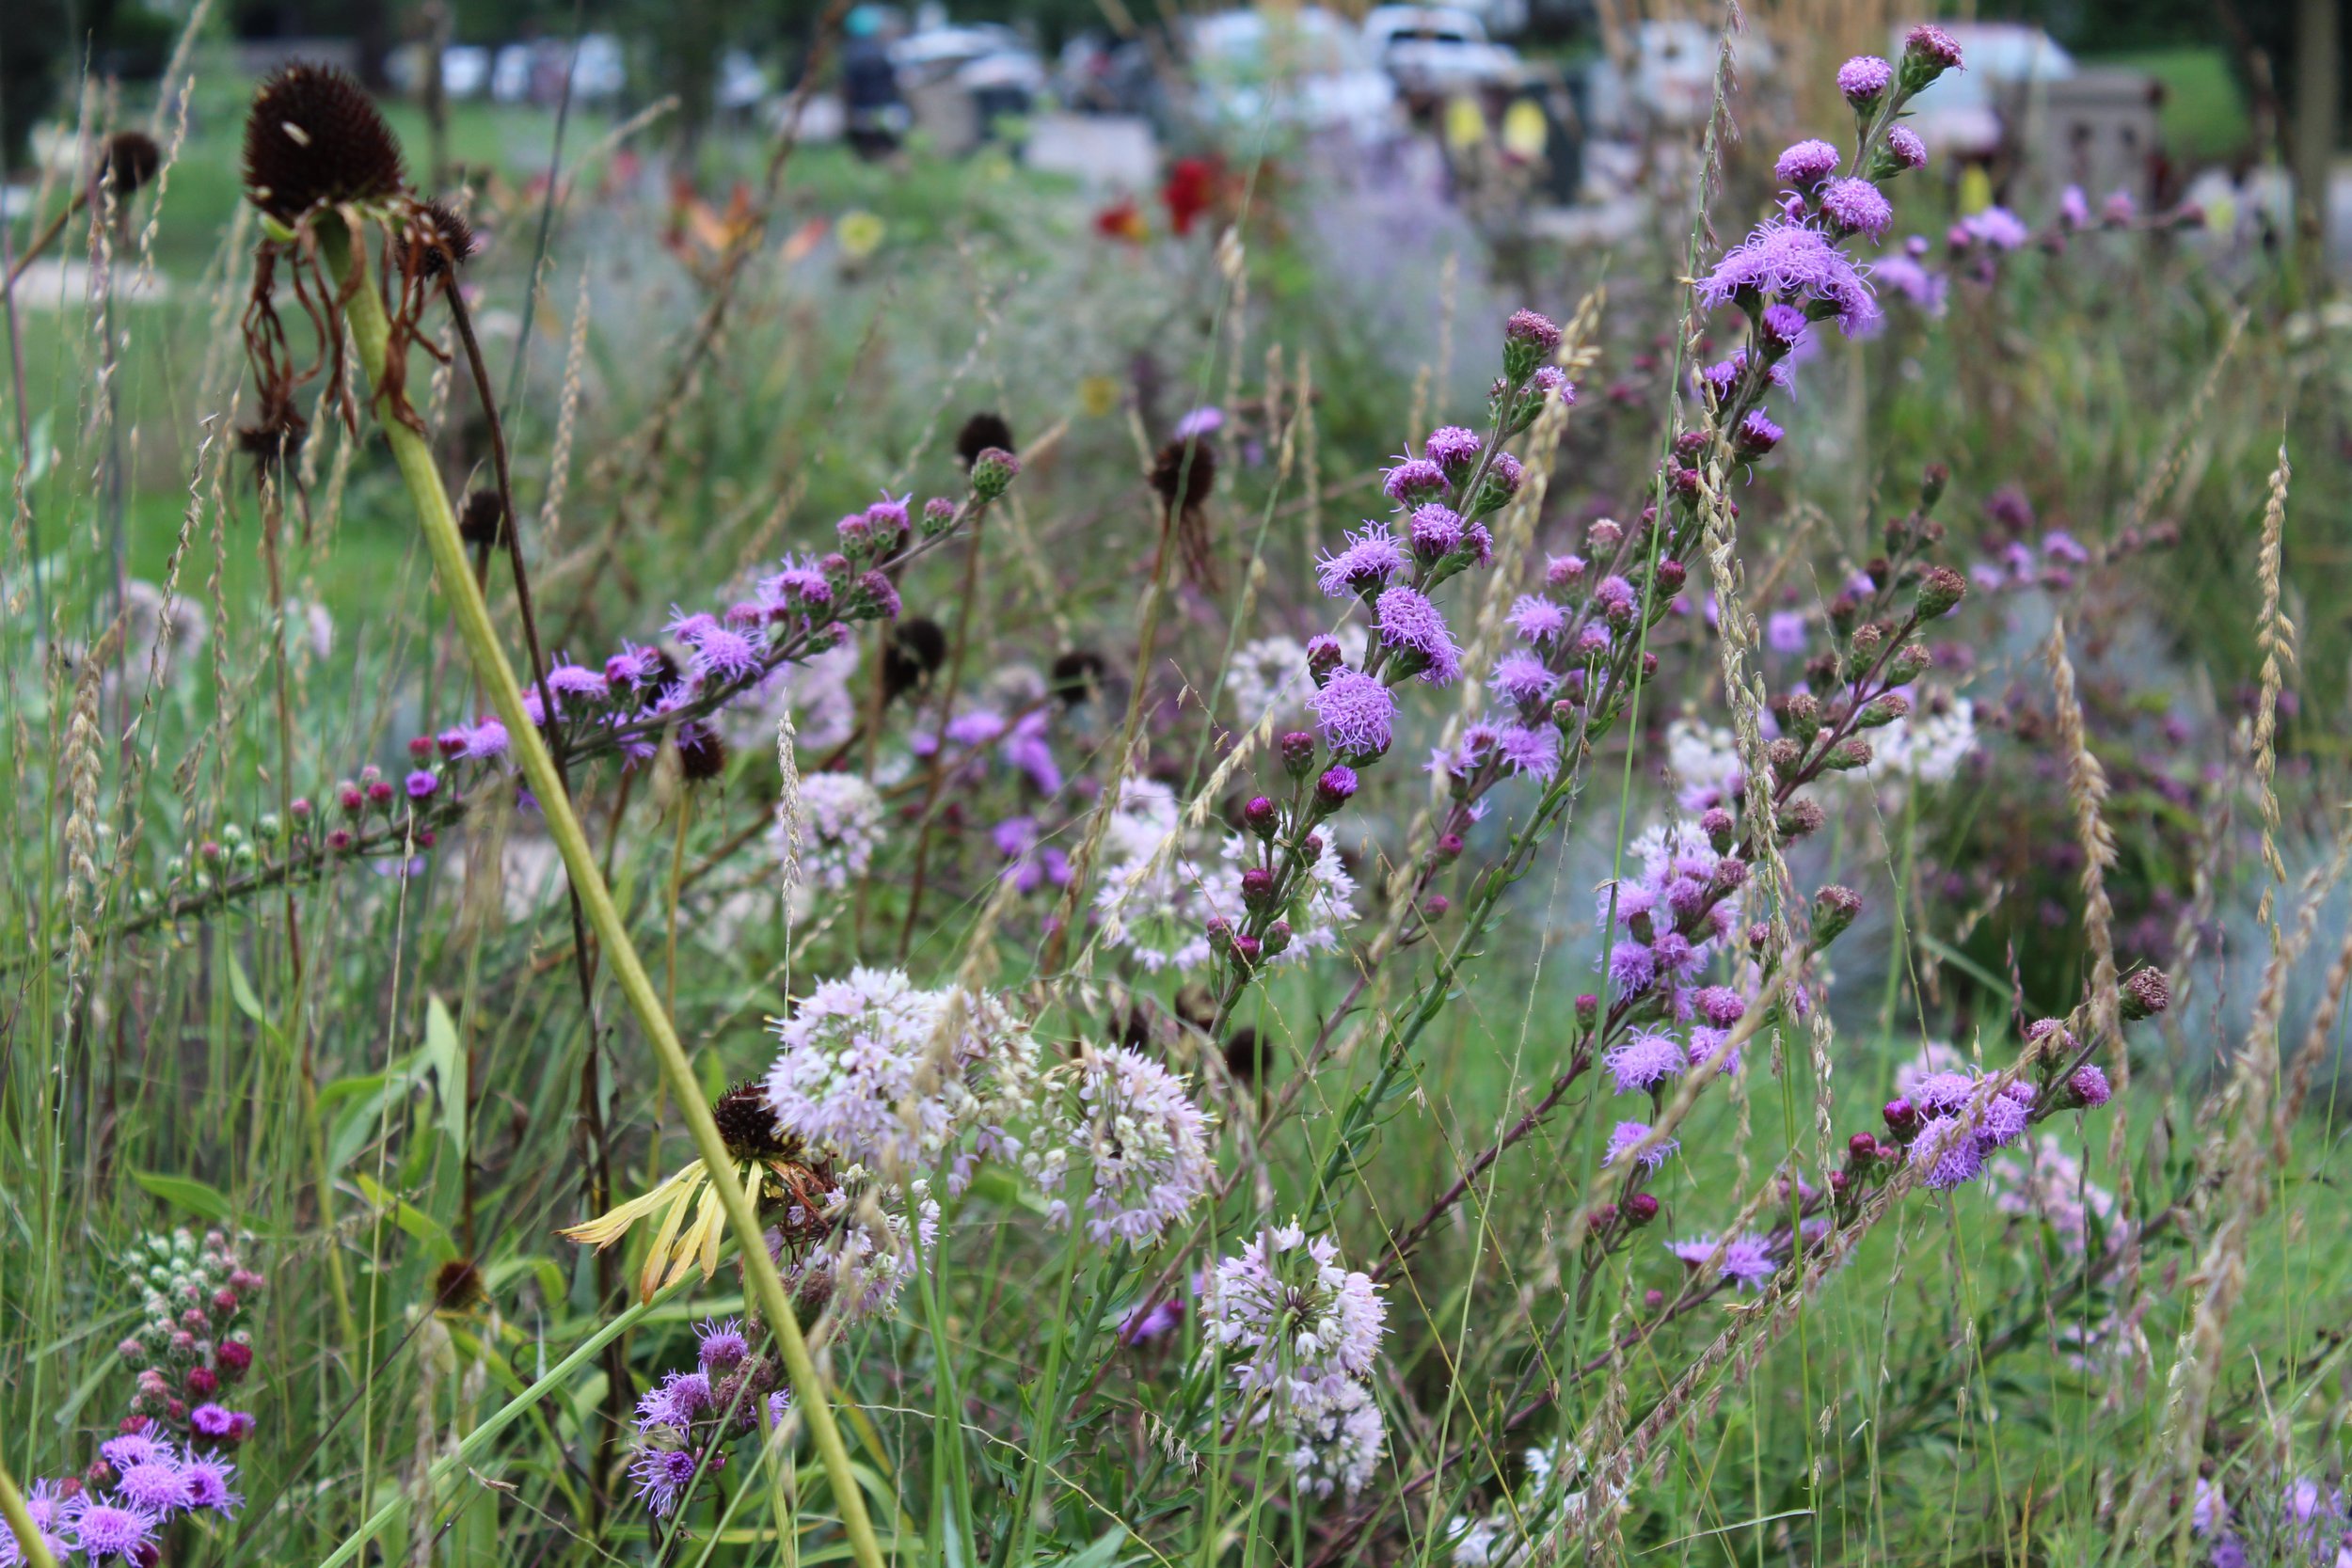
A few months later, I started on the next section, this time up near the house and along the sidewalk to the back garden that you saw in the very first image. I used a very different plant palette here, leaning more on grasses like Gramma Grass (Bouteloua curtipendula) as a base layer, with “punctuation” perennials like Meadow Blazing Star (Liatris ligulistylis) and Nodding Wild Onion. (Allium cernuum).
Today, this little pocket is one of my absolute favorite areas of the meadow because of how many layers are growing together, in harmony. I’ve continued adding plants over the years, including more delicate accents like Purple Prairie Clover (Dalea purpurea), Flowering Spurge (Euphorbia corollata), Royal Catchfly (Silene regia), and White Sagebrush (Artemisia ludoviciana).

The same meadow section in summer 2025.
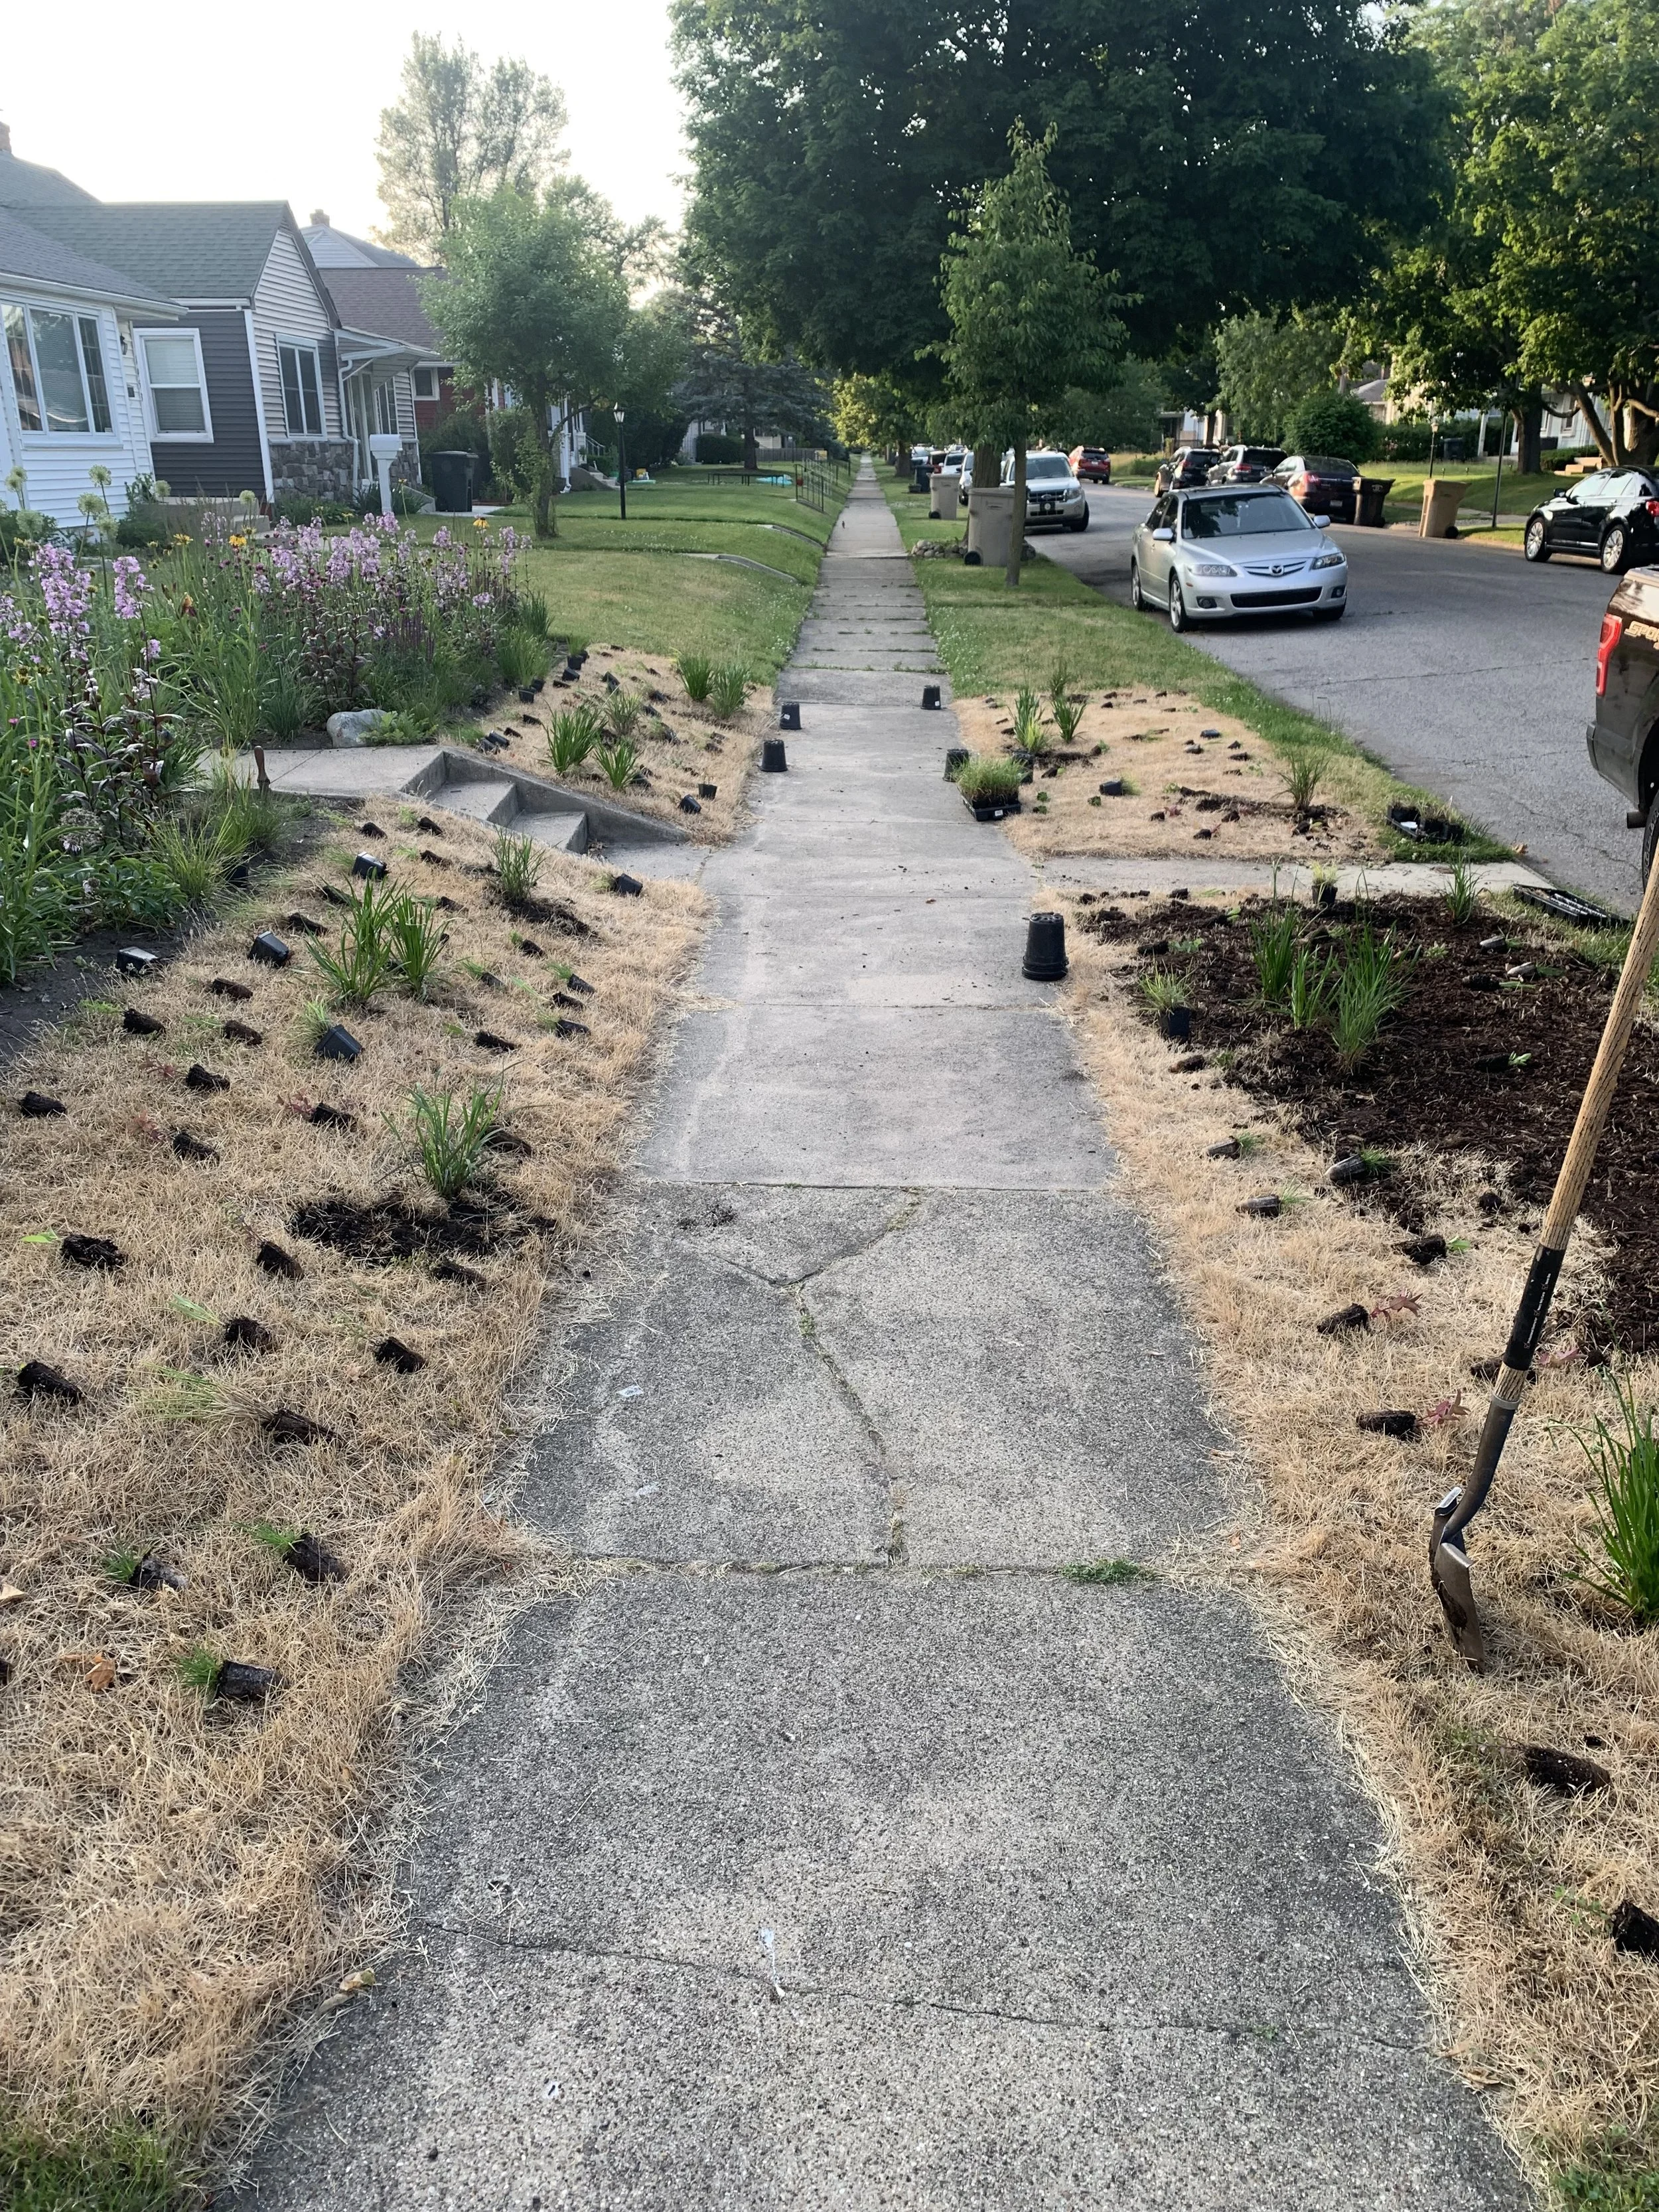
Finally, toward the end of summer 2021, I started on the center plantings. Square-footage wise, this was the largest area I’d tackled to date. I still hand-dug everything, and you’ll note the turf path running through the center.
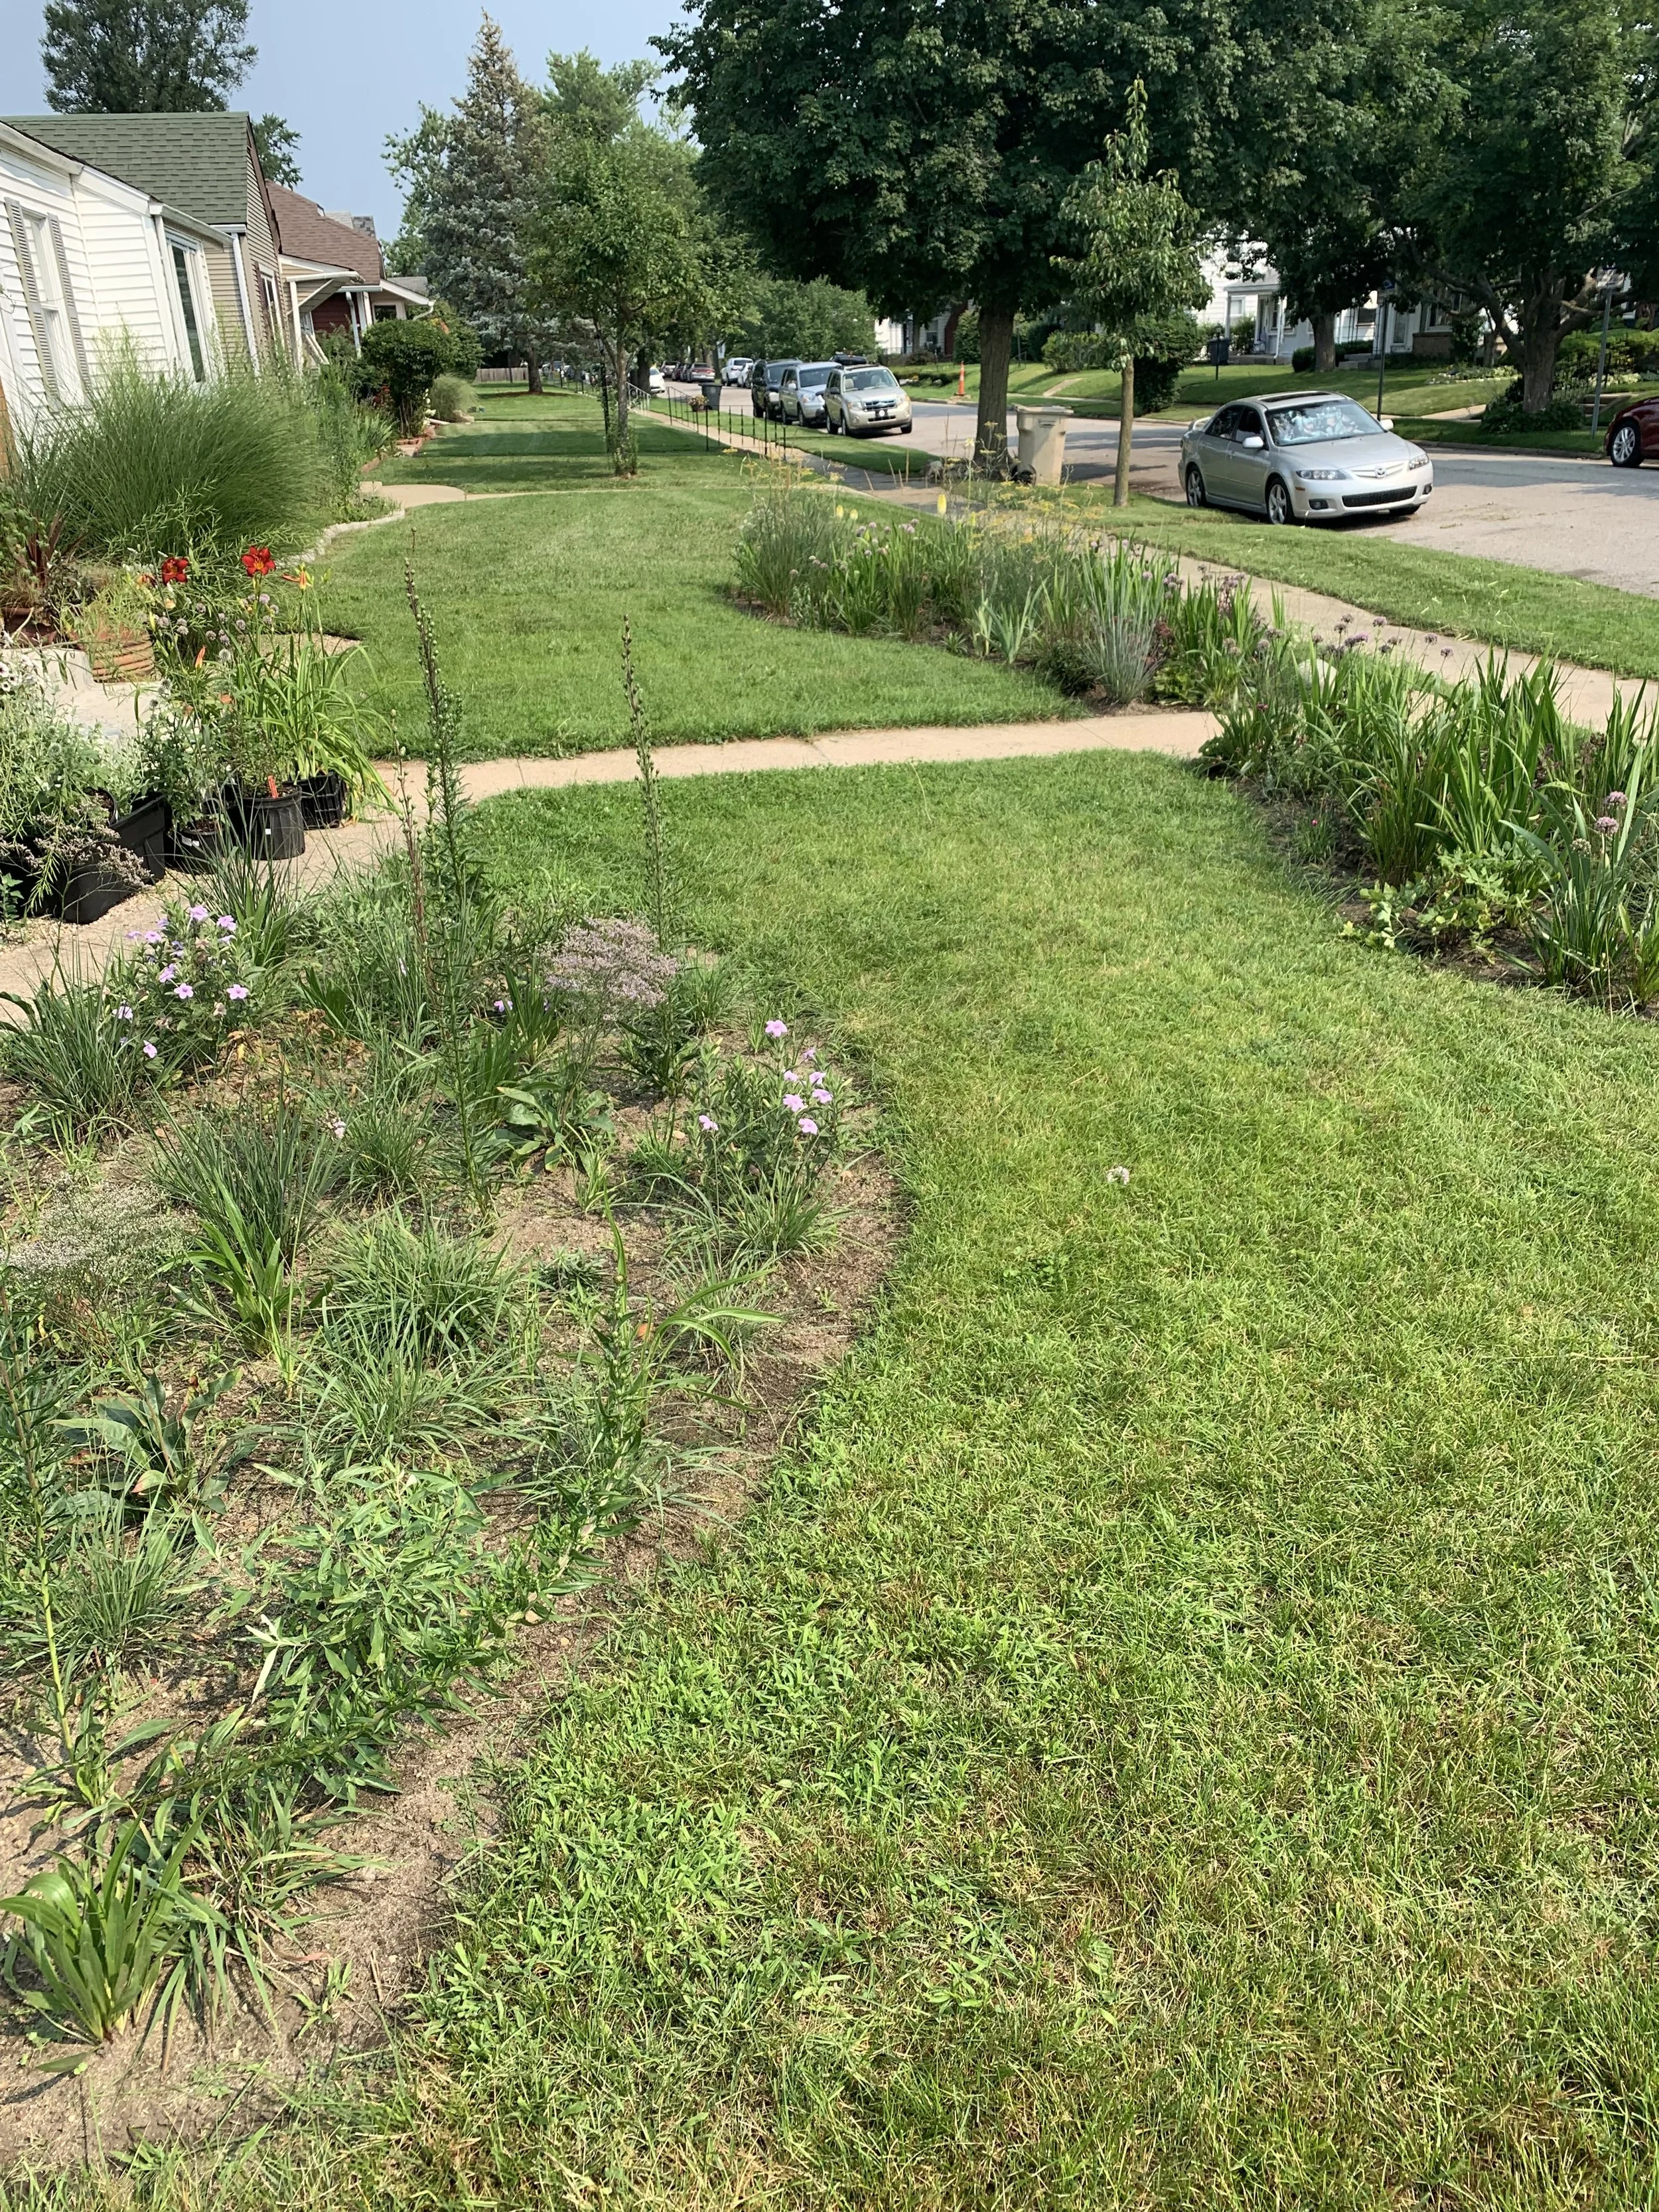
Before digging in - I picked one of the hottest days of the year for this, by the way.
Here’s a helpful tip. Grab a piece of 1×4 or 1×6 lumber and use it as a “tightrope path” to access the depths of deeper beds like this one. This helps reduce soil compaction while also keeping your shoes a bit more clean. (Only just a bit.)
This path serves several purposes, not least of which is for the benefit of our mail carrier. If you live in town, you’ve probably noticed that mail carriers often cut across front lawns when they can, as it’s seriously more efficient. I don’t blame them!
This path also serves me, the gardener, as it allows me to get up close and nearly inside the plantings. This is super helpful when doing any weeding or management tasks.
We’ve made it to the end of the very first growing season. I was lax in my photo documentation around this time, however I did add a handful of spring-flowering bulbs for early interest, which you’ll see soon. I’m going to pause here and share a few key lessons from this first year of lawn conversion.
First Year Key Lessons & Learnings
Hand-digging turf is hard, back-breaking work. The only silver lining is that it only has to happen once, and never again. You’re also left to deal with the turf that you’ve removed. I ended up composting it, and it actually creates great compost! (To be continued…)
Mulch immediately after planting. About 2” of finely shredded bark or old leaves are the best options. They’ll help with water retention and weed suppression, two critical elements of helping new plantings establish successfully.
Water immediately after planting, too. Your goal here should be to mimic about 1” of rain/week between natural precipitation. It’s actually a good thing to stress out new plants just a little bit, because it encourages them to put their roots down deep in search of water, and this will be important for their long-term resilience.
Leave a path for your mail carrier, if applicable.
Start with what you already have access to. Whether that’s extra seeds, plant divisions from friends, or lifting and dividing things you’re already growing: especially when planting a smaller space, a few plants can go a long way and help extend your budget, too.
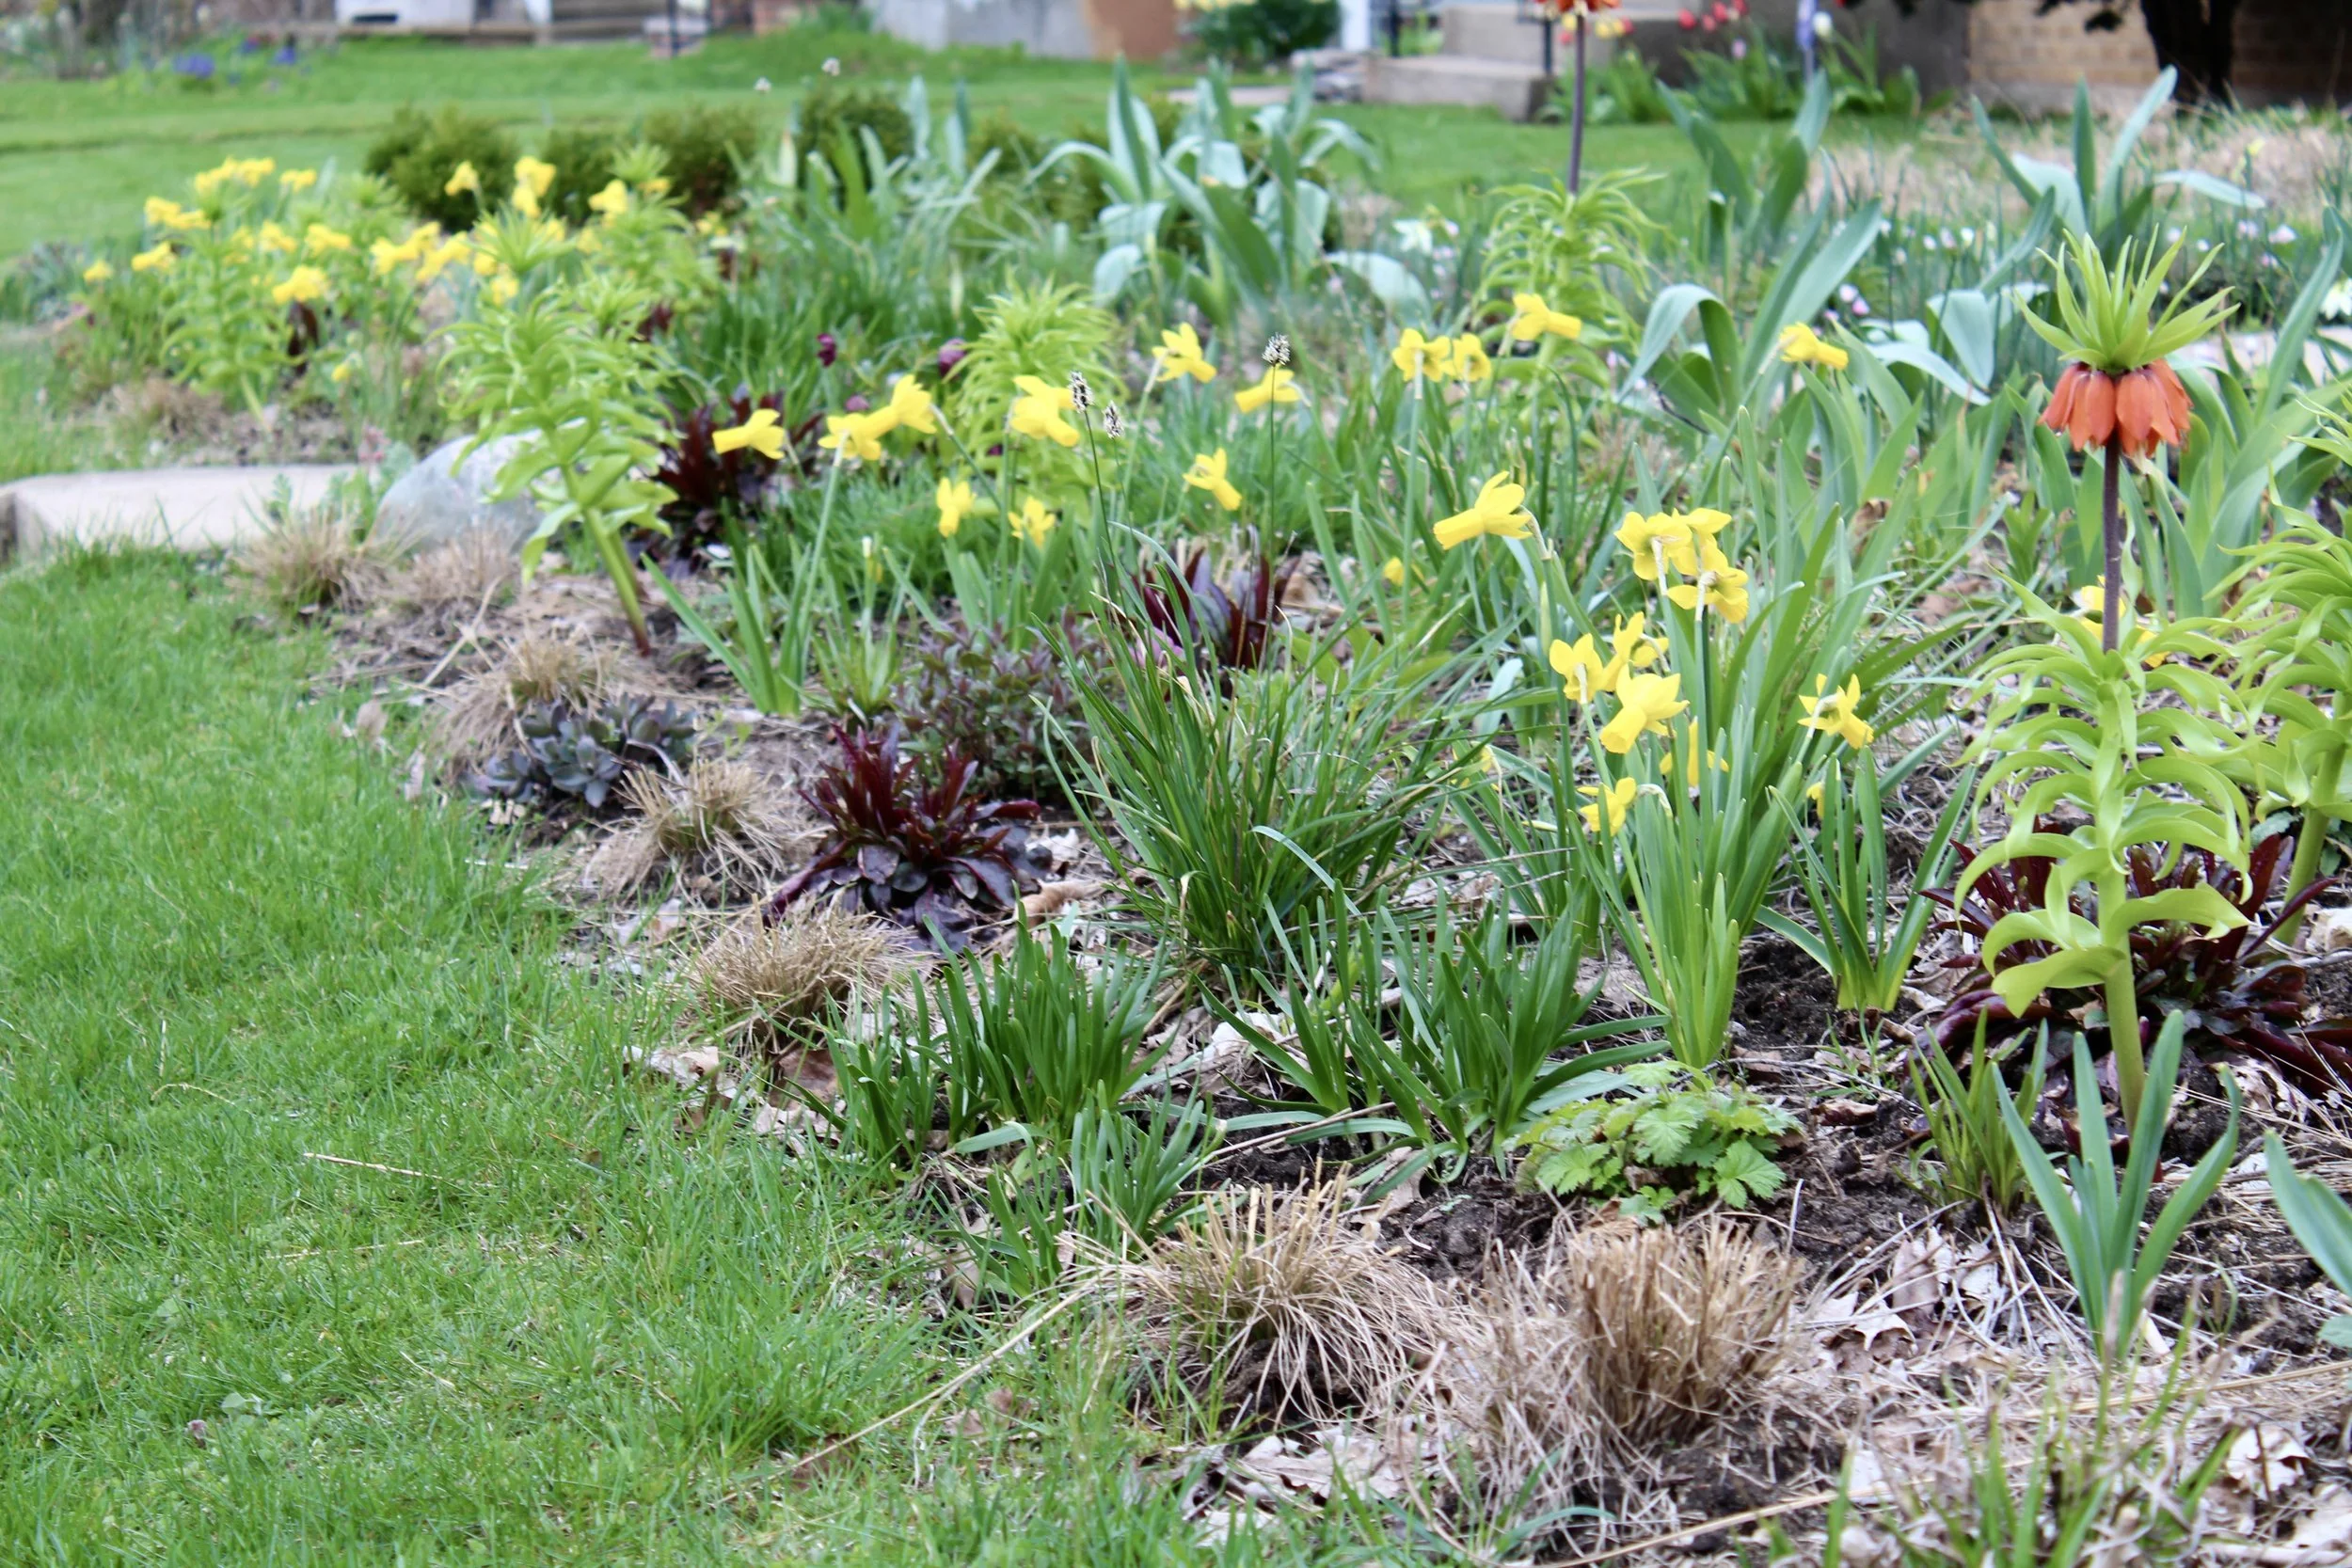
The first spring of the new meadow in 2022, with early-flowering spring bulbs for color before the perennials take over in late spring.
Year Two: The Lower Meadow & “Creep”
If you’ve done any research or reading on designing with perennials, you’ve probably come across the phrase, “sleep, creep, leap” when referring to plant establishment.
In the first year, new plants “sleep” in that they might not do much growth above ground. That’s because most of their energy is focused below ground, putting down deep roots and gearing-up for long-term resiliency.
In year two, plants begin to “creep” as they bulk up and produce more flowers and leaves. It’s also when new plantings begin to reveal their personality, and we discover if the recipe we’ve concocted will work as we hoped.
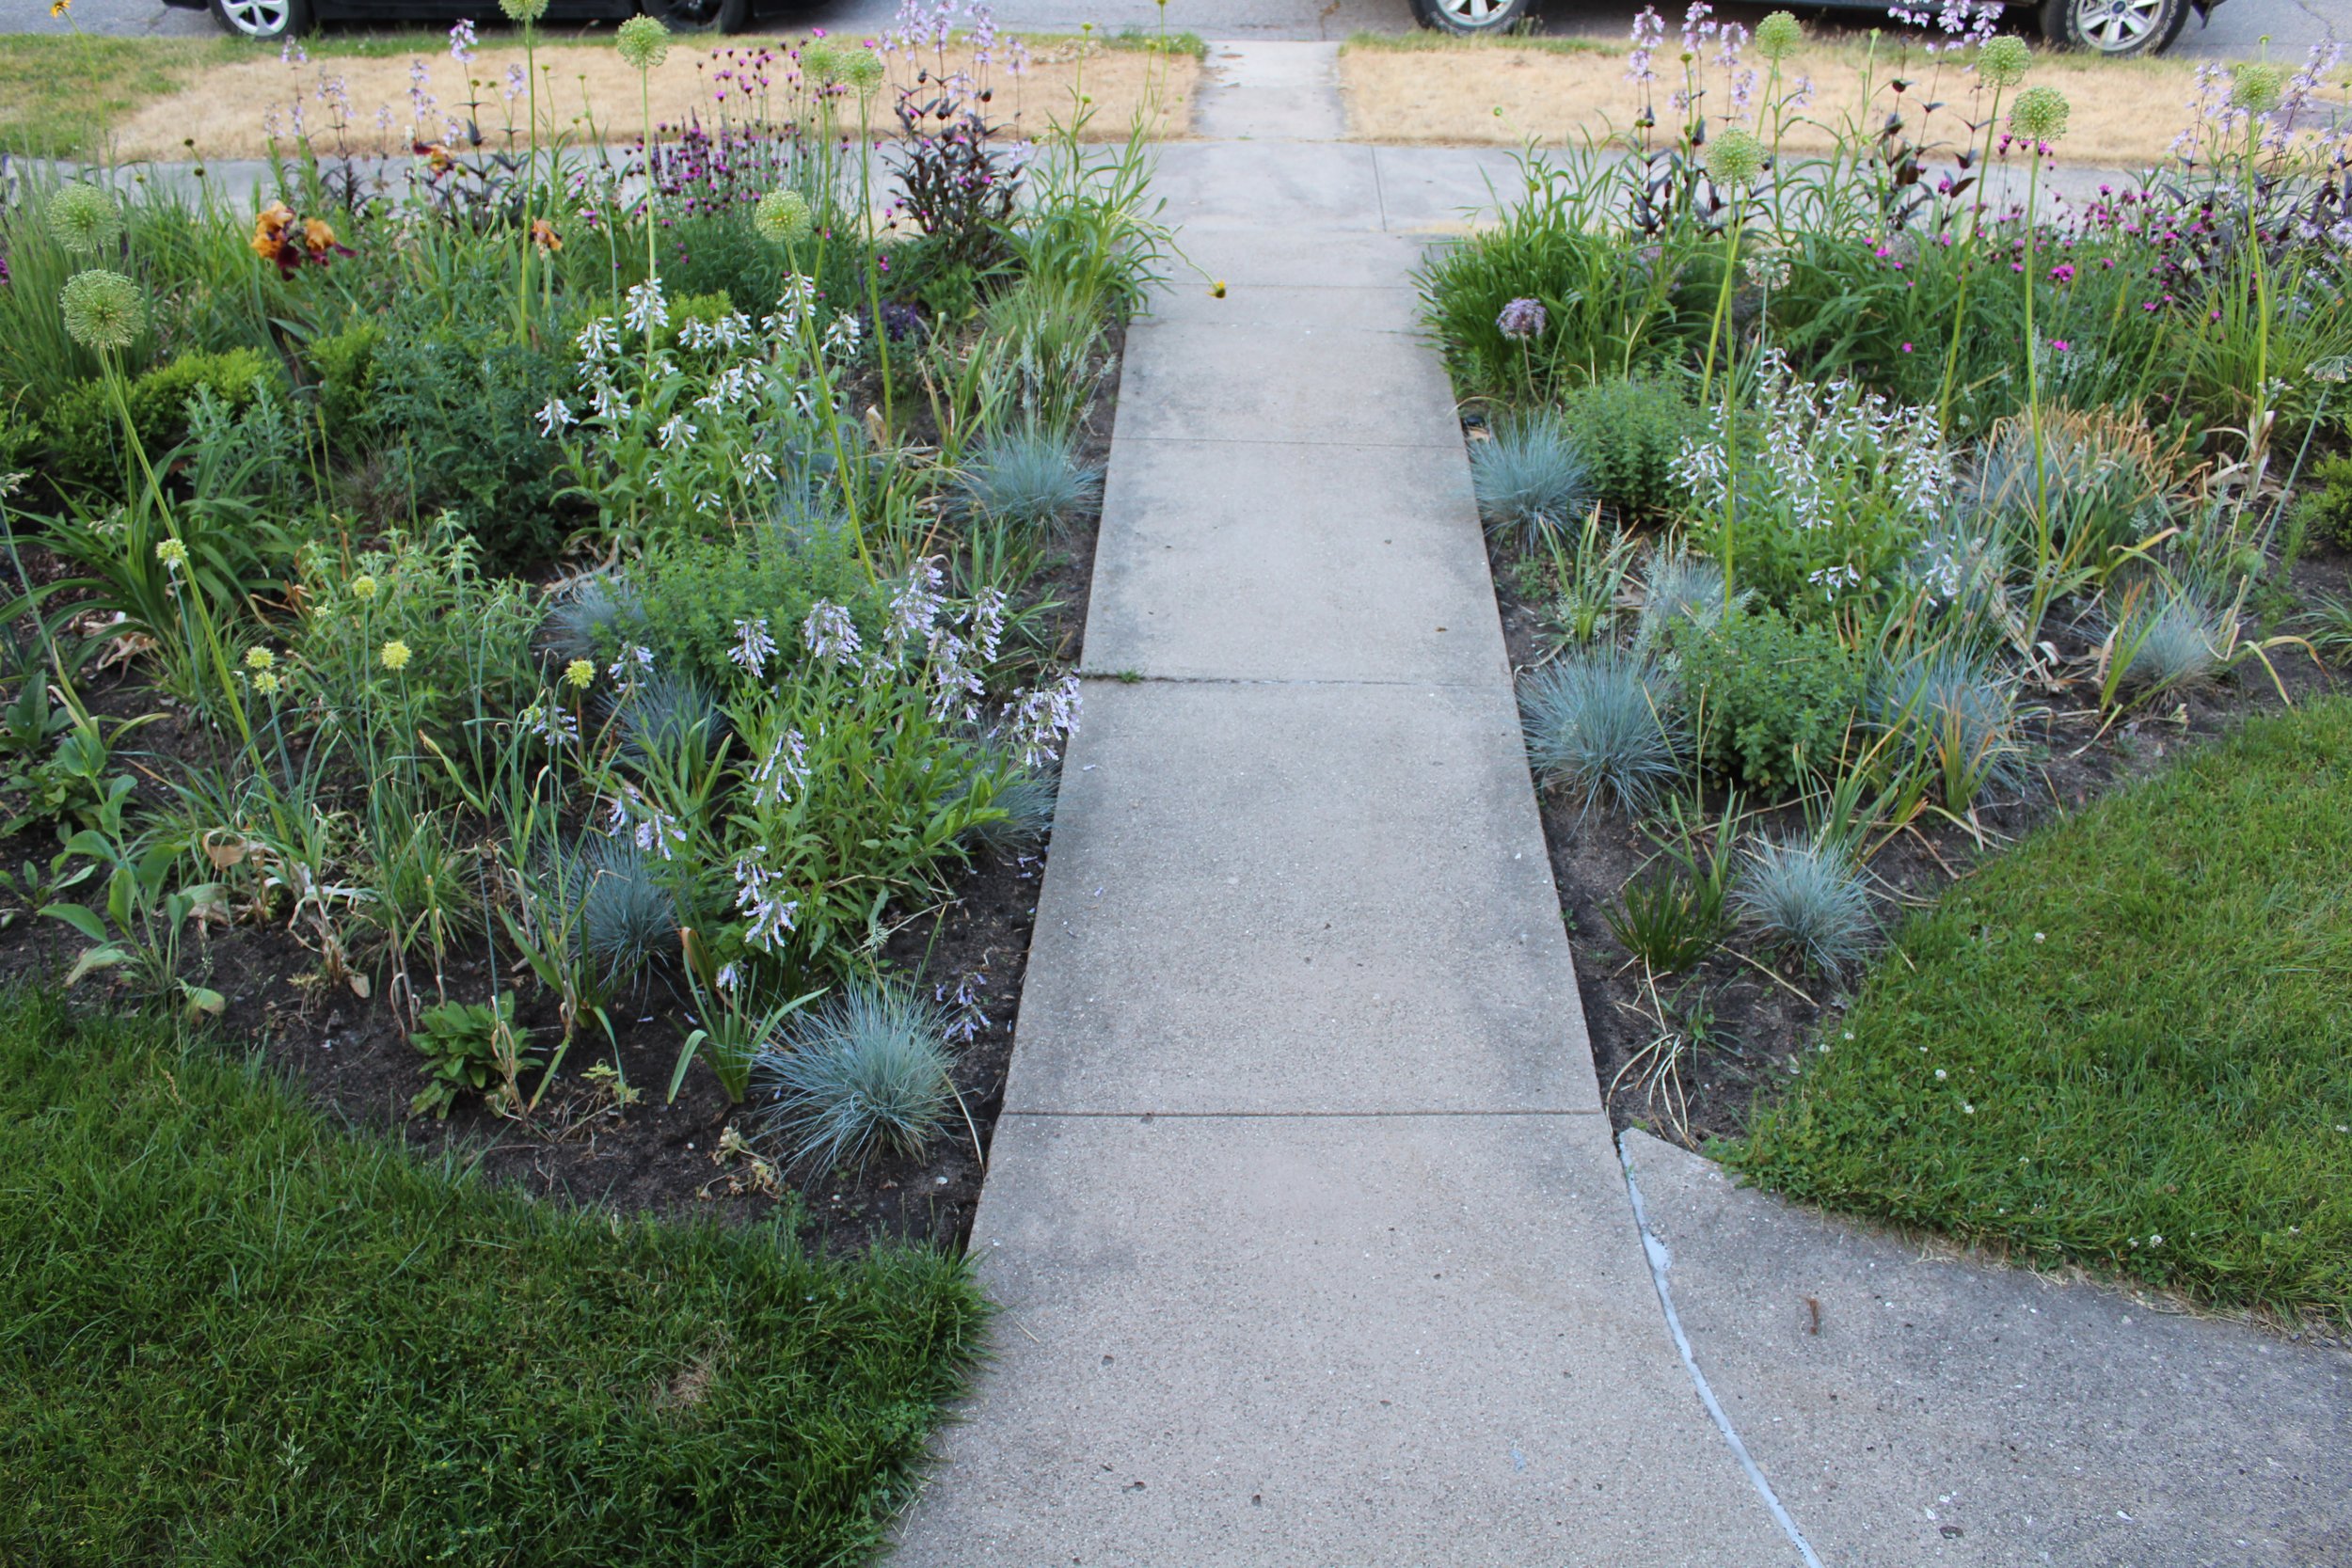
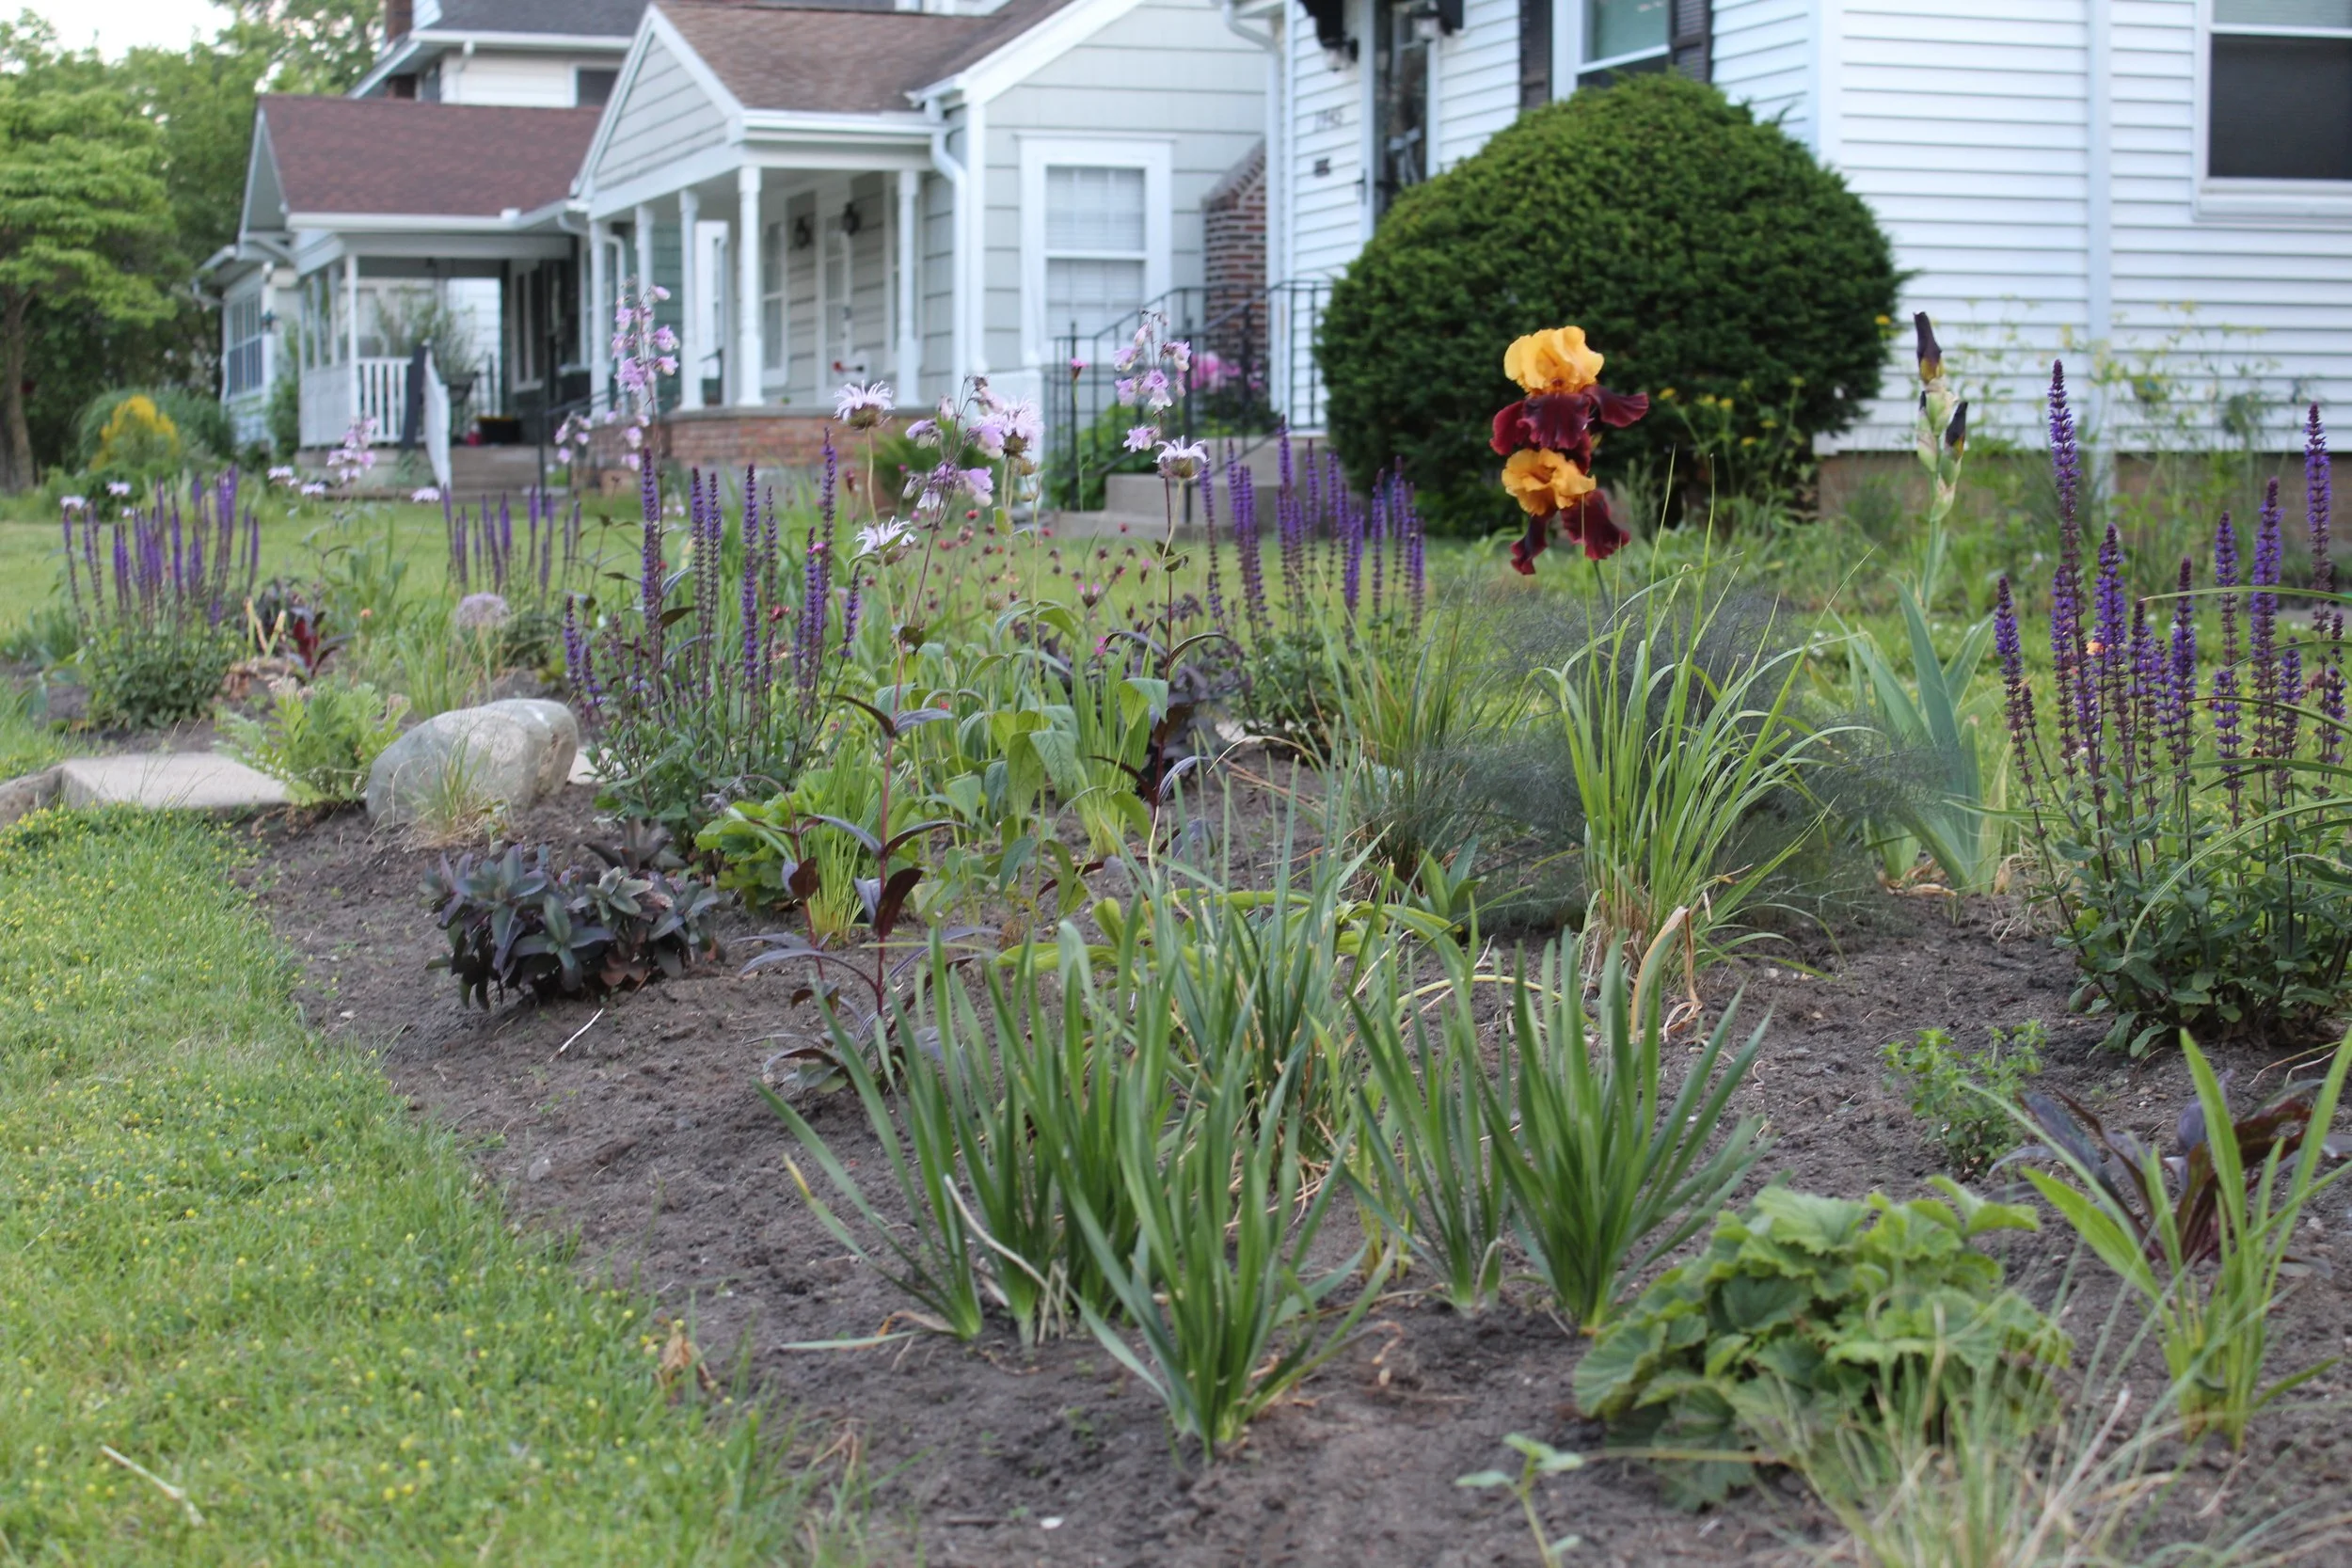
The view from our front stoop in late spring 2022, looking down towards the street.
In the beginning, I was often working with what I had easy access to: leftovers and remnants from our lawn conversion work. I wasn’t choosing a custom plant palette: I was working with “scraps”. Generally, I’m pretty happy with the results and I think the early creative pressure of limited ingredients worked in the garden’s favor.
That said, there was still lawn to remove and plants to install, and if you look toward the street, you can see this process beginning to take shape.
“Phase Four” begins to take shape along the sidewalk and berm. I used herbicide to kill the turf in place and planted directly in to the old sod. Scroll down for the “after” one year later.
With the lessons of year one firmly in mind, I decided to take a different approach with converting this next section for a variety of reasons. I utilized a foliar herbicide, Glyphosate, to kill the the turf in place, rather than digging and removing it.
I know this might seem counterintuitive and even controversial for a variety of reasons, and I wanted to share my thinking. Ultimately, the choice on how you remove your turf is up to you.
Digging turf disturbs soil and creates opportunities for erosion. Mulch can help mitigate this, however when dealing with a slope like this one, I knew a heavy summer rain storm would wash away both mulch and soil. It could cause long-term headaches and mess. Leaving the turf to decompose in place helps keep the soil secure while the new plants establish.
I wanted to save my back, and the soil. I didn’t have it in me to manually remove all of this sod, nor did I have the space or capacity to compost it. I found that plants in this section performed far better than those where I dug out the turf, likely because of reduced soil disturbance.
This is the last and only time this space and soil will ever see a synthetic chemical, and it’s a means to a better end. In this case, I viewed using Glyphosate like a scalpel - a specific tool for a specific, measured outcome. Often when we hear about misuse and abuse of this chemical it’s in the context of industrial agriculture or conventional landscaping. Glyphosate is an important tool in habitat restoration, lawn conversion included.
It bears repeating: if you choose to go this route, follow all safety guidelines posted on the packaging including spraying on a calm day and after the dew has evaporated. You can also hire a certified professional to help with this stage of the process, too.
Typically, a lawn is ready to plant within 2-3 weeks after spraying - it’s a pretty quick turn around! Plants are installed directly in to the old turf, and I’d recommend mulching first before you plant (I didn’t do that here… yikes). It’s a struggle to try and spread mulch around a bunch of tiny new plants.

One year later from the image above. Look at how quickly those plugs took off!
At this point, the only “lawn” we had left was that upper path - that’s it. Everything else had transformed into a vibrant plant community.
This is where things really started to get interesting. The initial conversion process is exciting and thrilling - the “instant gratification” of getting rid of sod and putting in new plants can feel dramatic and exciting and it’s easy to see the change taking place.
With every season thereafter, as the plants matured and the exposed soil vanished, I witnessed an abundance of new life, from birds and mammals to pollinators of all shapes and sizes.
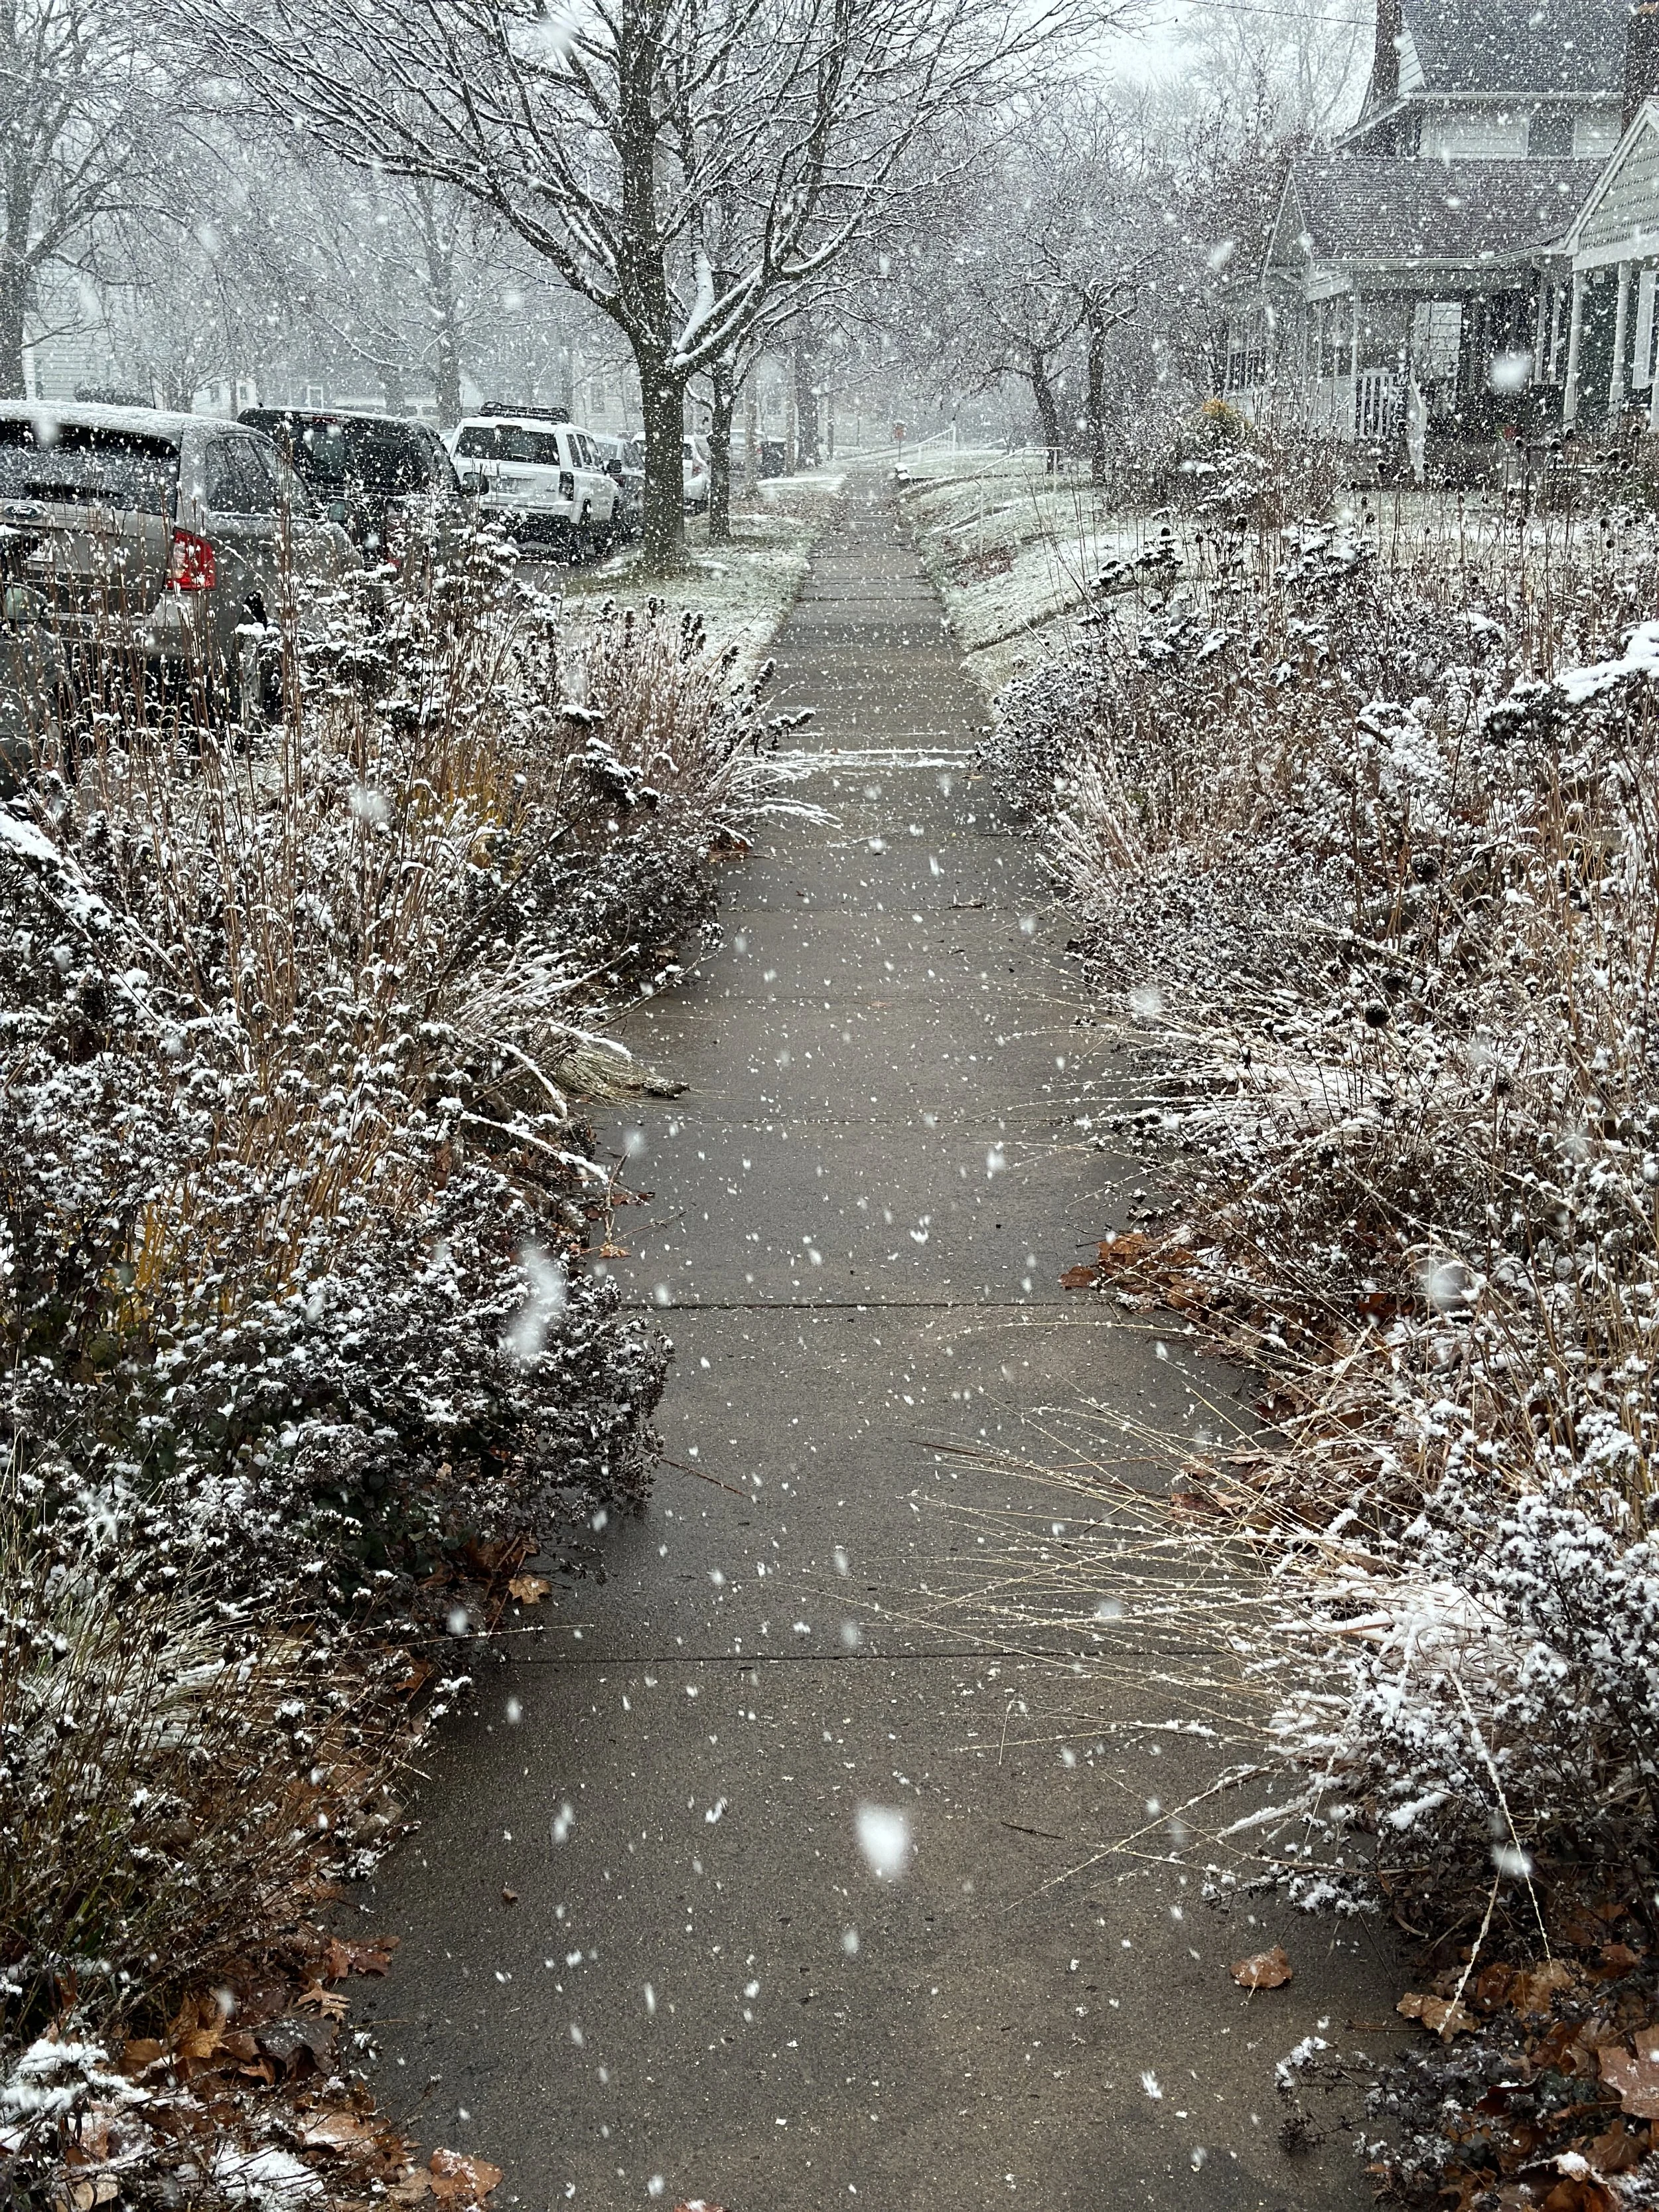
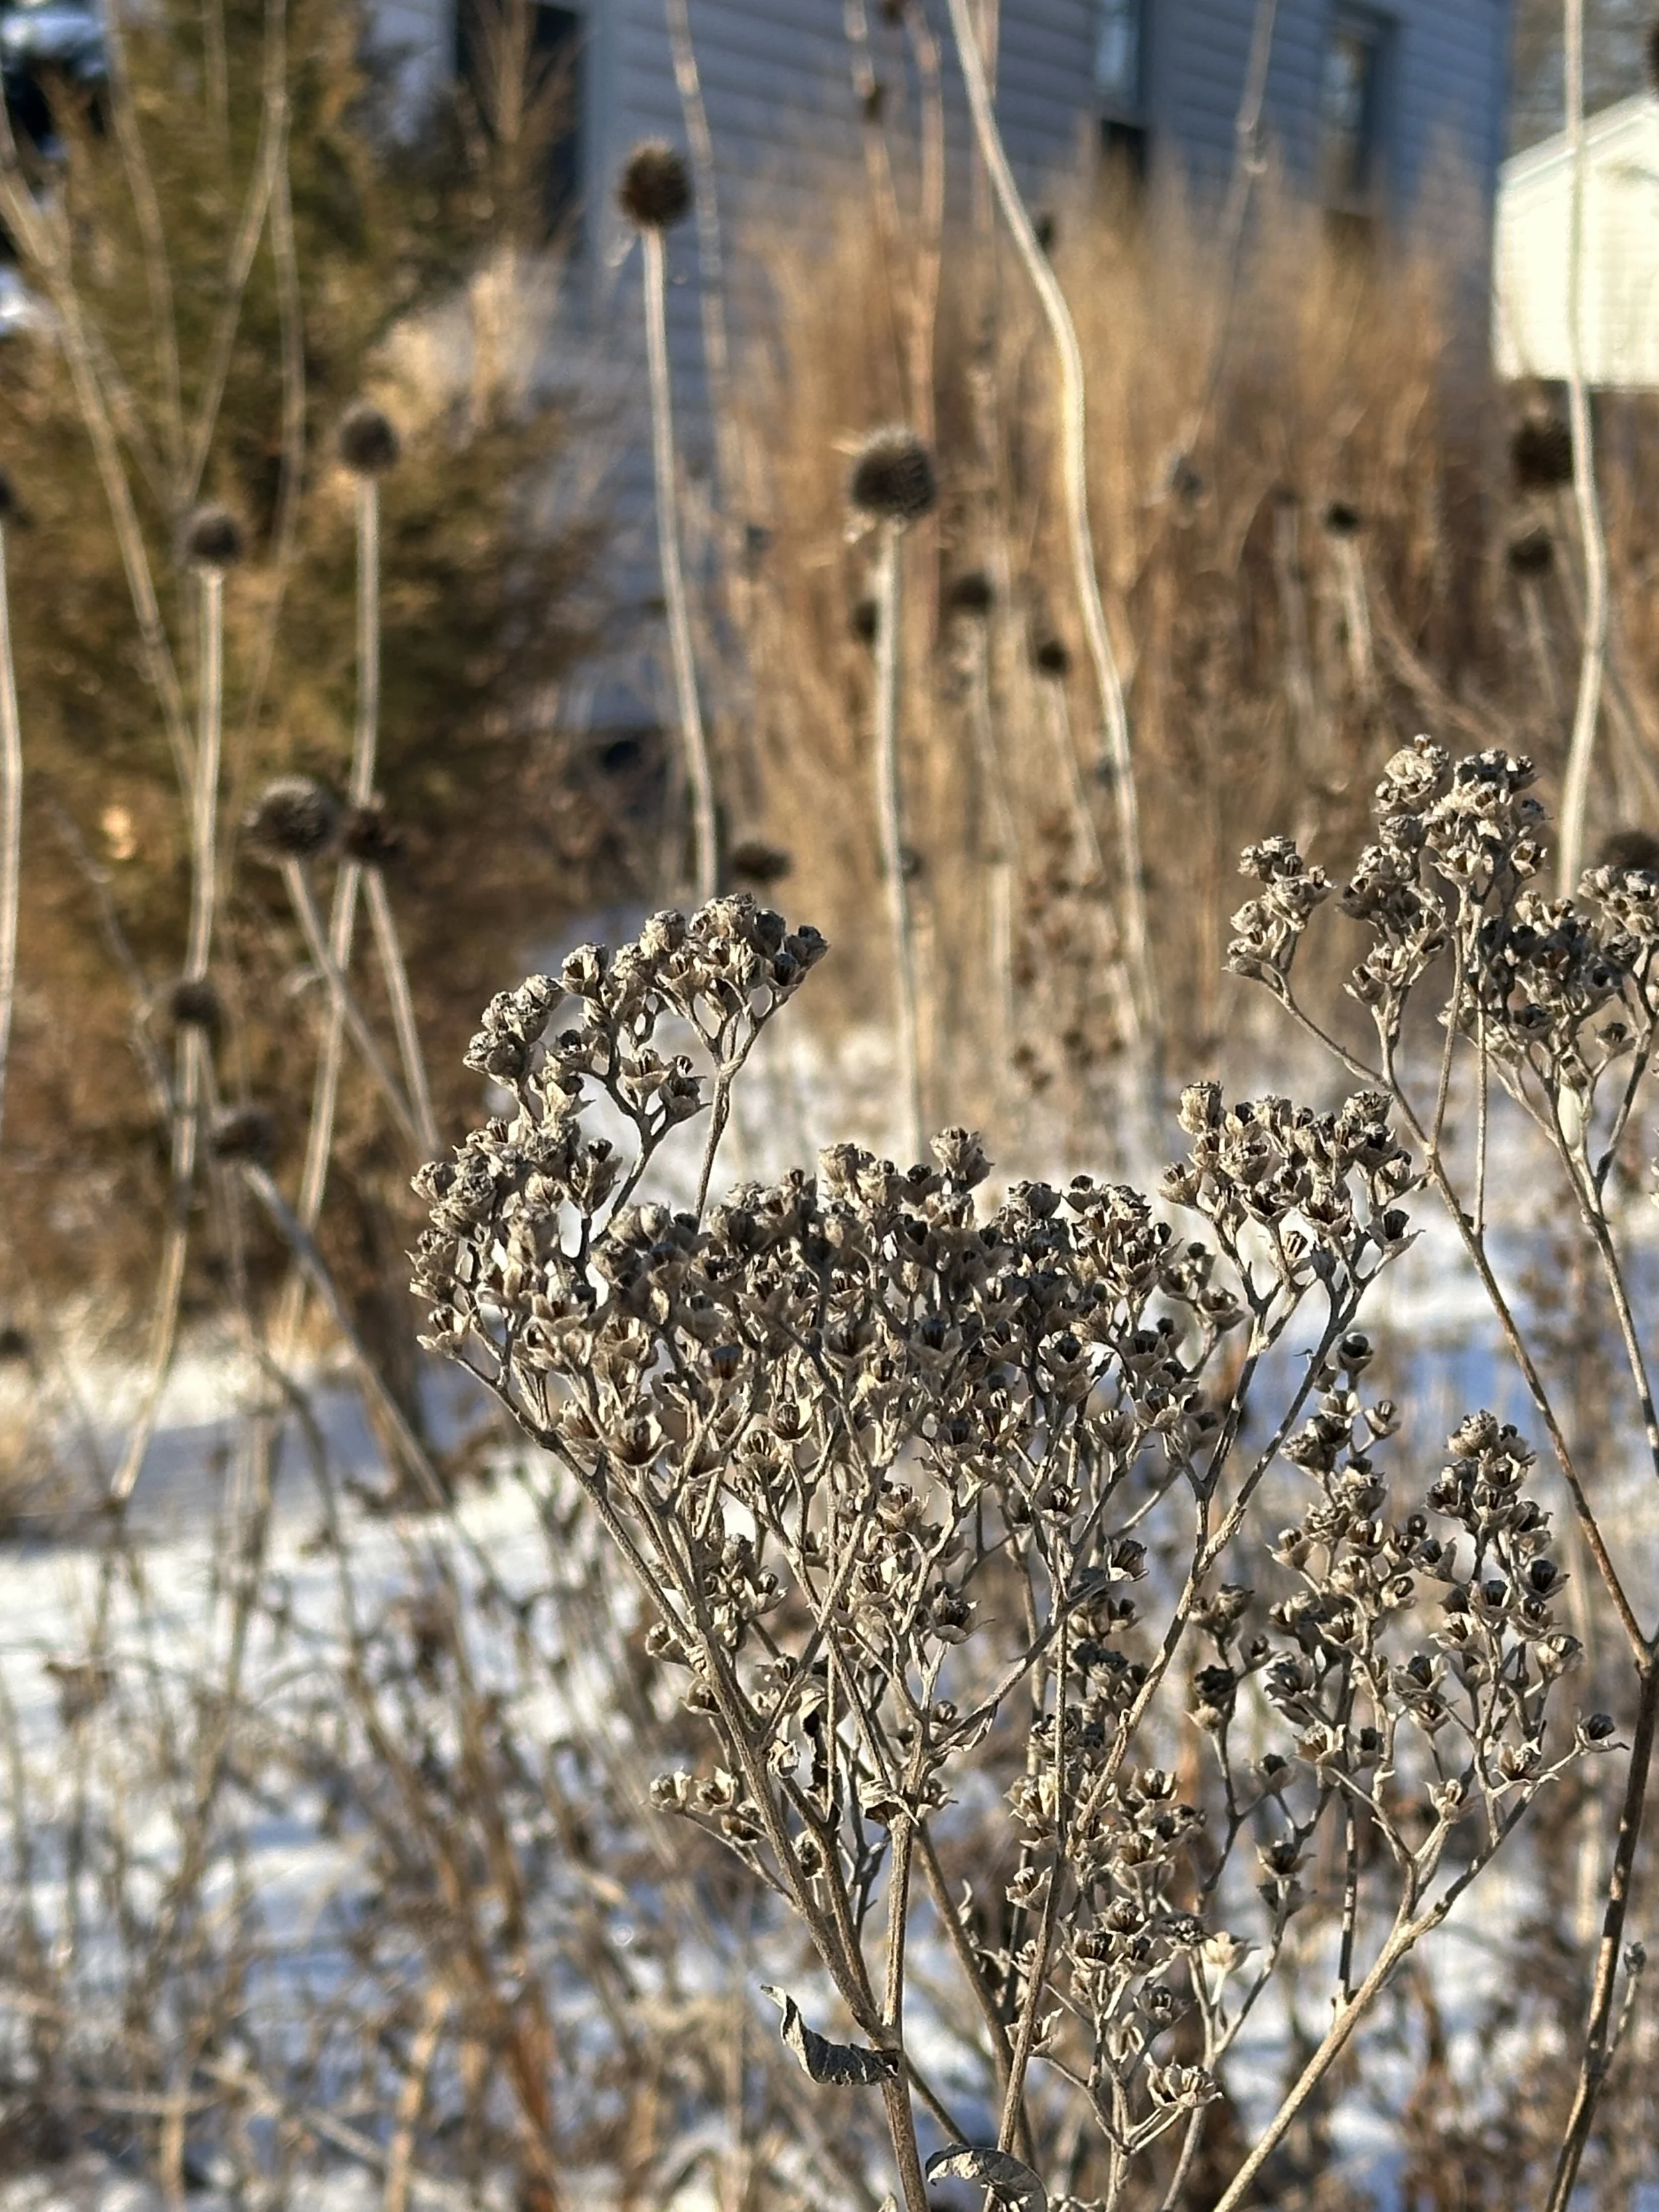
The plantings also impart new interest for us humans, through every season. Late summer in to autumn with it’s gentle senescence is calm and mellow. The first frost and snow is magical. In the depths of winter, the durable seed heads poking through snow offer respite and food for birds. The “duff” below the snow is a hotel for overwintering insects taking refuge in last year’s plant material.
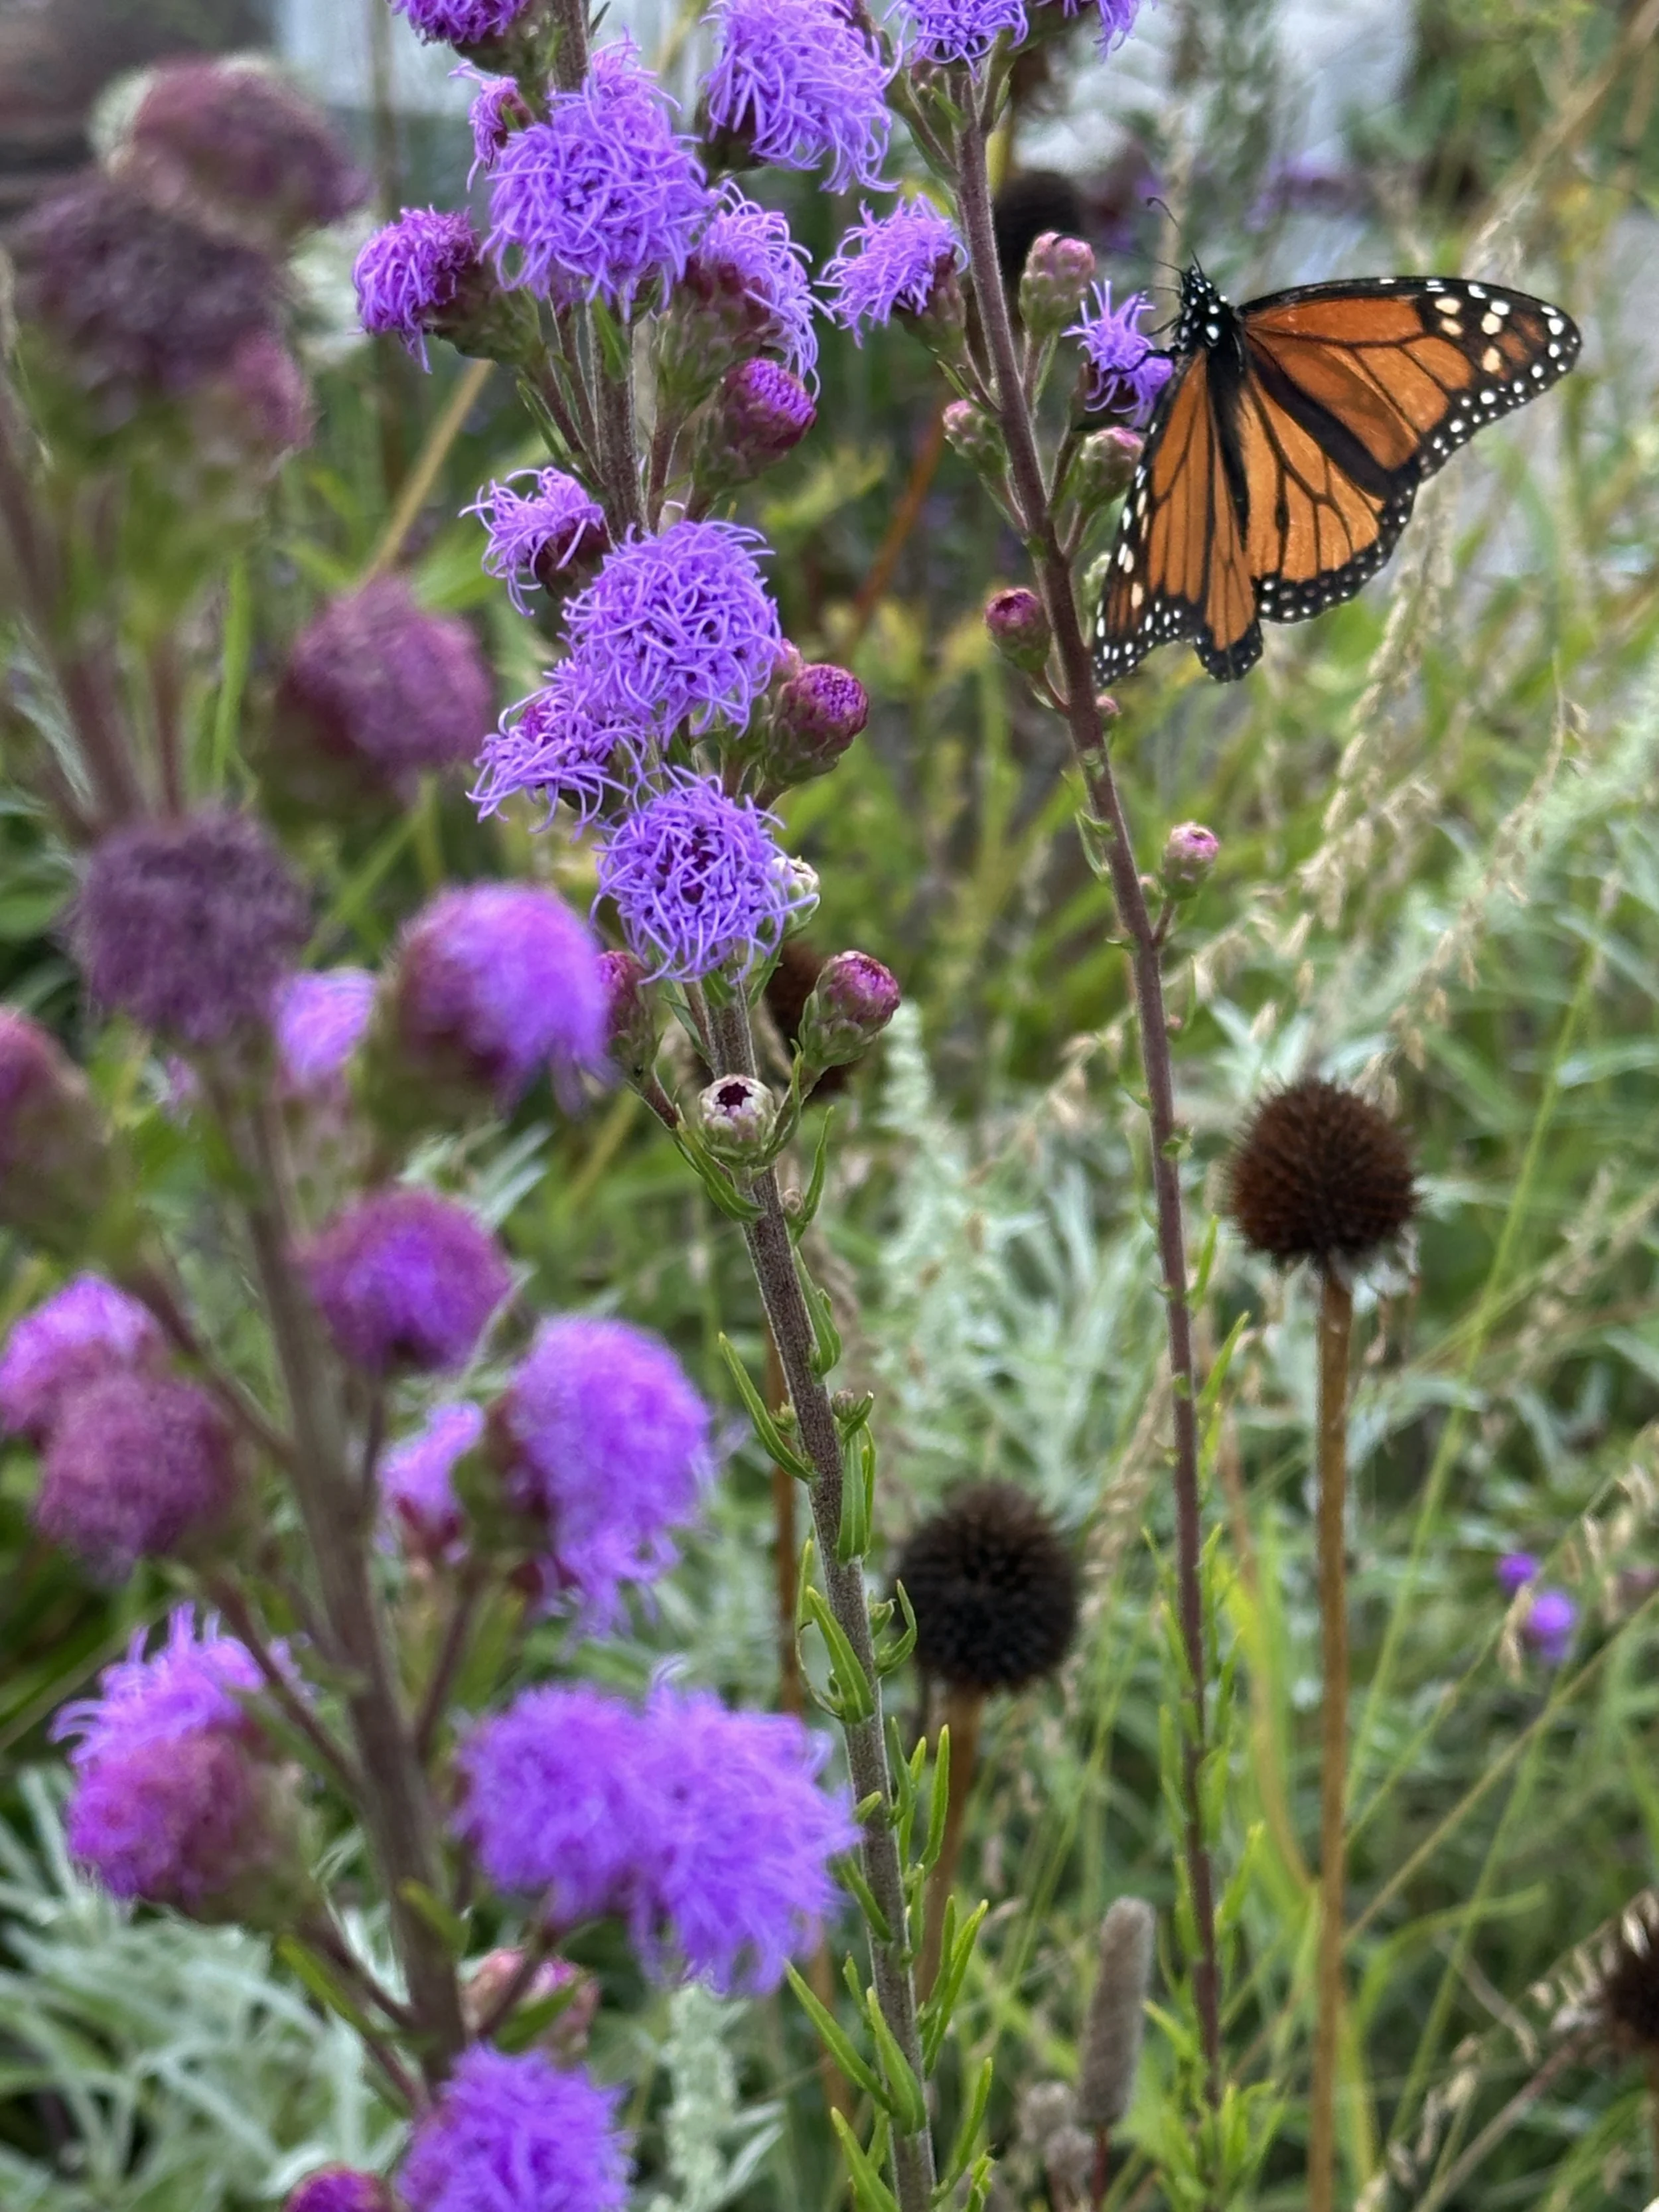
There really is something magical in coming home to a cloud of Monarch butterflies dancing above a small drift of Liatris by your front door.
Year Two & Three: Key Lessons & Learnings
Plant for density & community. Plants are social beings, just like us, and they crave community, too. Any exposed soil in year two means you should plant something to fill that void. This will help reduce weed pressure while also enhancing biodiversity and beauty.
Pattern helps with legibility and understanding. I share more resources re patterns in the Lawn Conversion Library, and also the Lawn Conversion Workshops. Repeating a certain group of plants across a space, even a small one, helps it feel more cohesive and designed.
Keep scale in mind. Some of those plants along the sidewalk were later removed because they felt just a bit too wild leaning over the path. I wanted our neighbors to enjoy walking through this garden, not feel consumed by it.
See through every season. Don’t “cut back” the plantings in fall, add spring bulbs and early color, and aim to have something flowering in every season.
Year Three Forward
With the bulk of the perennials now in and established, my relationship to this meadow has evolved from design and installation to stewardship, management, and editing.
I think it’s important to distinguish this relationship from one of “maintenance” which, to me, implies a more rigid, dogmatic approach. “I planted this here and it must stay exactly here, always.”
Plants simply don’t work that way. They’re driven to move, ebb, flow, recede, and surprise. When we lean in to that behavior, gardening becomes far more rewarding and joyful, less about tasks and to-do lists and more about relationships and listening, responding rather than demanding.
Remember: plants are social, just like us.

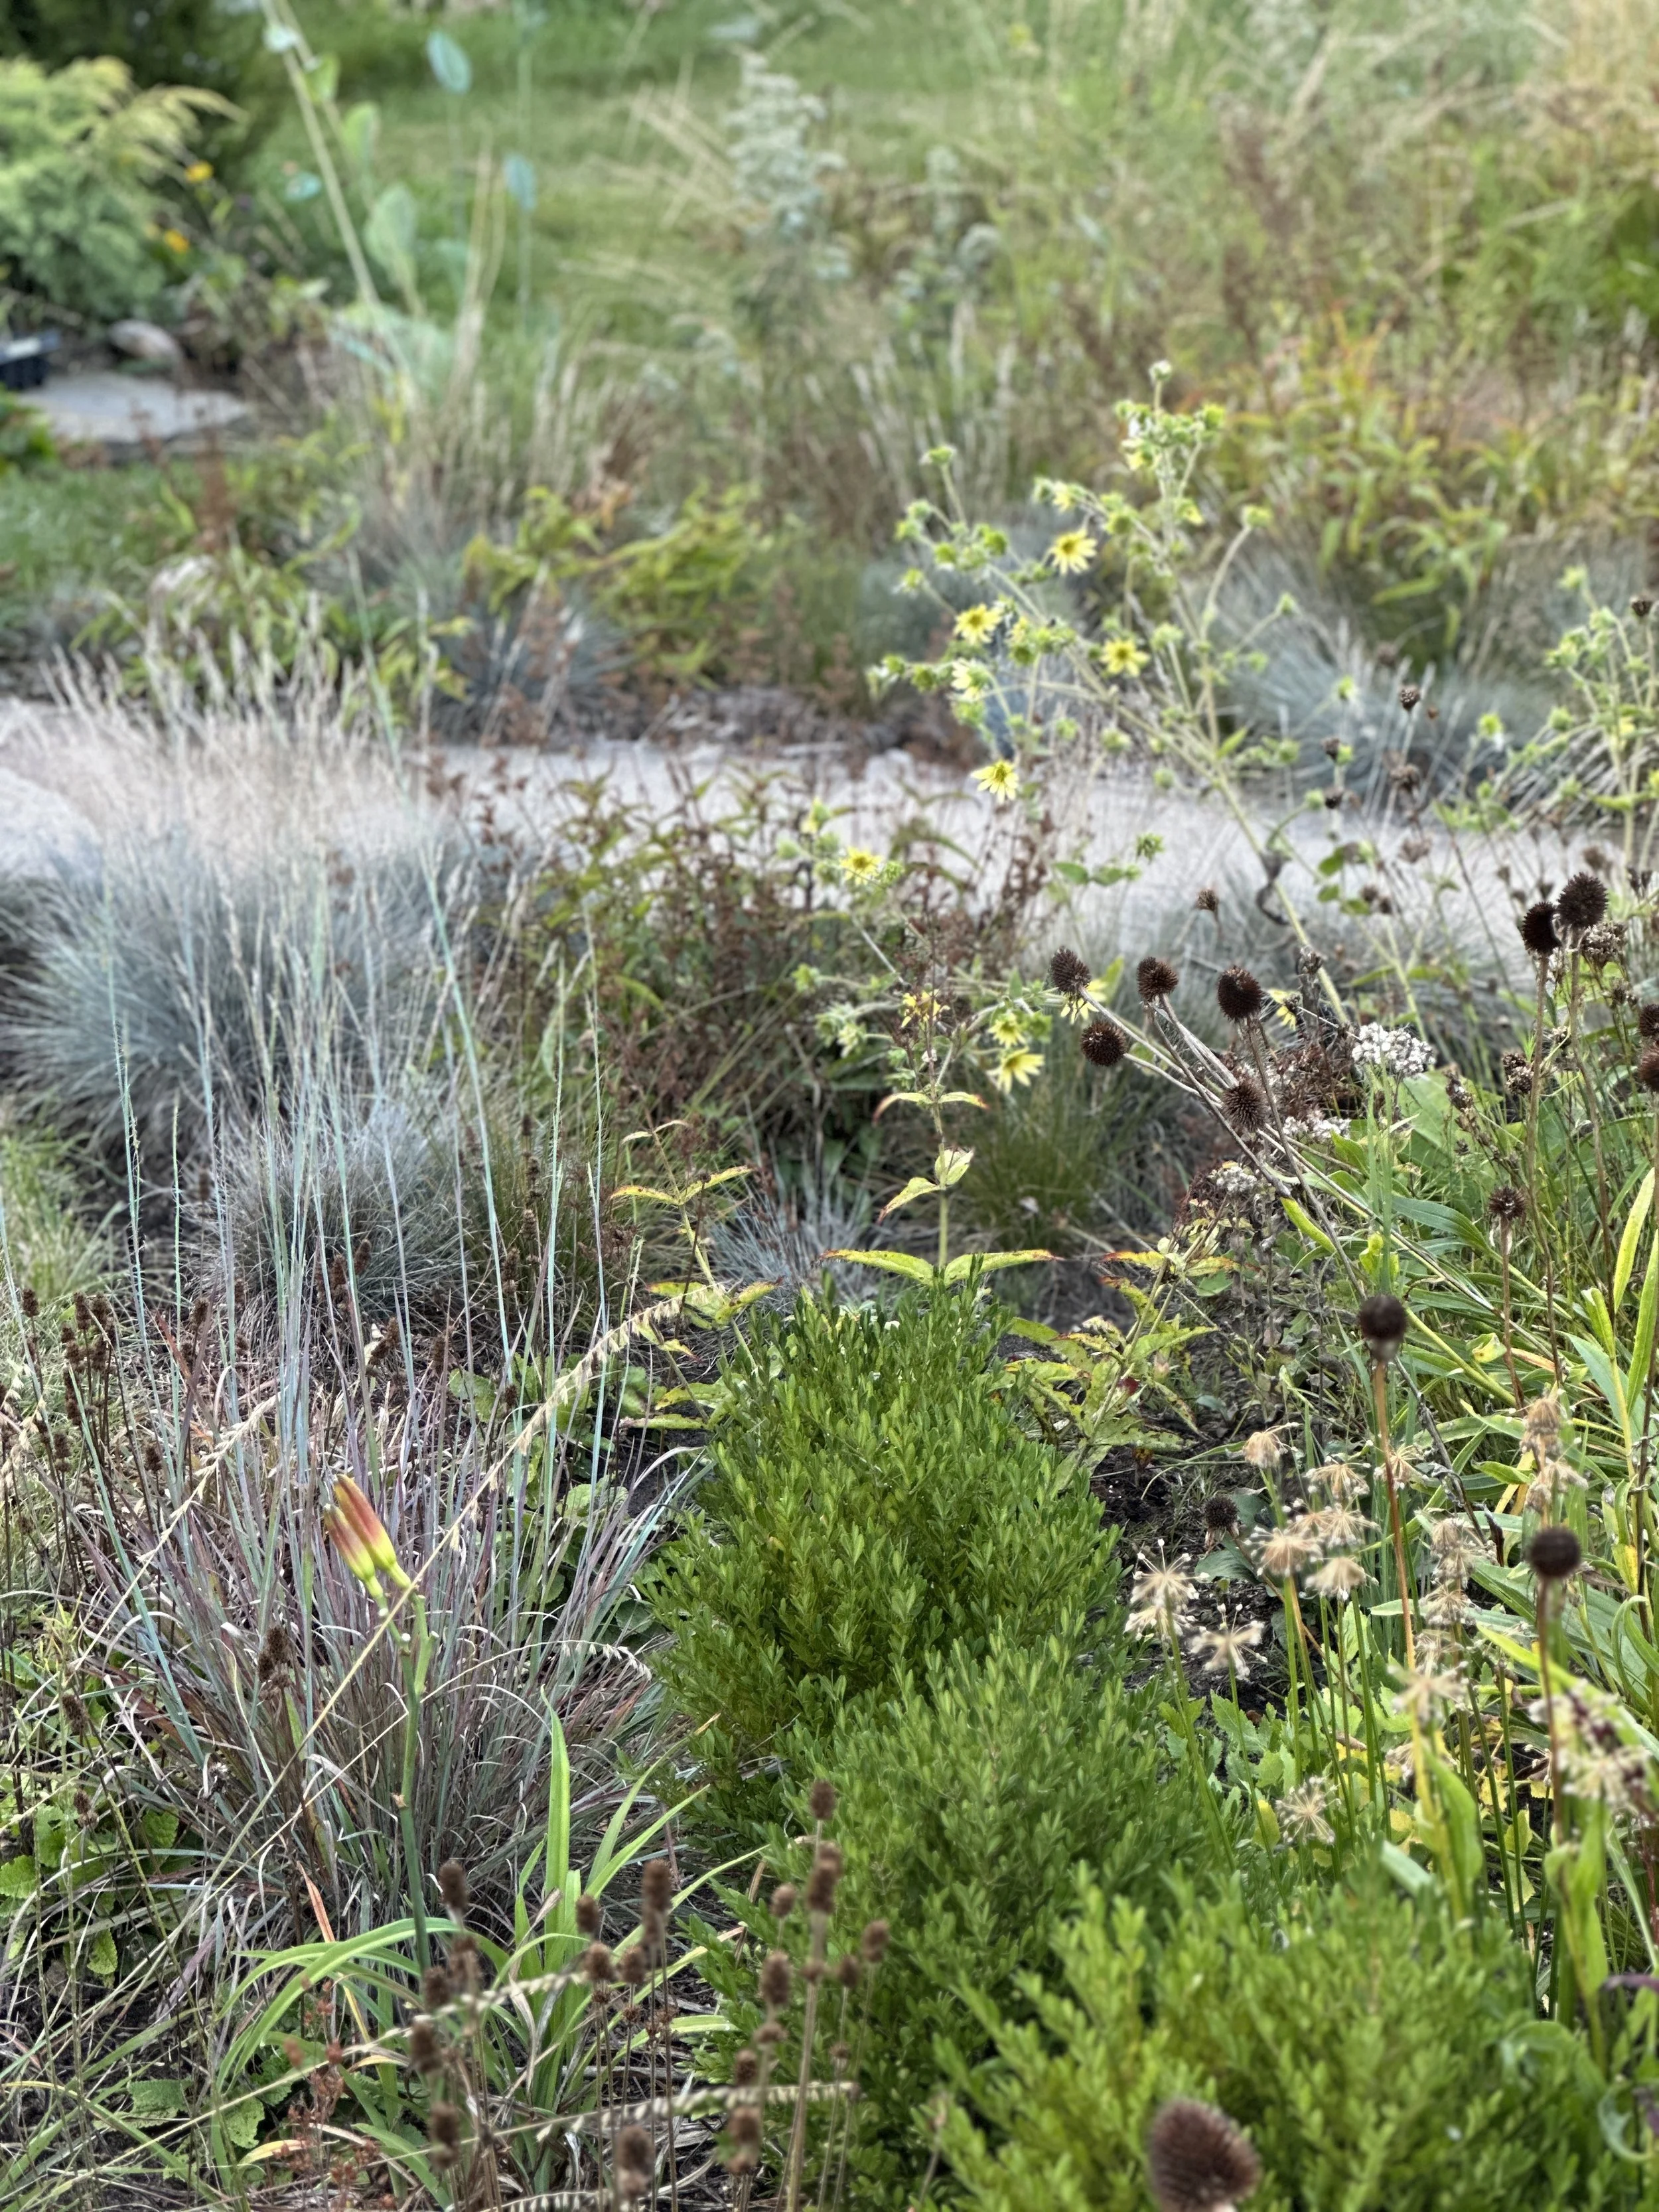
I love the layers of textures and the drifts of colors and forms from this angle. This is the view from the sidewalk looking up and in to the meadow.
Thinking in Layers
Many of us come to lawn conversion from a desire to re-wild our own outdoors: to welcome pollinators and wildlife back into these otherwise desolate spaces. To do our part for conservation and community building.
The most resilient and captivating plant communities thrive in layers, horizontal and vertical.
I think one of the biggest “failings” of a conventional landscape plan (the “dots and circles” on paper) is that it struggles to capture the full complexity of these layers, especially as they change over time.
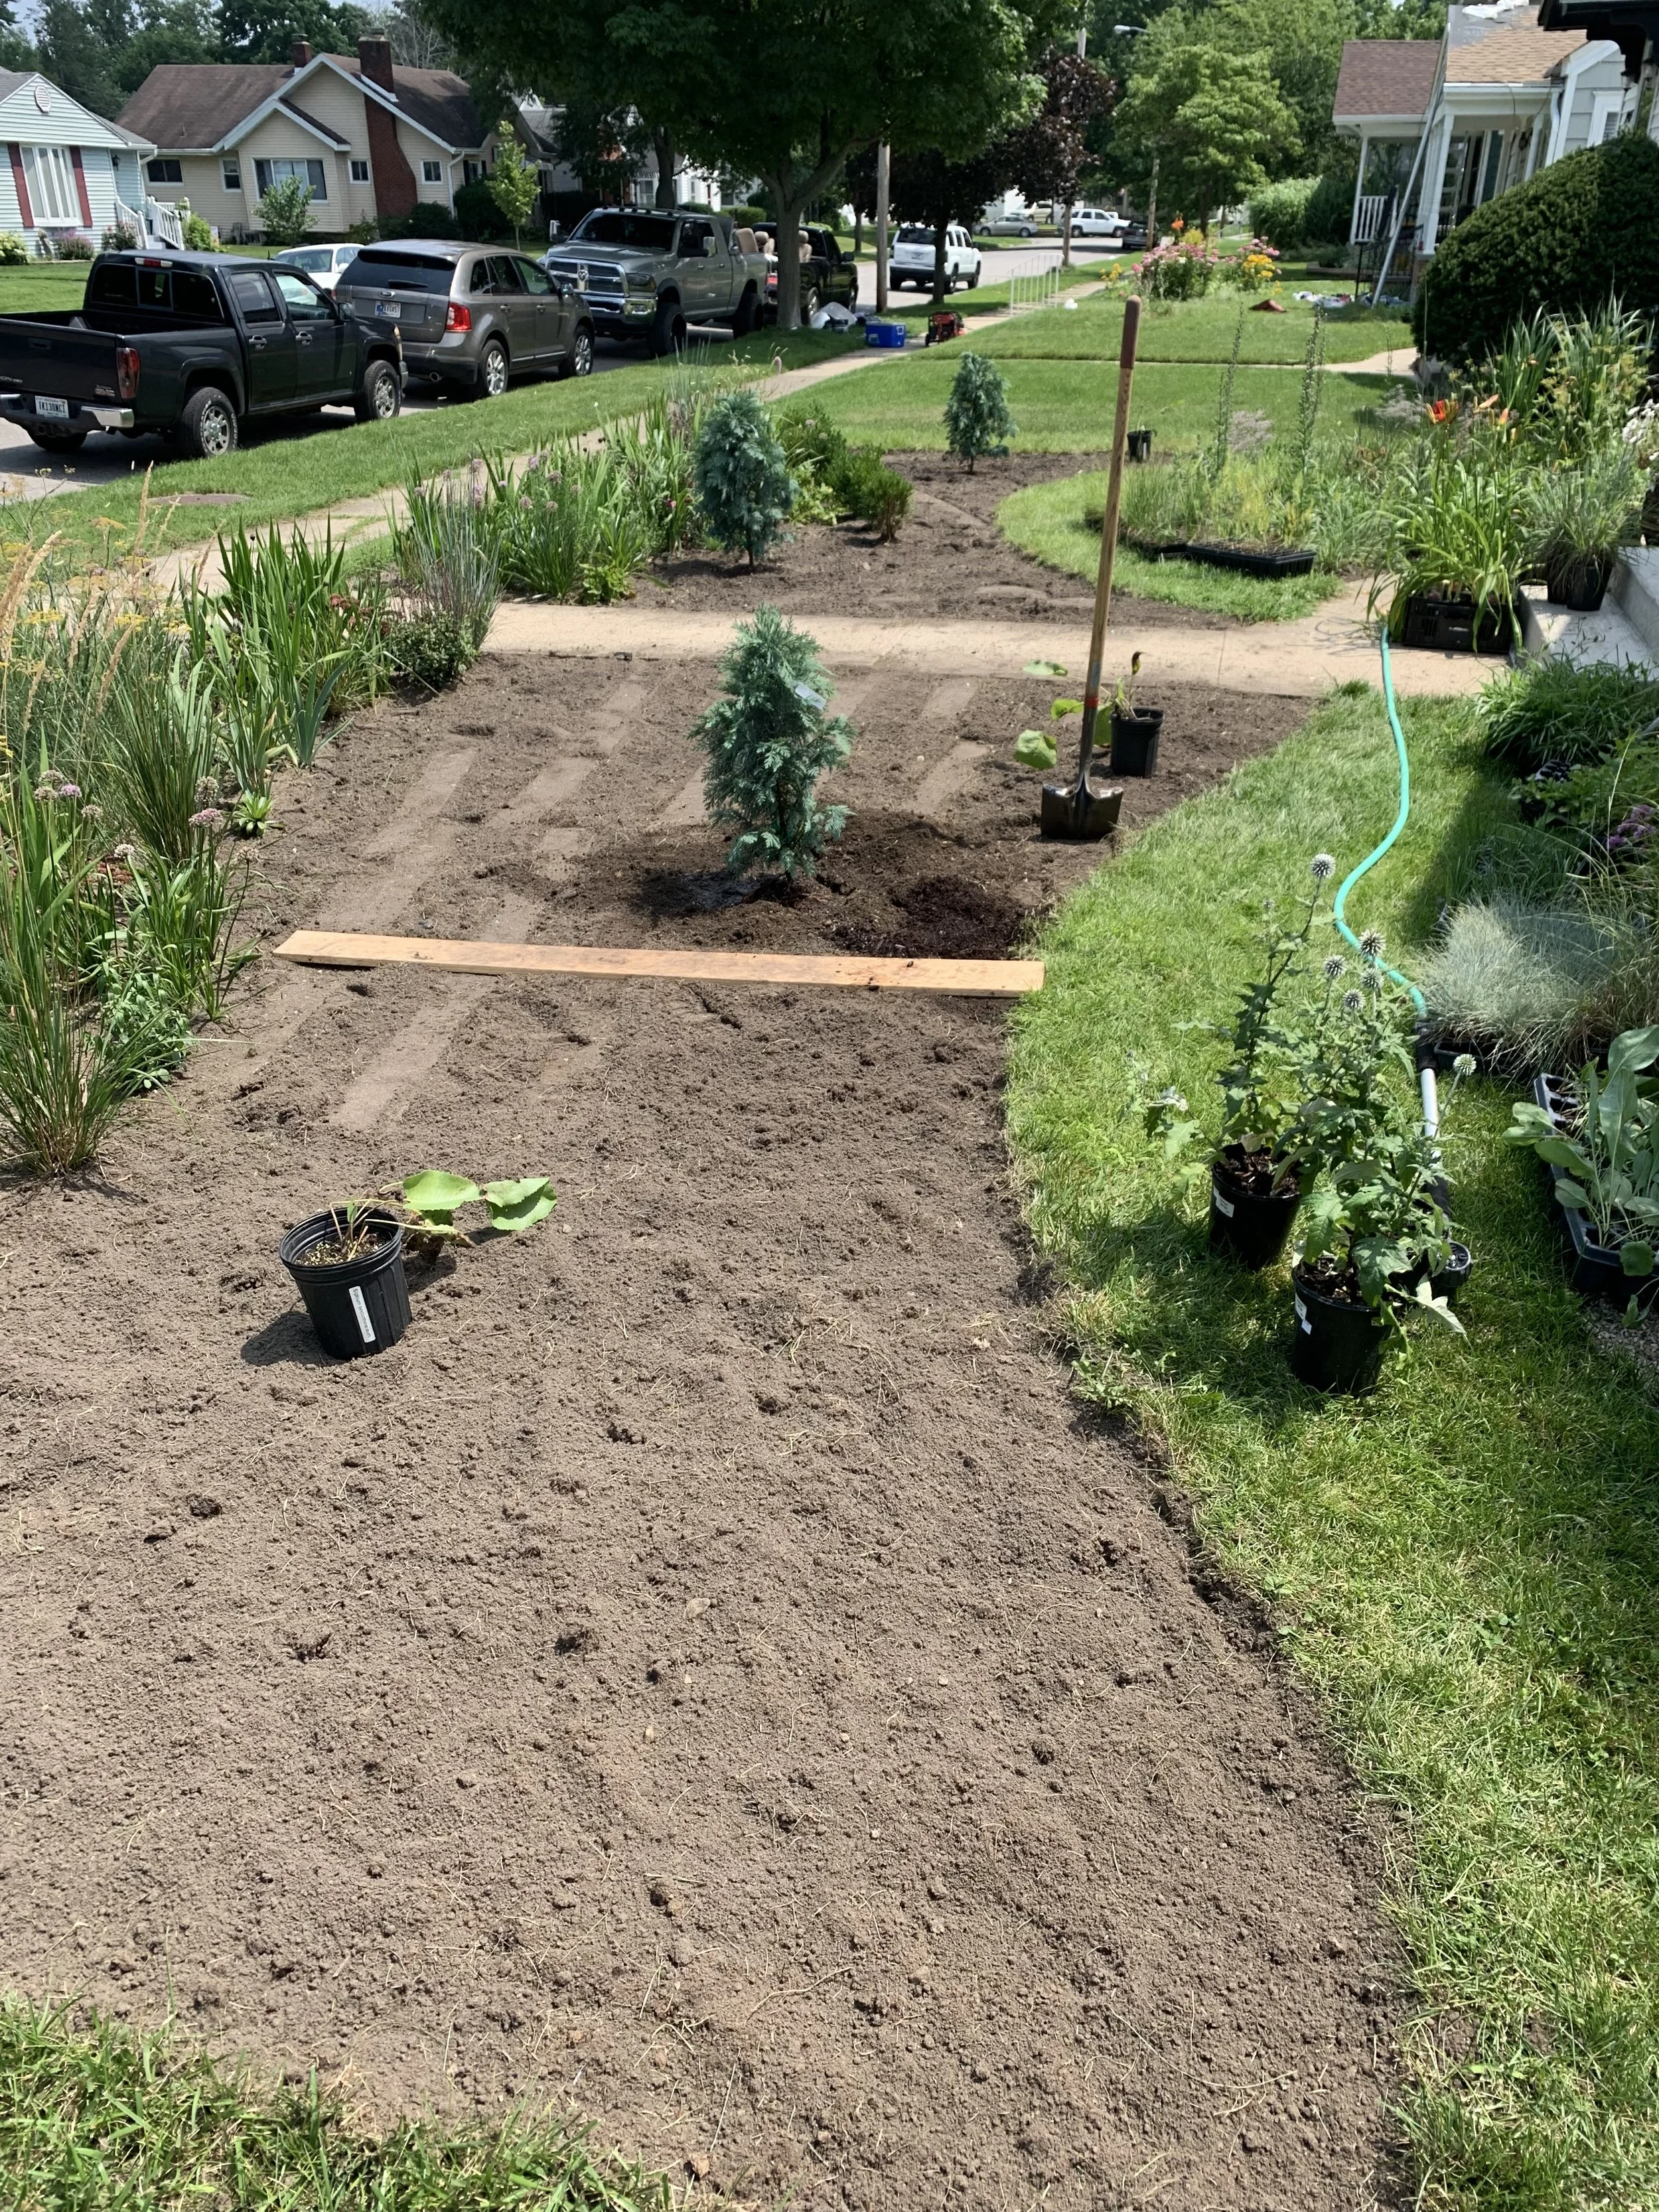
Beginning in 2024, I was craving more vertical layers and began adding small-scale trees and shrubs. These long-lived plants are far more “set” than most perennials, which are easy to move. As they grow and change over time and space, they’ll continue to reshape what happens around them.
Now, this is a small space, after all, so I really had to focus my intention and goals.
I wanted things for maximum wildlife benefit, first and foremost. These include keystone species to support caterpillars and songbirds, in addition to pollinators.
I wanted four-season interest for us humans, including interesting flowers, berries, fall color, and branch form.
I needed things to be in scale. The biggest mistake folks often make when planting trees and shrubs is getting them too close to houses, sidewalks, etc. where they really have no business growing. It hurts to rip out trees or shrubs a few years later because the plants did exactly what they were planning to do, we gardeners just put them in the wrong place. (They’re also a greater financial investment, and I want to protect that, too.)
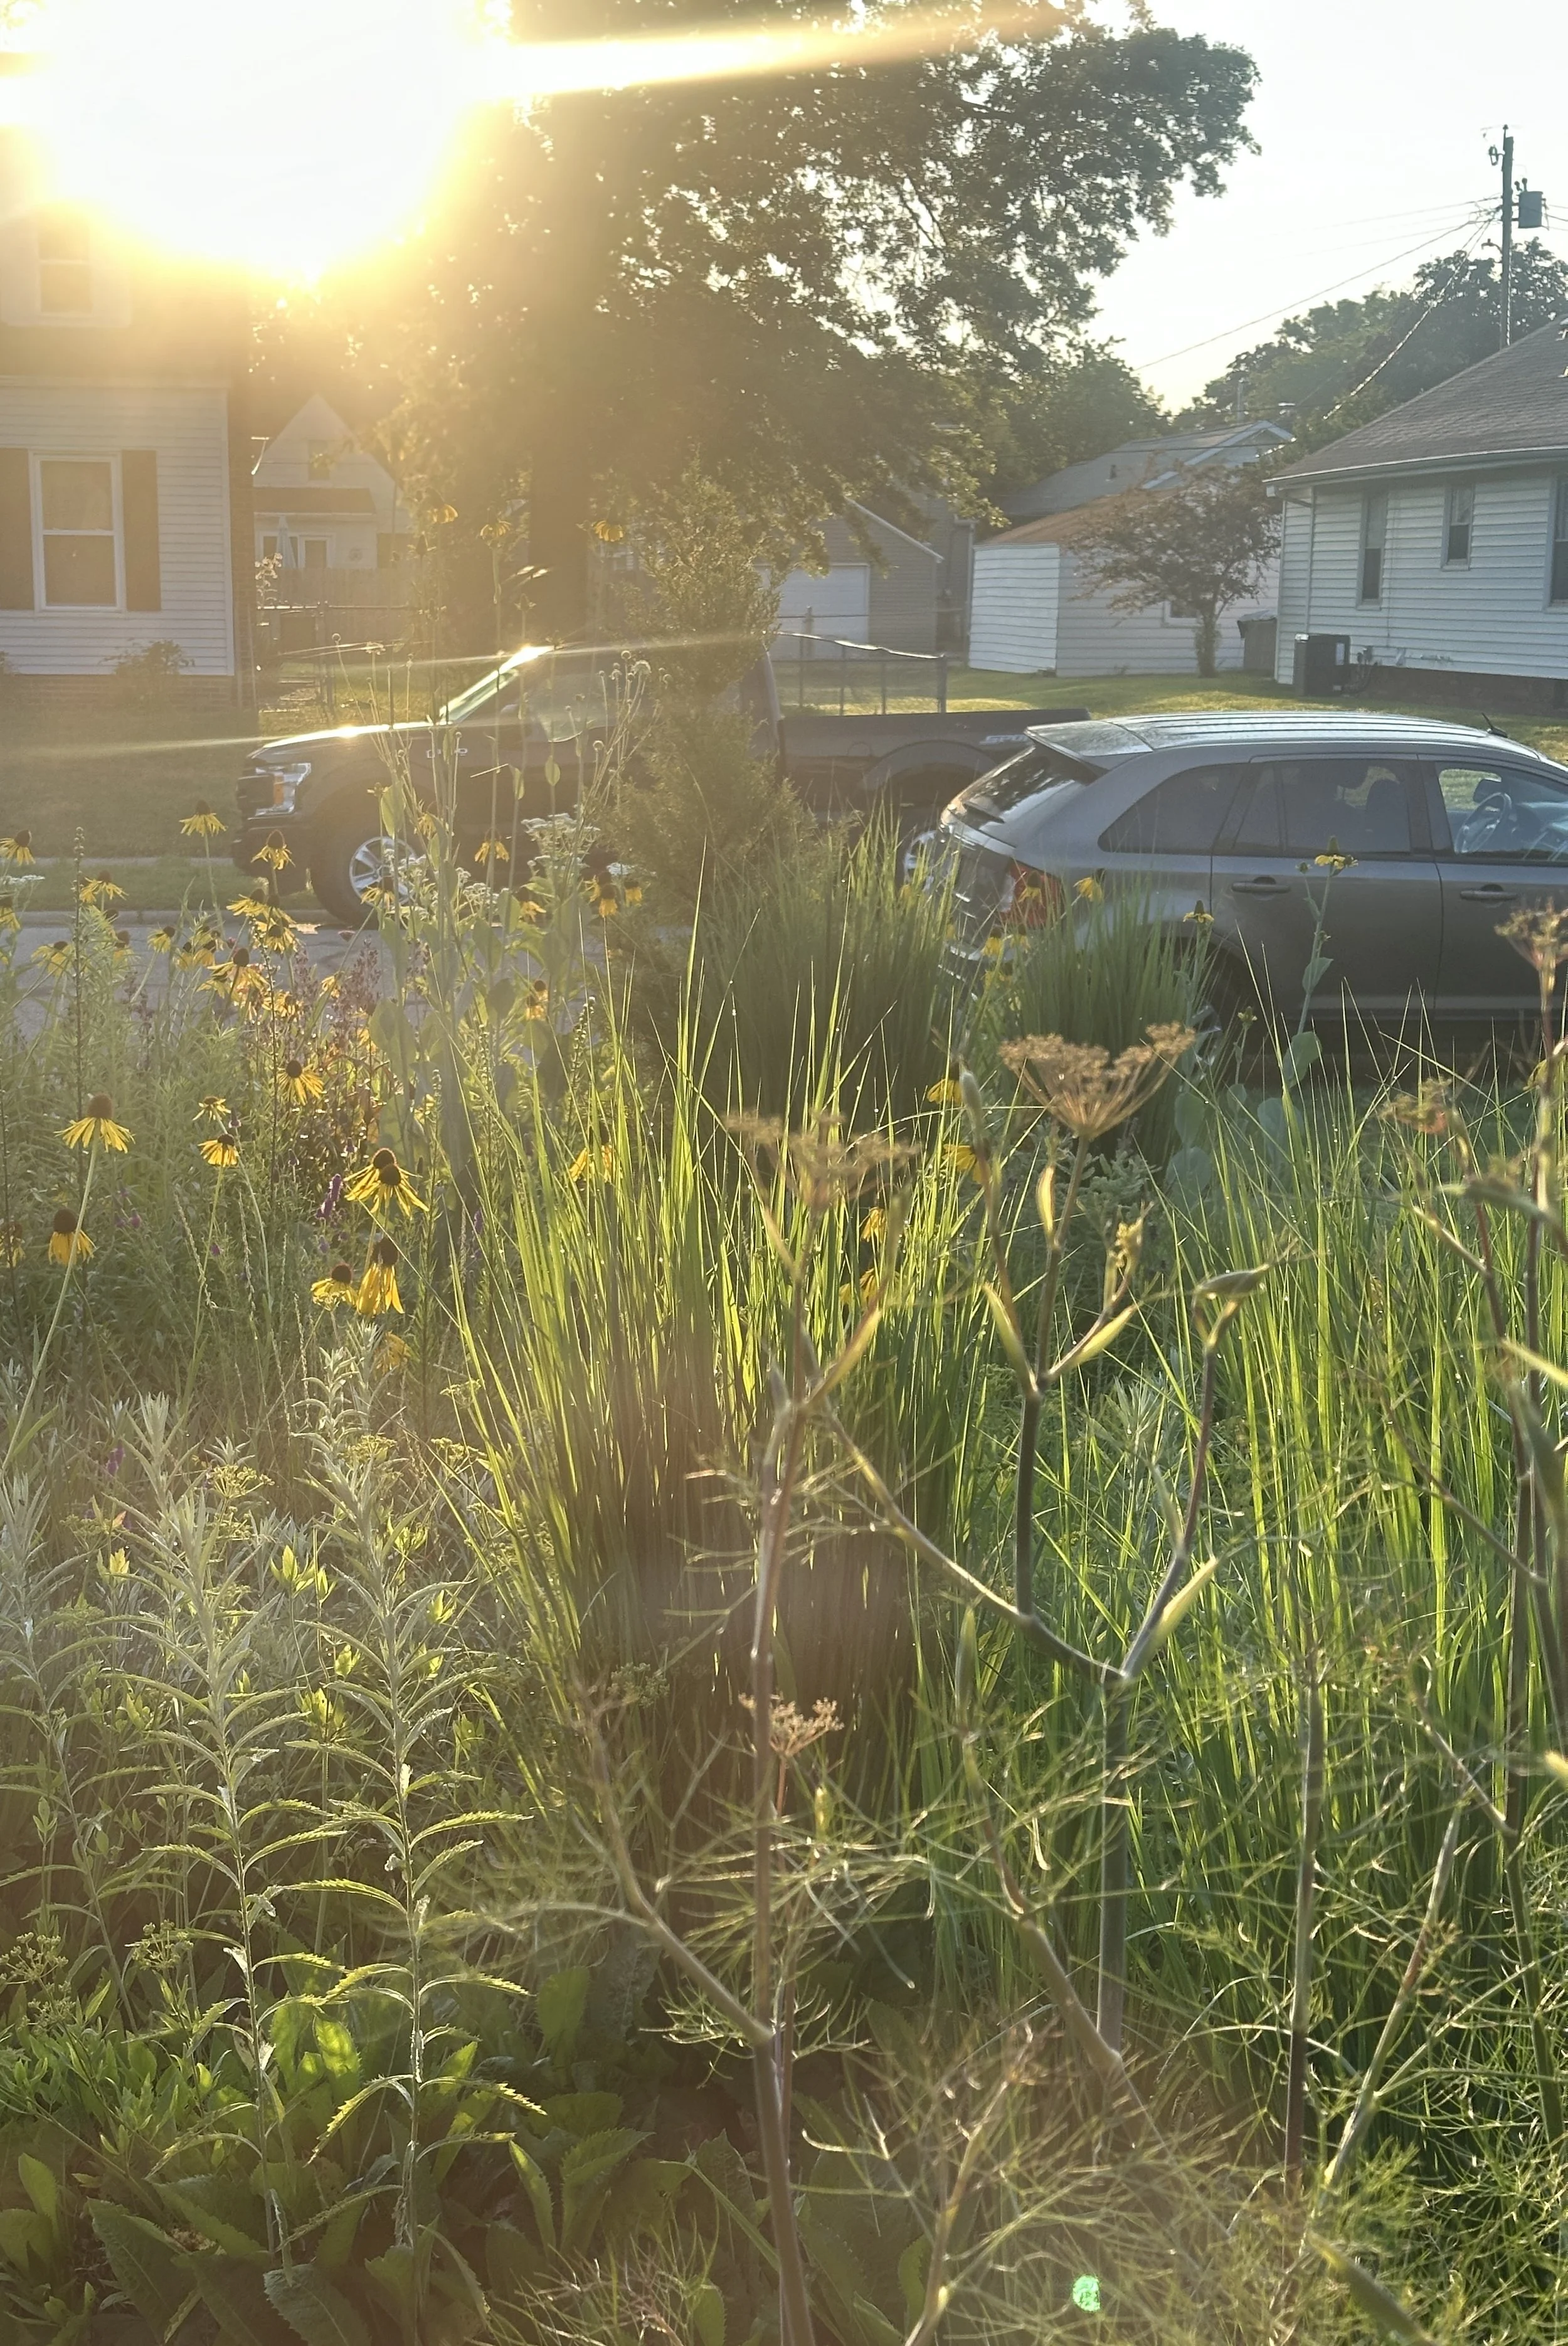
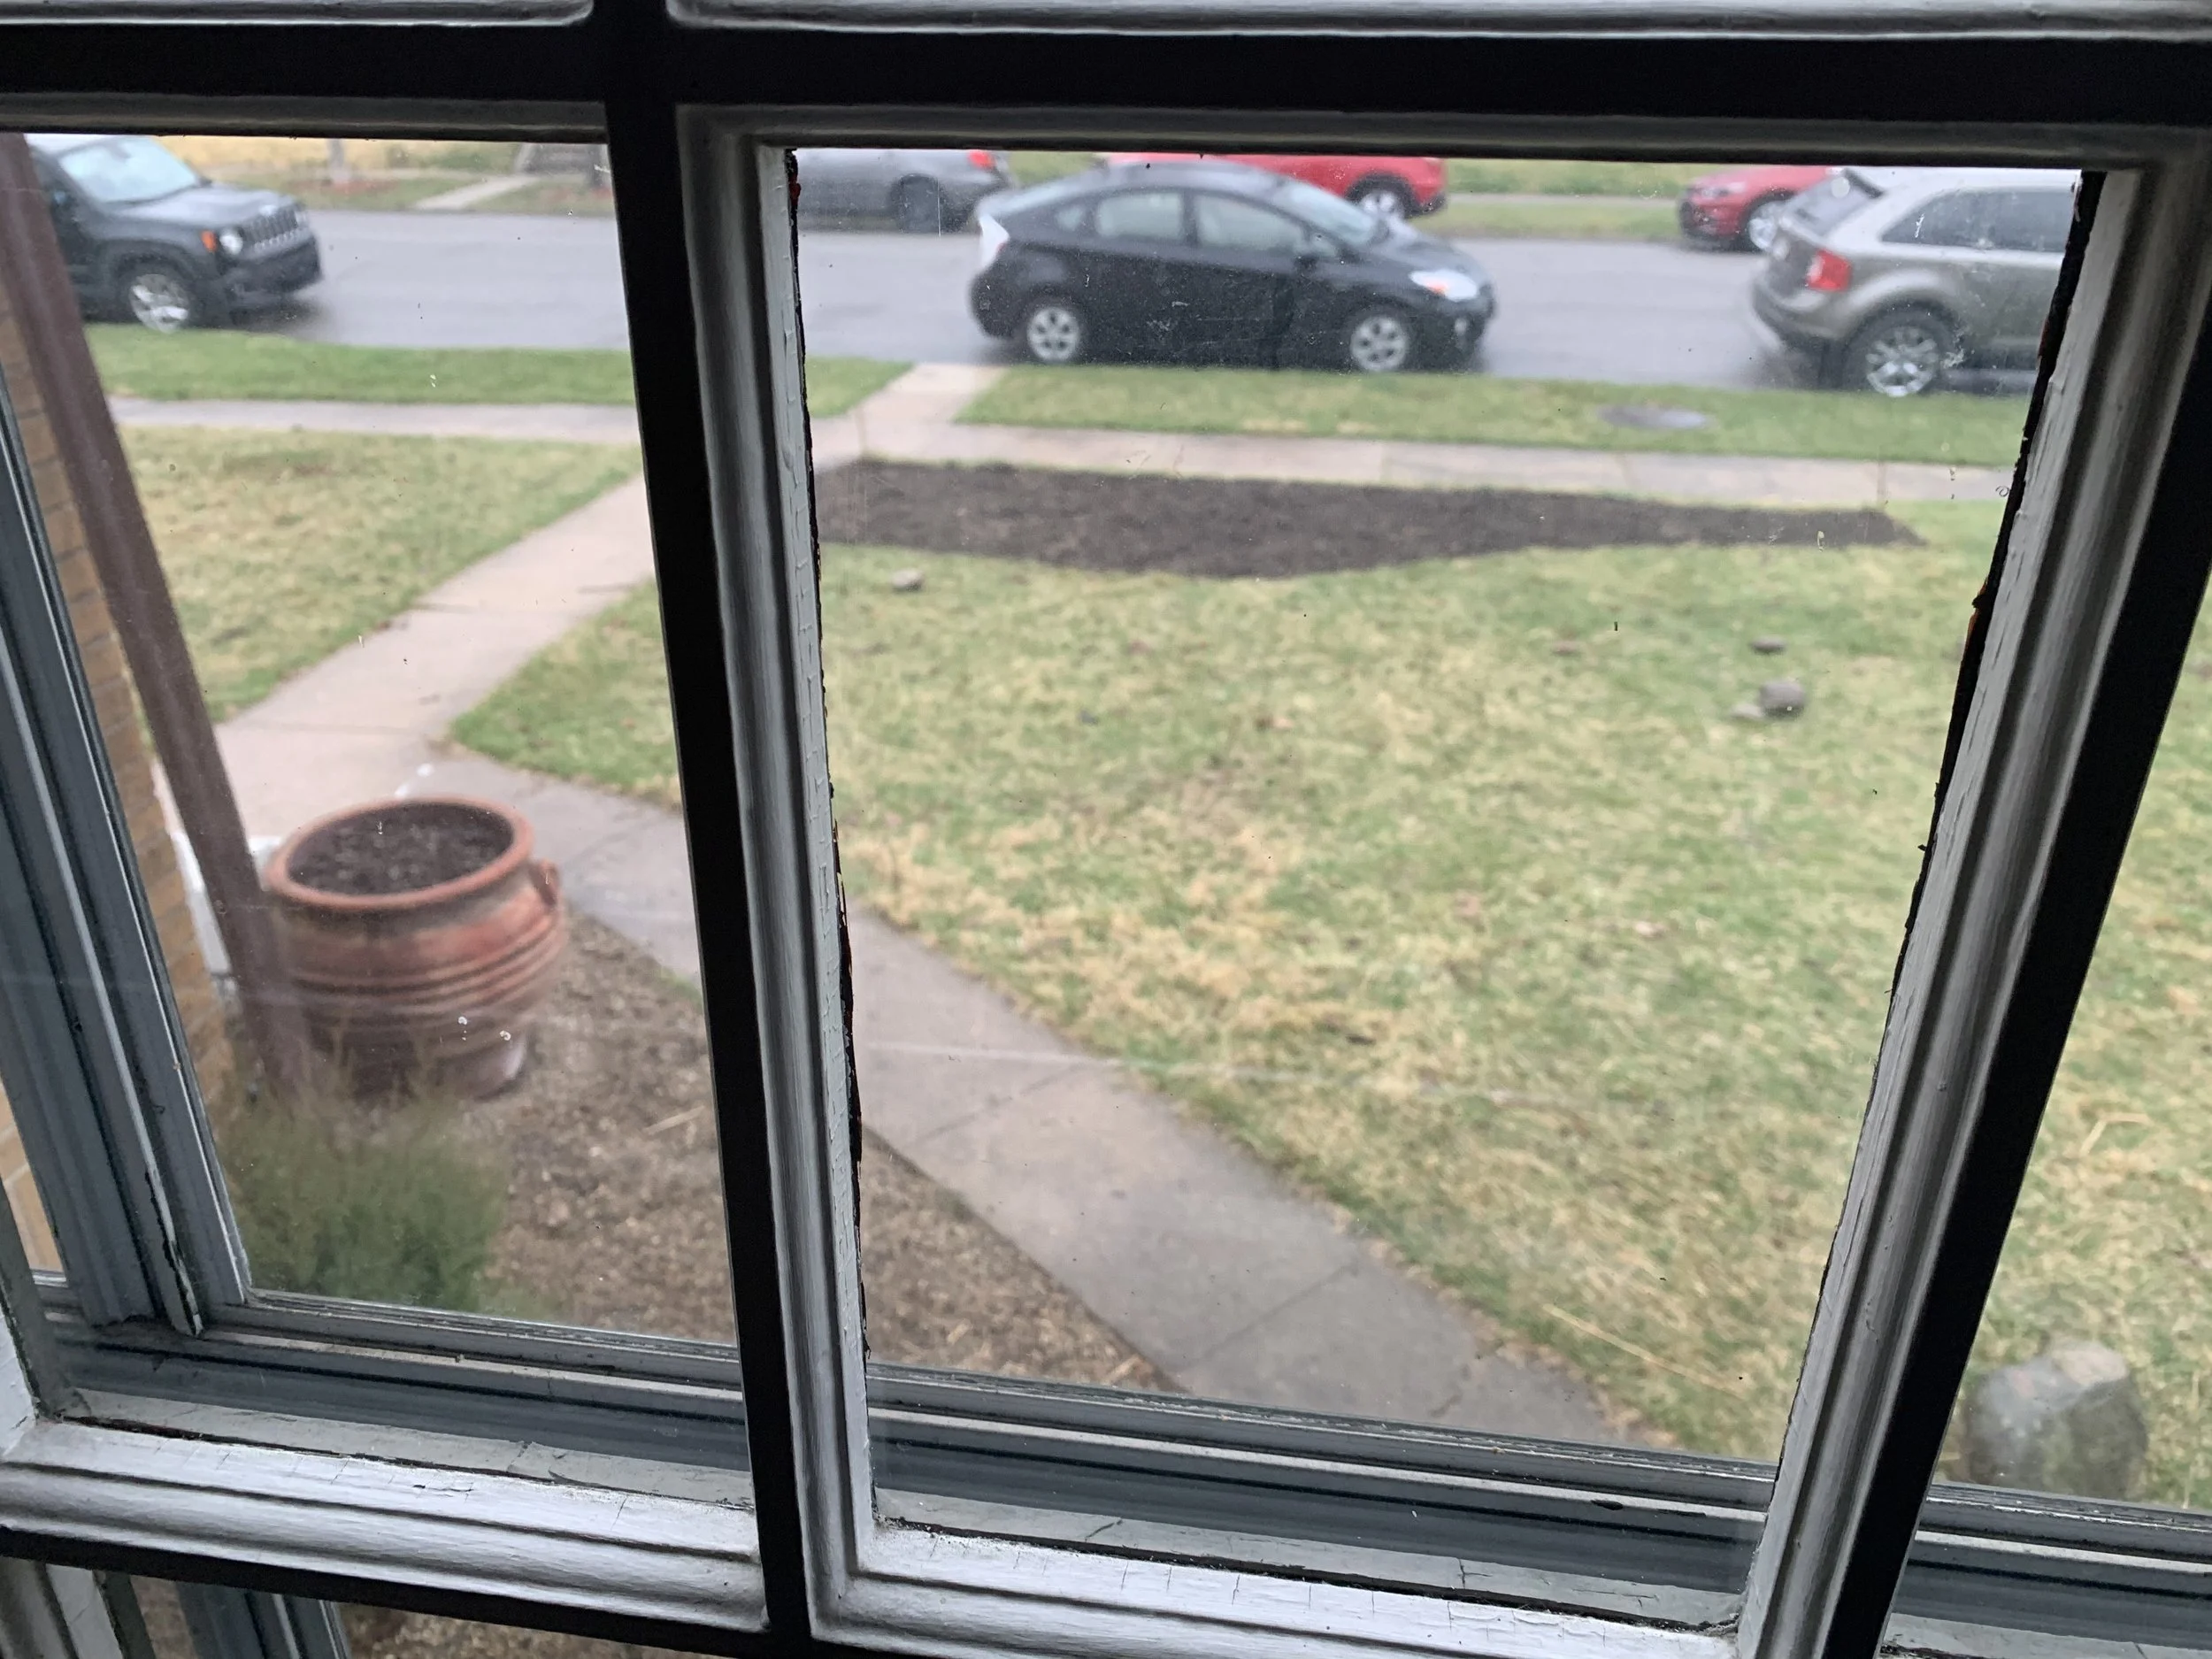
A morning view, looking out through our living room window. This view sparks immense joy.
Here are the trees and shrubs I’ve added to the front meadow:
Paw Paw | Asimina triloba
This native, small-scale tree has gorgeous, velvety flowers in early spring (see below) and stunning golden-yellow fall color. They need a pollination partner to set fruit, so I have two planted about 15’ apart. The fruits resemble a lumpy, greenish-gold potato, and ripen in late summer/early Autumn. They have the flavor and consistency of banana cream pie. Paw Paws are a host plant for a range of insects, too.
Chinquapin Oak | Quercus muhlenbergii
We need more street trees in our neighborhoods: their benefits to urban life are well-documented. Oaks make a great street tree because they’re tap-rooted, meaning they won’t heave up the sidewalk as they grow. In addition, Oaks are another keystone species, supporting hundreds of critical insects and wildlife. You can see ours growing in the background of the photo below, just to the left of the Paw Paw in the mid-ground. This one is growing in our “tree lawn” between street and sidewalk.
Black Chokeberry | Aronia melanocarpa
I really can’t get enough of this plant: I absolutely love it. Gorgeous, fragrant clusters of white flowers emerge in May, followed by glossy, deep green leaves and handsome black berries in late summer, appealing to both wildlife and humans (they need to be cooked down, first). Their super-fruit properties rival the blueberry! They have exceptional fall color, appearing to glow from within, and are a relatively fast-growing, multi-stem species. They’re also salt-tolerant, so I have them planted down in the tree lawn, too.
Staghorn Sumac | Rhus typhina
This is a fast-growing, small-scale tree with a suckering habit. It sends out shallow roots that will pop-up often several feet away from the mother plant. You typically see them growing along highways and woodland edges, forming dense thickets. I’ll be honest, this one is still an experiment for me. I’ve planted it in a small, confined space where it (hopefully) can’t escape, and am pruning and pollarding to keep the scale in check. It has great, big, attractive - almost tropical - leaves, gorgeous deep red flower clusters, and fall color that will make you swoon. Another keystone plant that’s durable, adaptable, and absolutely needs to be planted with care in the right spot.
Northern Bush Honeysuckle | Diervilla lonicera
Not to be confused with the non-native Lonicera tatarica, which causes harm in local woodland ecosystems, this native selection is an exceptional choice for small gardens. Another suckering plant, only far less so than the Staghorn, it will gently form a small colony of stems about 3’ tall. The leaves naturally carry a bronze/red/orange hue, and are especially vibrant in autumn. Tiny clusters of bright yellow, tubular flowers adorn the branches in early-mid summer, beloved by Bumblebees in particular.
Red Horse Chestnut | Aesculus x carnea ‘Briotii’
This is the only woody cultivar in this planting, a cross between A. pavia and A. hippocastanum. A cultivar is a plant variety selected by humans for a desirable or specific trait. A. pavia is native to the continental U.S. while A. hippocastanum is from Europe. It ended up here quite by accident, as I bought it from a local garden center for an episode of Let’s Grow Stuff several years ago. It was a “rescue plant” in that it needed some serious surgery to address girdling roots at planting time. It’s been slow to grow and recover - but it’s getting there! It found a home in this garden and simply never left.
Fun story, this particular cultivar dates back to 1858 and was named to honor Pierre Louis Briot, the nurseryman at Trianon-Versailles near Paris, France. I’ll share more about cultivars, native species, and plant selection in a future post.
When it blooms in early June, hummingbirds swarm the flowers.
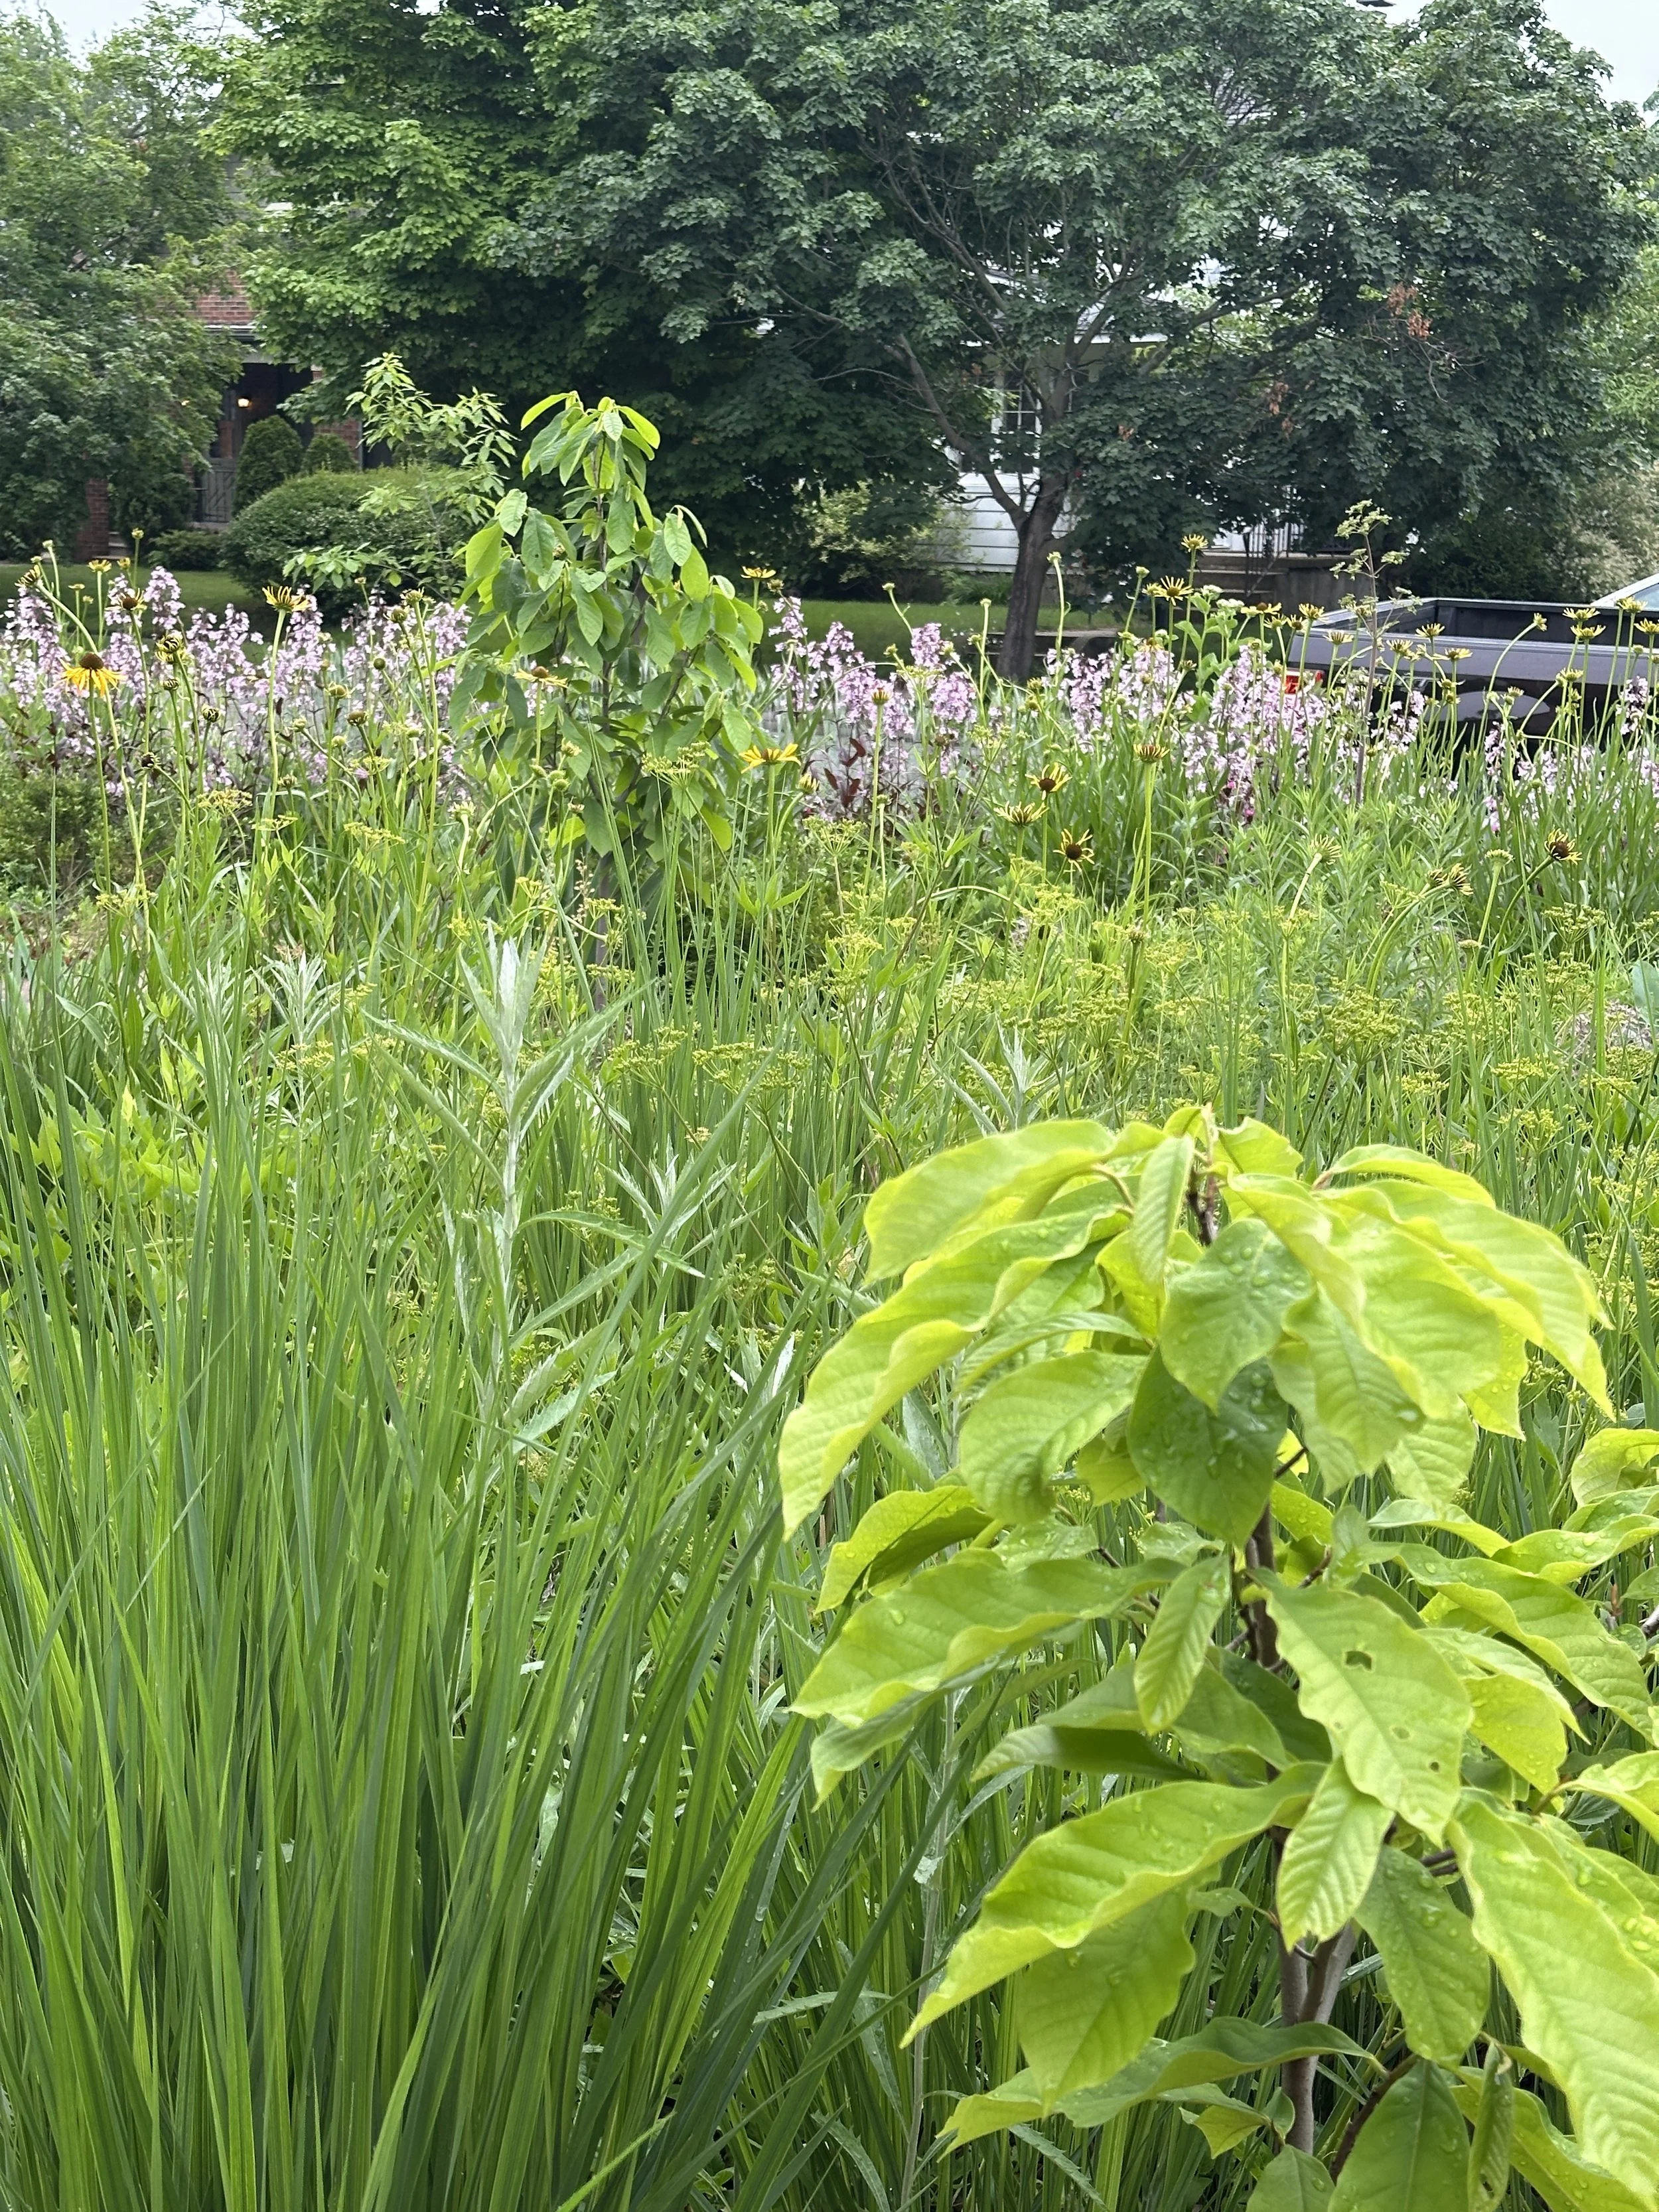
The two new Paw Paw are visible here, with one in the foreground and midground, about 15’ apart. This spacing helps ensure insects can pollinate flowers effectively each spring, which ensures optimal fruit set as they mature. The Chinquapin Oak is in the background to the left. This view and these plantings will evolve considerably as these new plants fill in over time.
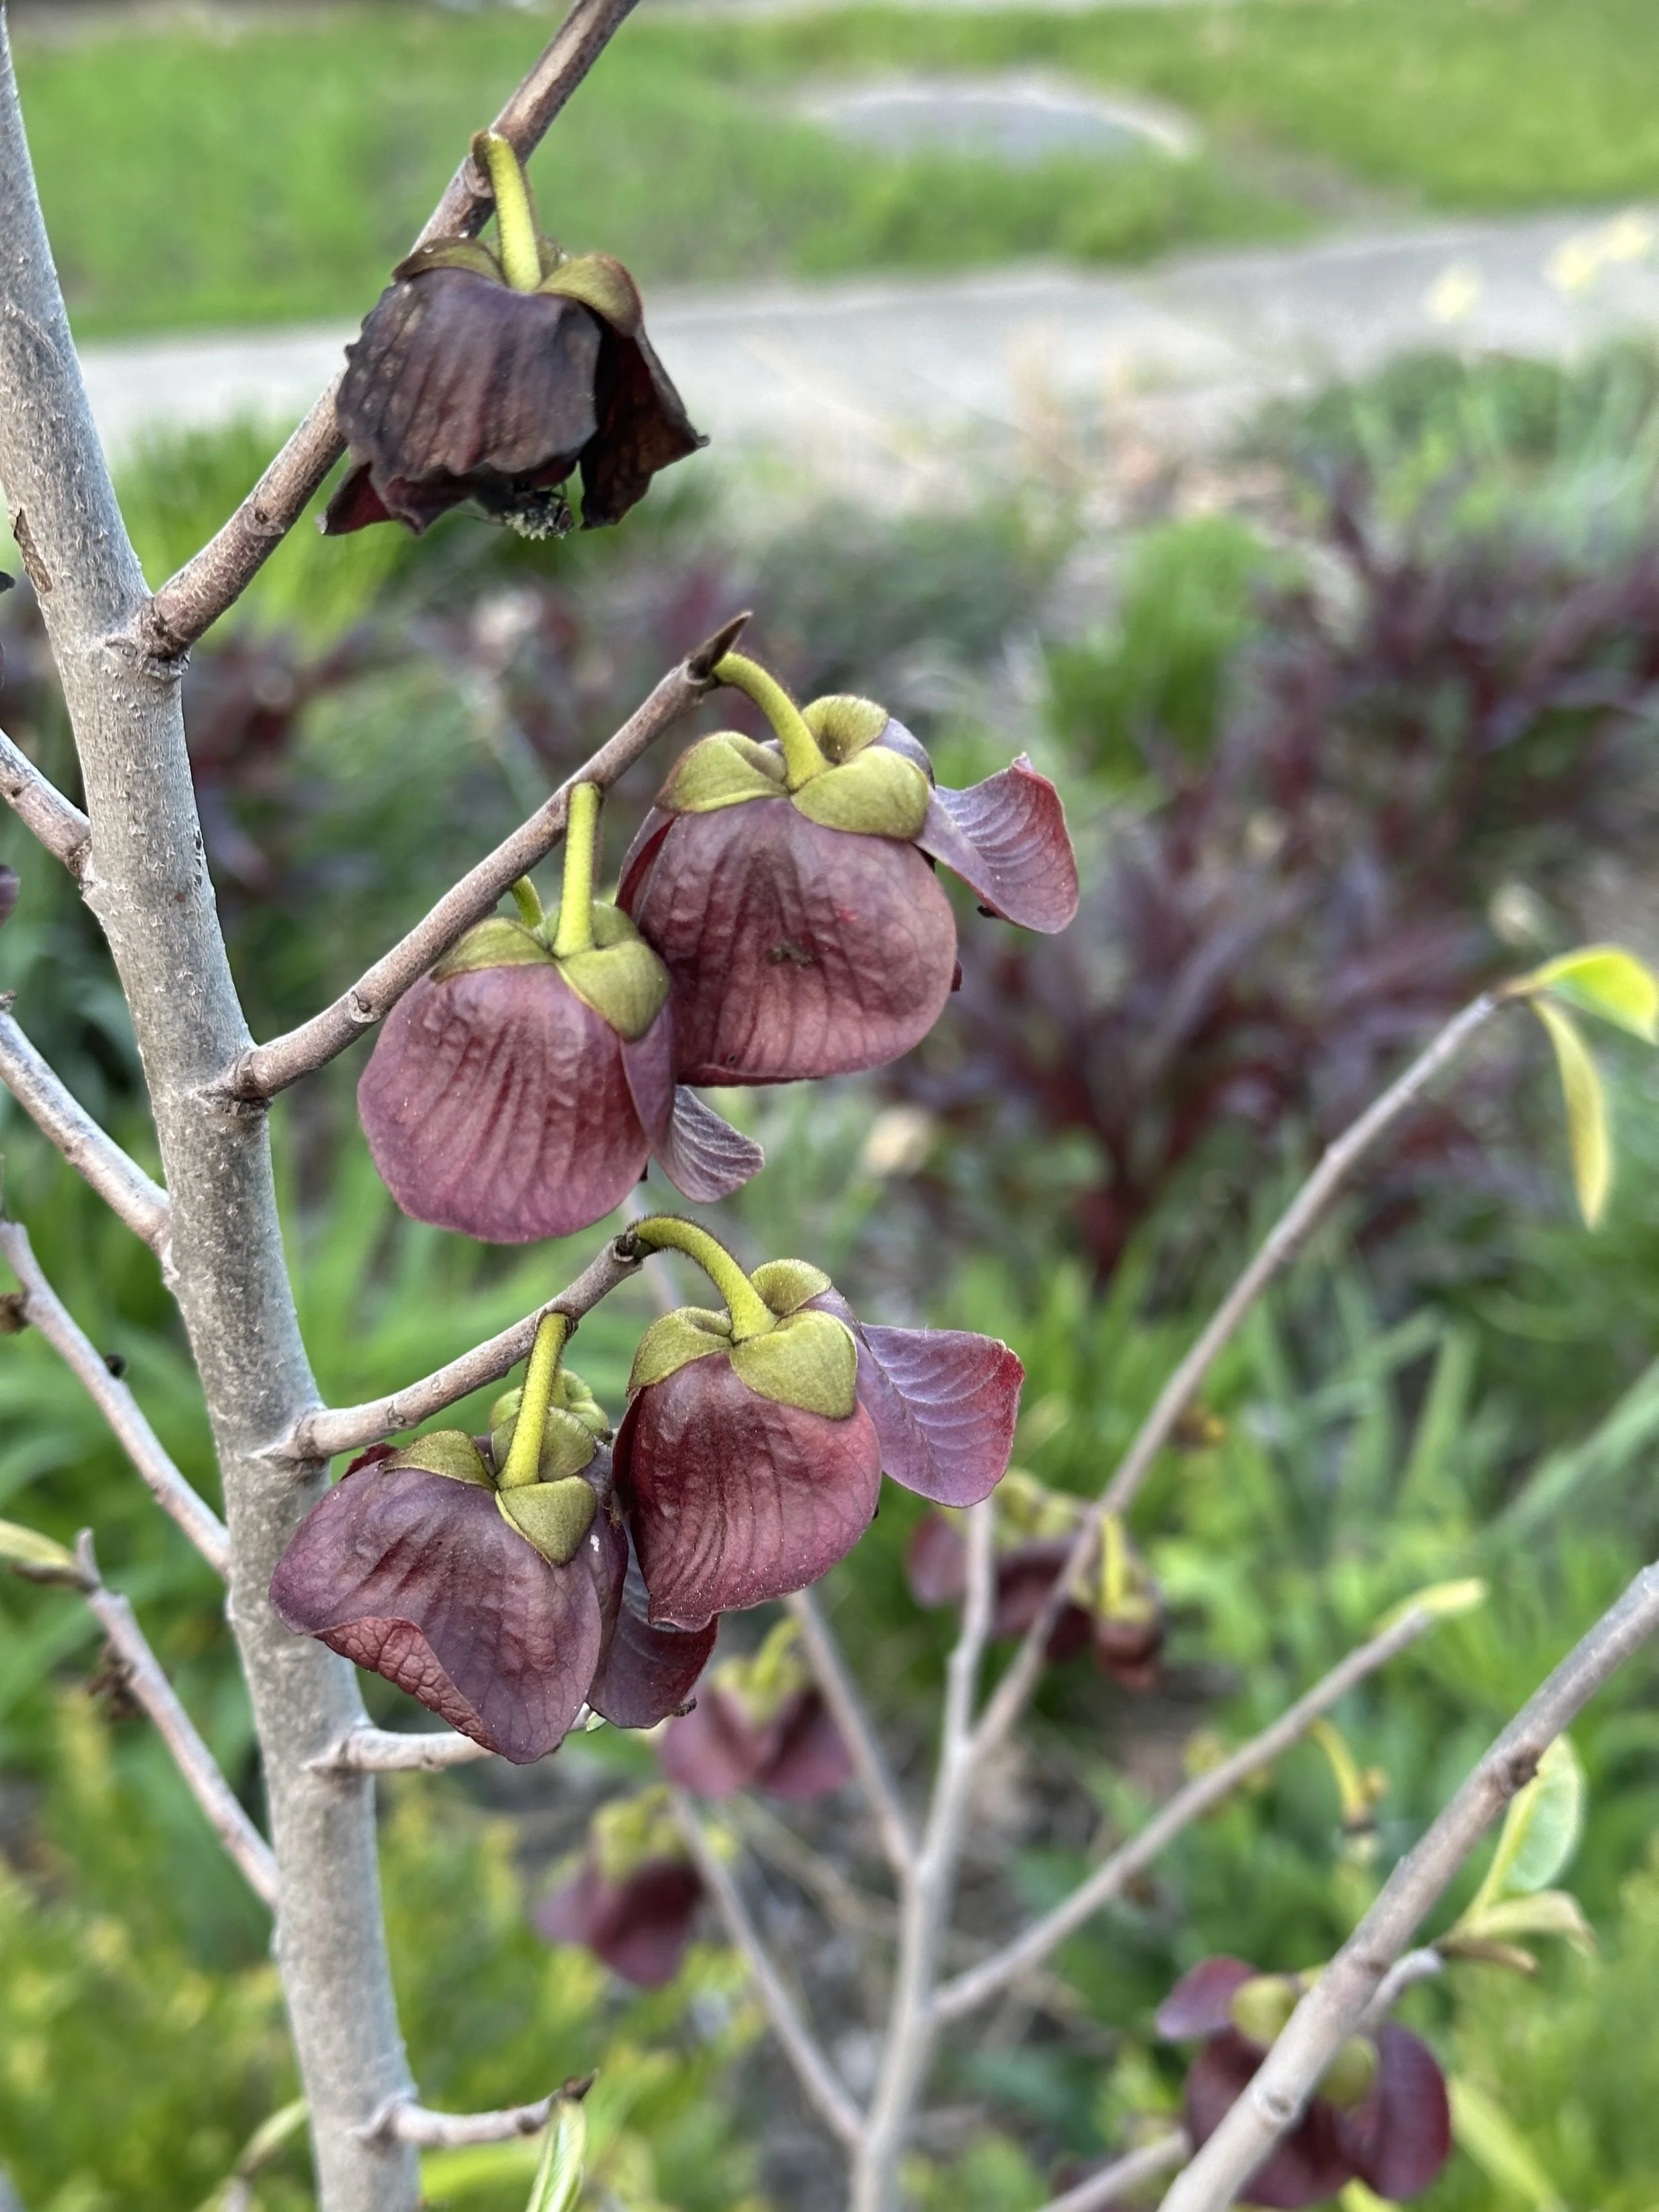
Paw Paw flowers, one of my absolute favorites as Spring kicks off each year, coming into bloom late April-early May. The color is hypnotizing.

Paw Paw in autumn, and this is near the end of the season. The leaves begin a bright golden yellow, turning to a rich terracotta as they fall. They make a great mulch for anything growing underneath.
Mind the Gap: Edges
This was a surprise I wasn’t expecting, though probably should have: edges.
Some of the most exciting and interesting moments happen on the edges. In ecology, especially when looking at something like the transition from a meadow to a woodland, edges are where we find the greatest diversity of species, flora and fauna alike.
In 2025, I observed this up close. As the “forest” of mature perennials began to hit their stride, the 2-3” between sidewalk/turf and planting bed is where I spent nearly all of my management time last year. Read that again.
How can these narrow, linear spaces require so much work? And also, why bother?
Edges matter for a few reasons:
You can’t avoid them, there will always be an edge of some kind to your planting. What’s growing (or not) on the other side also is important to consider.
If you’re planting along pavement, especially in full-sun, plants on the edge need to be able to cope with the amplified summer heat that’s absorbed, reflected, and released from this hard surface. They also need to hold soil in place during a heavy rain if the paved surface is large or sloped - edges are where erosion tends to happen. This means things that are low to the ground, drought/heat tolerant, and won’t flop in to the path too much.
If you’re planting along turf, and don’t install a physical edge (wood, plastic, metal, there are options), it becomes a constant battle to keep the turf at bay. Turf spreads by shallow, horizontal, underground roots, which can grow upwards of 6-10” in to the bed before it pops through the soil. When it comes up through an established perennial, it’s almost impossible to remove, entirely and keeping grass out matters for the integrity of this new plant community long-term.
I just use a sharp, flat-edge shovel and manually clean up turf edges maybe 2-3x/year, but 2025 nearly broke me - I could feel the weight of this “chore” against other things I “could” be doing. Especially with those turf paths, I have a lot of linear feet to cover (with more in the backyard, too). I’m hoping to invest in permanent, durable edging this year so that I never need to worry about this task again.
Edges are where you can really have a dialogue with plants. As areas of disturbance, they allow for seedlings (desirable and otherwise) to take root easily because this is where light and water tend to reach the soil, creating ideal conditions for new plants to germinate.
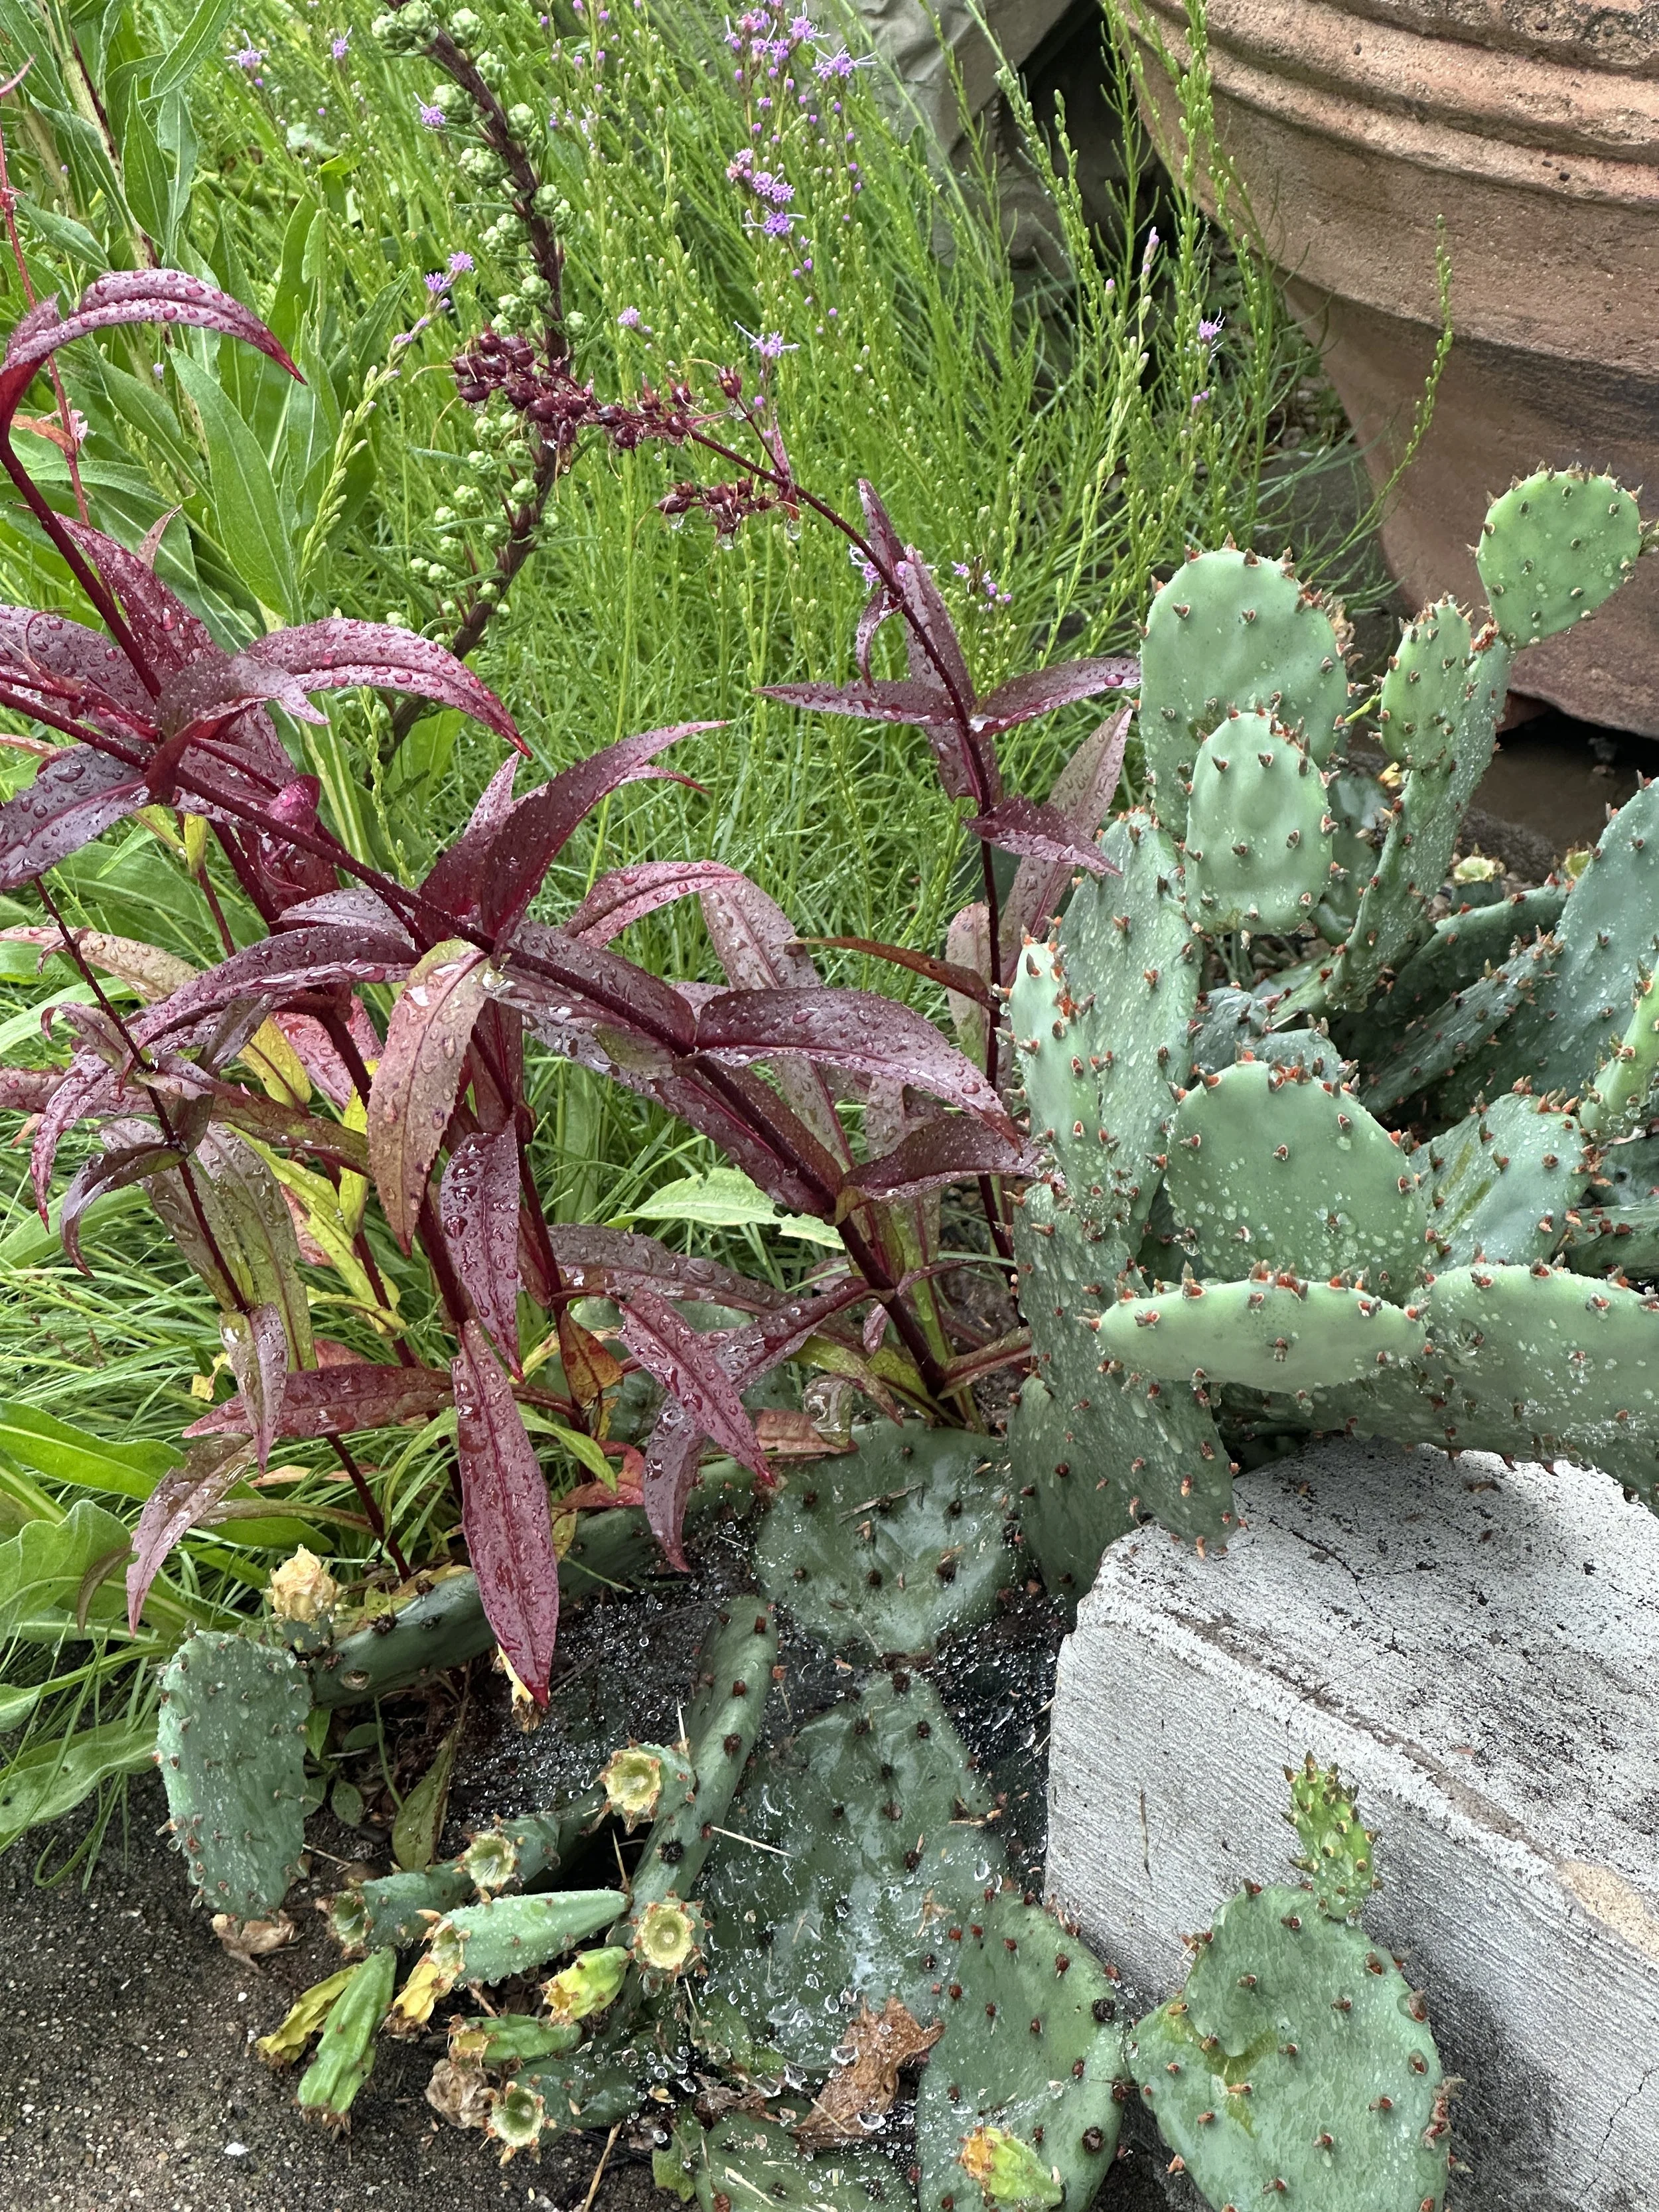
The only drawback to Prickly Pear on the corner of our front steps is that sometimes the hose will drag along and the tiny glochid thorns will get stuck in the hose, and later, my fingers. They’re the finest, most delicate thorns that you can feel but not see, and they’re an absolute pain to get out.
For this reason alone, I think this plant needs a new home in the garden in 2026. Despite this, I’ve really enjoyed growing it here and it’s absolutely been thriving (I started with a single pad.)
Most edges deserve and need to be softened, especially around hardscaping like pavement or decks (hence their name, edge - ha!) The example above is a great illustration of this, with a combination of native Prickly Pear (Opuntia humifusa) growing happily with Smallhead Blazing Star (Liatris microcephala). The dark leaves are a seedling of Penstemon ‘Pocahontas’ which put itself here and I left it, with Meadow Blazing Star (Liatris ligulistylis) also seeding in. This one is a bit taller than I’d normally choose for a spot this close to a path, but I’ve chosen to leave it.
Here’s why:
The Monarchs absolutely love it.
I love the color, shape, and bloom time.
It clearly loves growing in this warm, fast-draining condition (there’s a 3” pea gravel mulch underneath, and then only sand).
I chose to stake it, rather than remove it. This is a super quick chore for the mid-summer garden and onward. I have a few pieces of reclaimed rebar that I’ll stick next to a big stem, and gently train each flower stalk to “hug” the rebar. I’ll use twine if I need to, but it’s rare.
Yes, this can feel like a “fussy” chore in some circumstances, but I’ve come to see it more as “dancing” with the garden, as the plants continue to find their way.
It’s a practice of being led, rather than leading, and that’s extremely liberating.
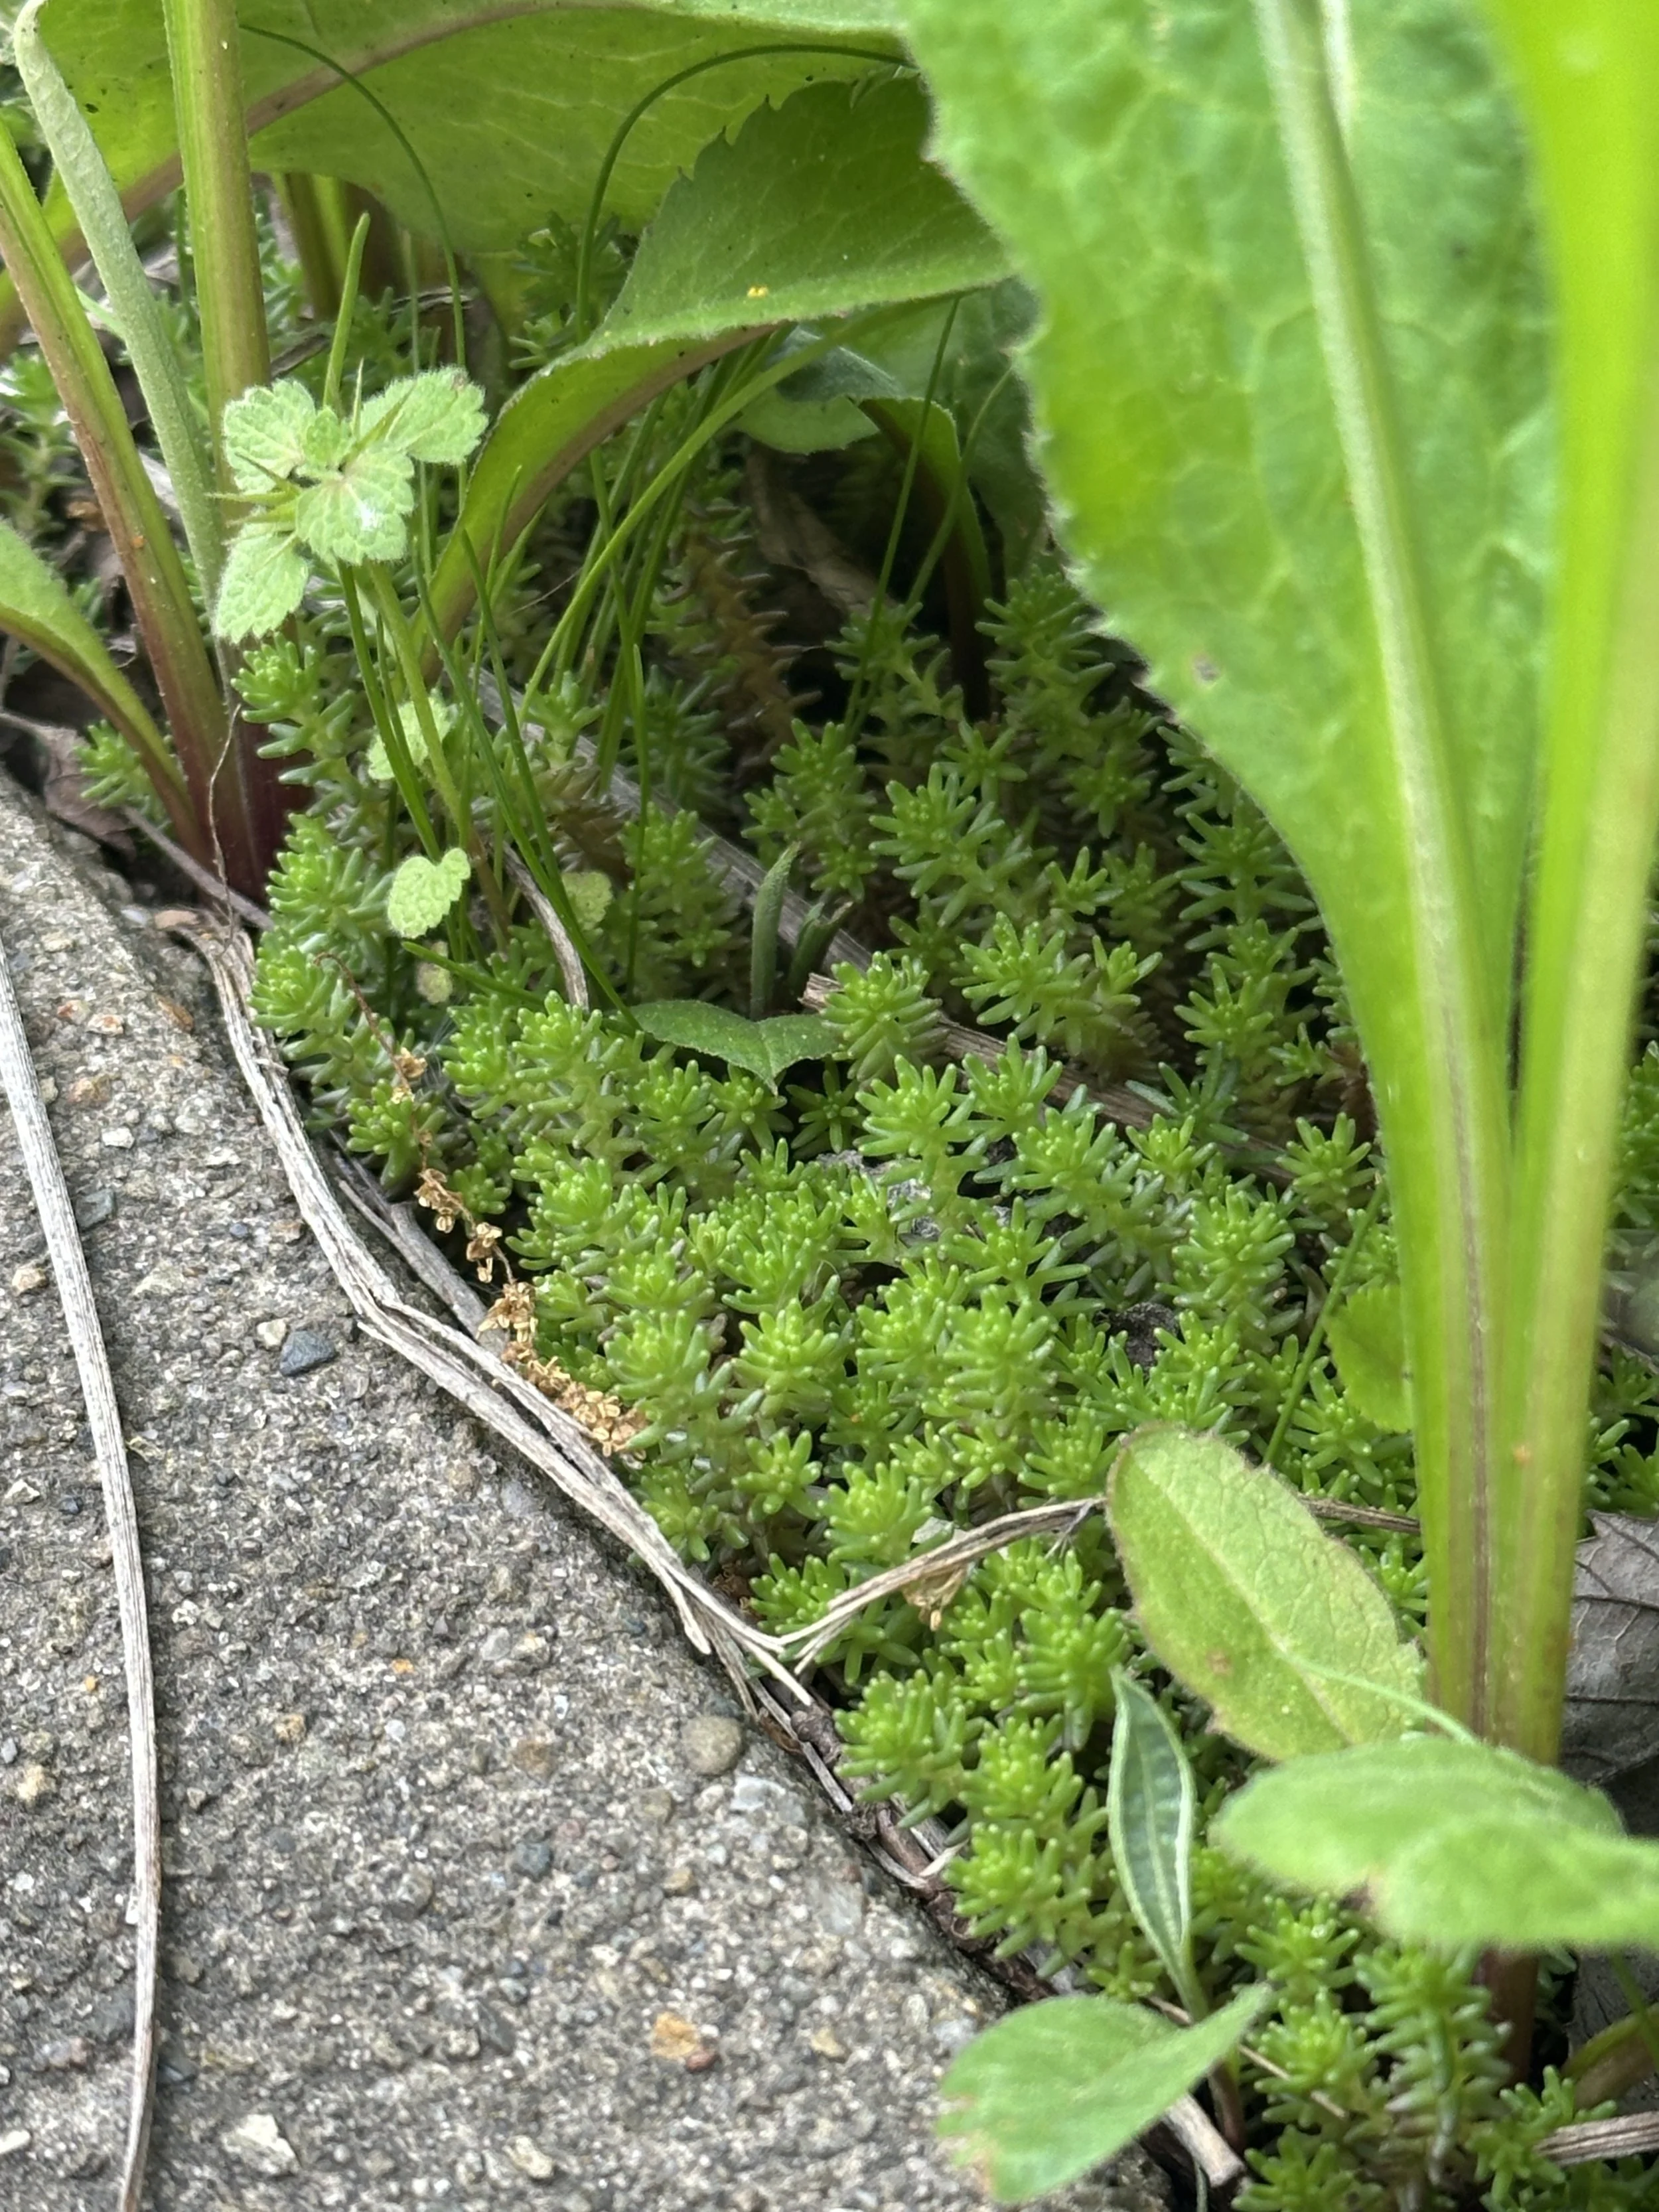
Sedum fills in the cracks between edges and larger perennials.
Continuing the “being led/layers/edges” theme, the vignette above was one of the most delightful “edge” moments of 2025. We inherited this ground cover Sedum (I’m not even sure if the exact species/cultivar) with the house. It was growing in the pea gravel across the path, and it’s hardly more than 1” tall. When I installed this section of the meadow in late 2021, it quickly “jumped” over the path and started growing along the opposite edge.
At first, I was alarmed. It felt like an aggressive move, even though it wasn’t. I fought it for several years, constantly weeding it out.
Here’s the thing: it’s pernicious. The smallest leaf or tiny bit of stem left behind will eventually take root and begin to grow again. Short of applying herbicides, I could either keep fighting it, or…
Surrender. Let it do its thing. See what happens if I just stopped caring. Or, more acurately, changed my relationship to it.
And, you know what? No complaints…
Was it really a foe? I don’t think so. It’s actually become a delightful friend, because it’s doing exactly what it needs to do here: it’s protecting soil.
Protecting from erosion (this is right near a downspout), protecting from other plants seeding in, and holding water in the soil. It’s perfectly suited to this location in a way almost nothing else has been, and all I had to do was stop “maintaining” and start “managing” (read: observing, listening, pausing).
This is the part where I pause to remind and reflect on the notion that the lessons of working with plants transcend the soil.
The examples above were happy accidents in the scheme of edges in 2025, but there was a different story emerging in another part of the garden…

Additional weed pressure along edges is evident in the planting above.
These beds along the sidewalk have been an evolving experiment the past few years. They started as meadow, but then many things were out of scale, so I removed most of what was there and made way for trial beds. They currently hold plants that will eventually make their way to The Field. (Which means this space will transition again at some point soon-ish).
Edges have been a constant struggle here. I think if I’d kept the meadow, something similar to what happened along the upper paths would have happened here: things would have found their niche and filled in the gaps.
But, because I’d stripped everything out and churned the soil (again) the weed pressure was just bonkers, and it was peak along edges (again), especially the pavement.
I’m still not sure what I want these beds to be long-term. Maybe a collection of low-growing ground covers, a “tapestry lawn” of flowering things that can handle foot traffic? Street parking is common in our neighborhood, and while I left a small strip of turf along the curb to accommodate, it’s still tight).
That said, I needed to address the edges, and to do so in a way I wouldn’t regret later. I wanted something low growing, durable/heat loving, with dense roots to hold soil in place.
It just so happened (you’ll note this recurring theme: use what you have!) we had a couple 72c trays of Blue Eyed Grass (Sisyrinchium ‘Lucerne’) sitting in The Lot Next Door from last season that really needed to get into the ground - they were struggling in those tiny pots.
I’ve slowly been falling in love with this plant over the past few years. It’s incredibly durable and easy to grow, seedless (so it won’t spread out of control), and bulks up quickly after planting. A member of the Iris family (it’s not technically a grass), it produces clouds of bright violet flowers with yellow centers from mid-May through mid-June, and then is a handsome, deep grey-green the rest of the year. I’ve had good success with it in the back garden, so trying it here seemed like a good next step in the experiment.
Planting a Mini Hedge
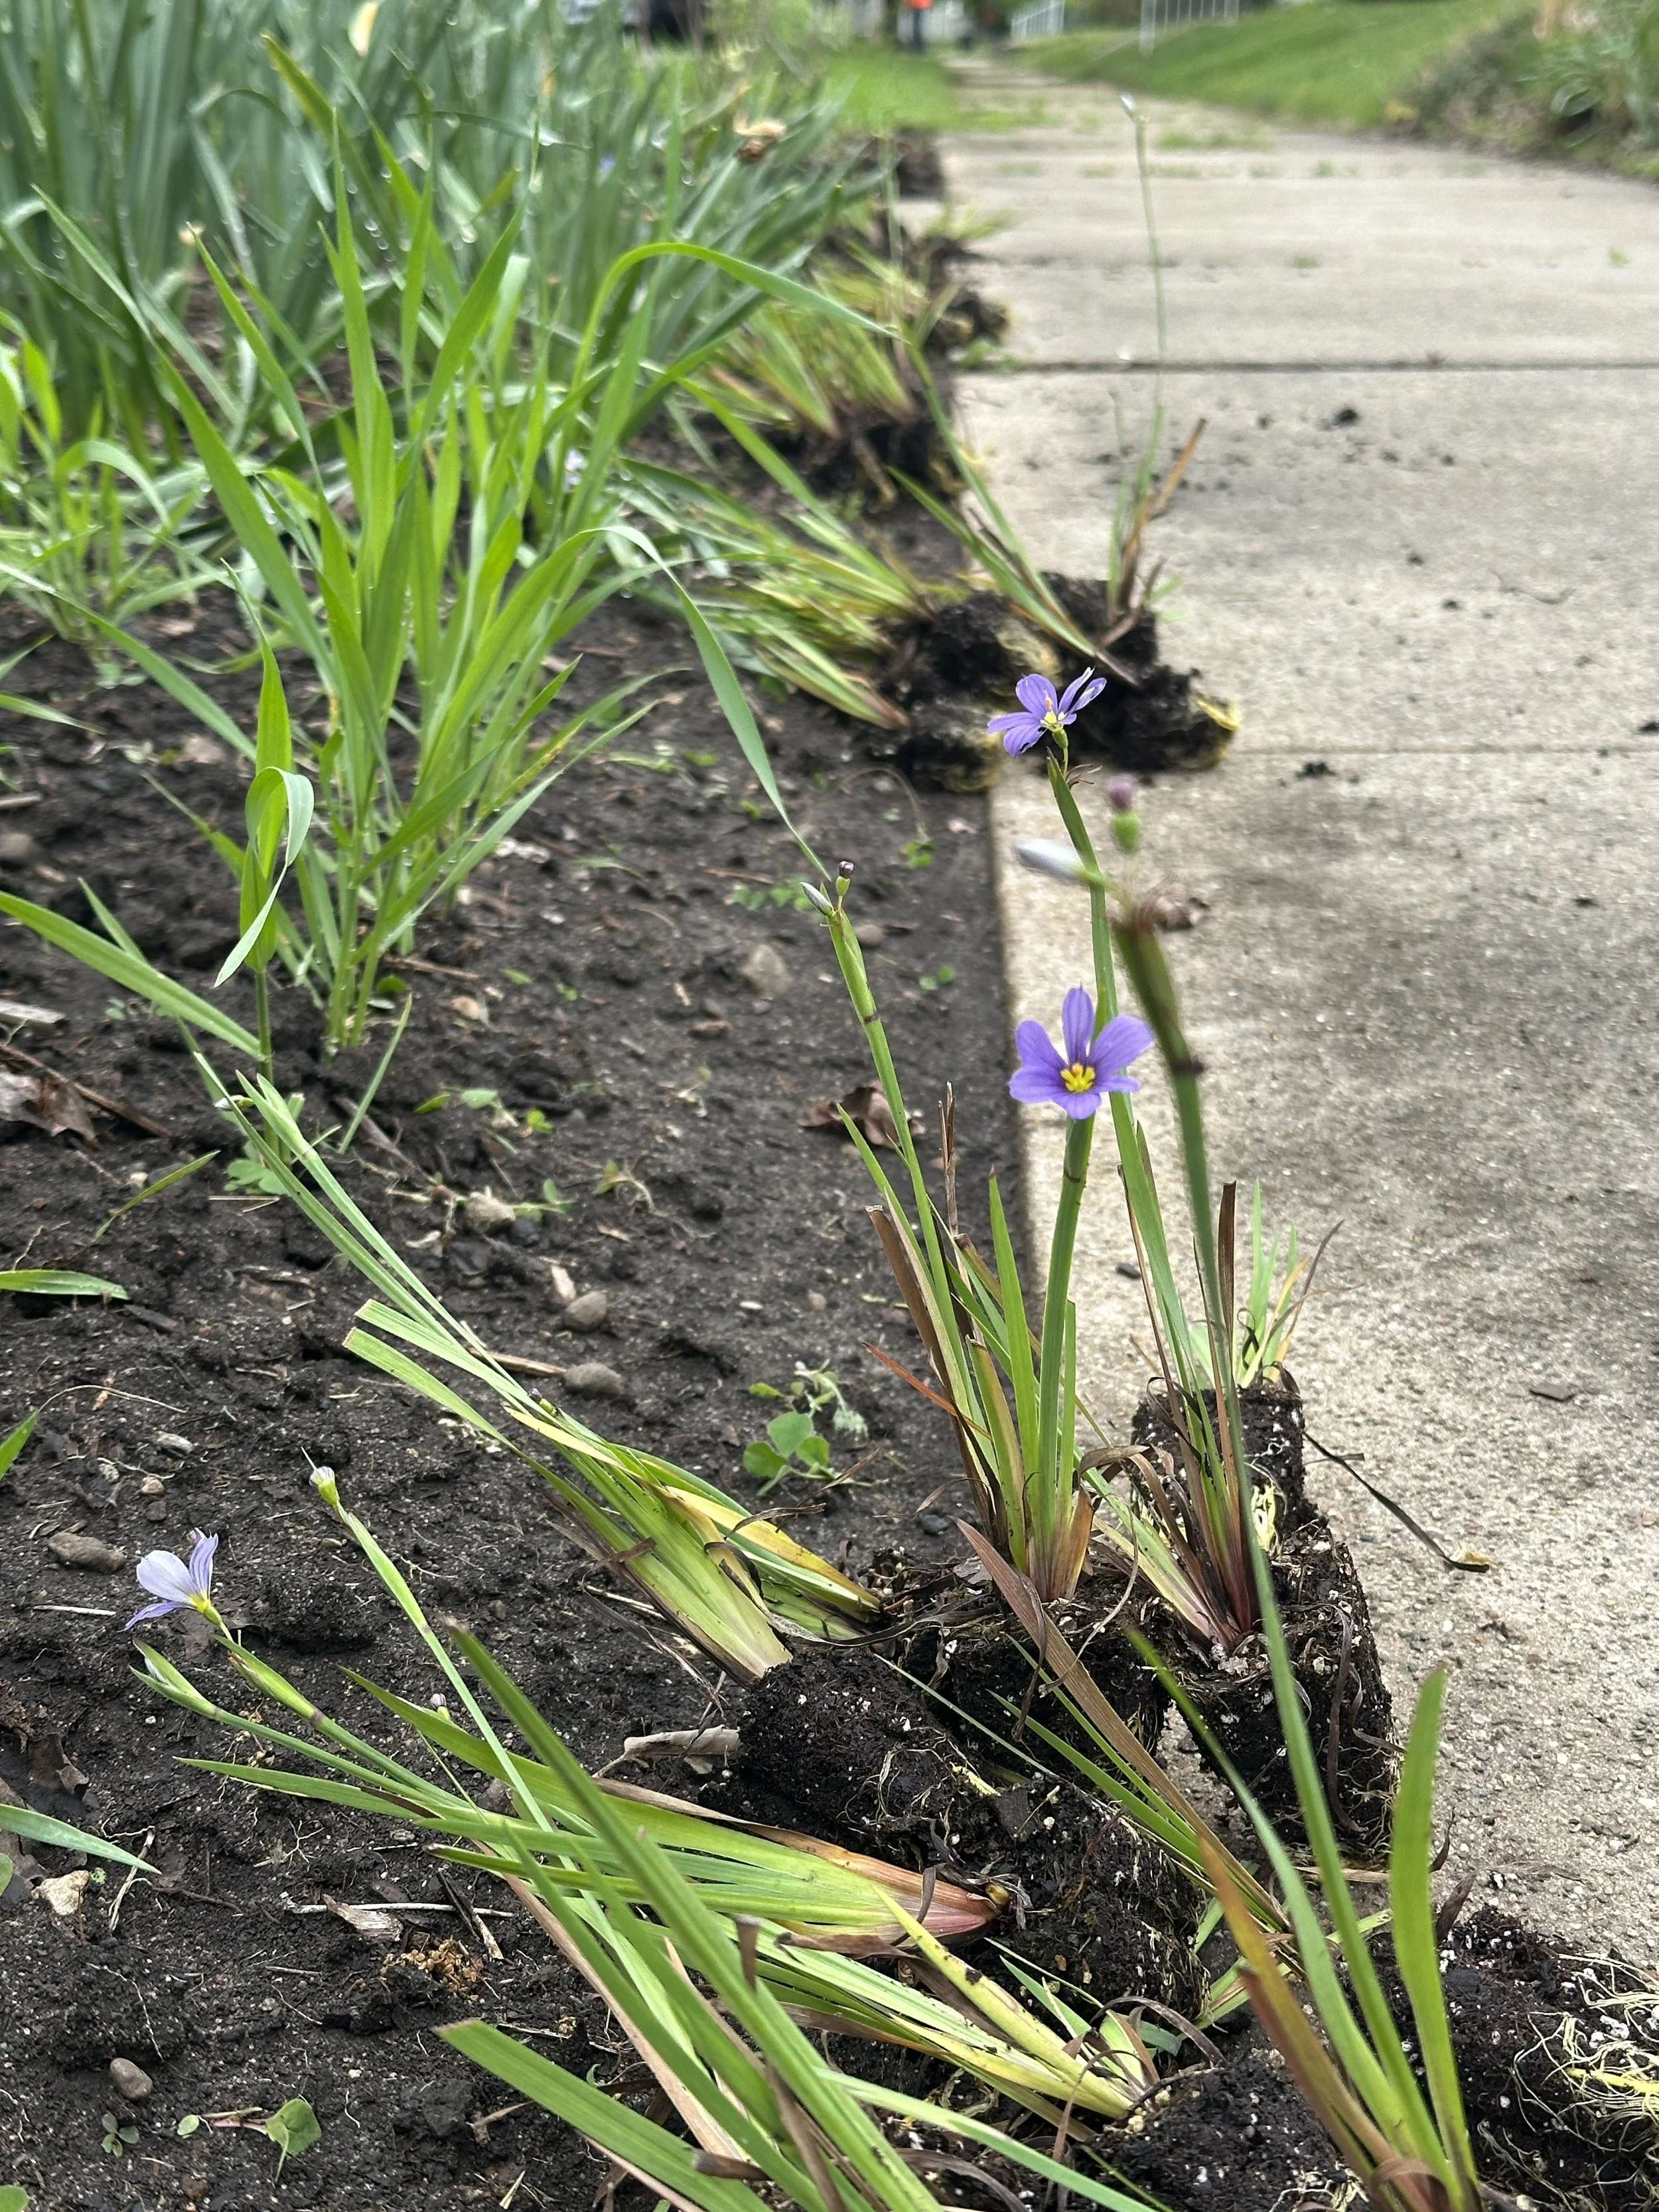
I decided to plant a “mini hedge” along the sidewalk edges, a double-wide, staggered line of plants covering the full sidewalk length of the planting bed, just along the path.
I started by placing two handfuls of plants every 3’ or so to get my rough spacing dialed in. I always like to lay things out first so I don’t get to the end of the line and fall short of what I need by just a few inches - very annoying.
As it happened, the number of plants filled the space nearly perfect, with plants spaced roughly 3” apart. They were blooming at the time so I was able to get a rough idea for what they’re going to look like this year.
I was very happy with how these new plants settled in through the second half of the year. They bulked up quickly, required minimal watering, loved the heat from the path, and did exactly what they were intended to: slow erosion, minimize weed pressure, fill a niche.
This is an ongoing experiment, and I’m excited to report back soon.
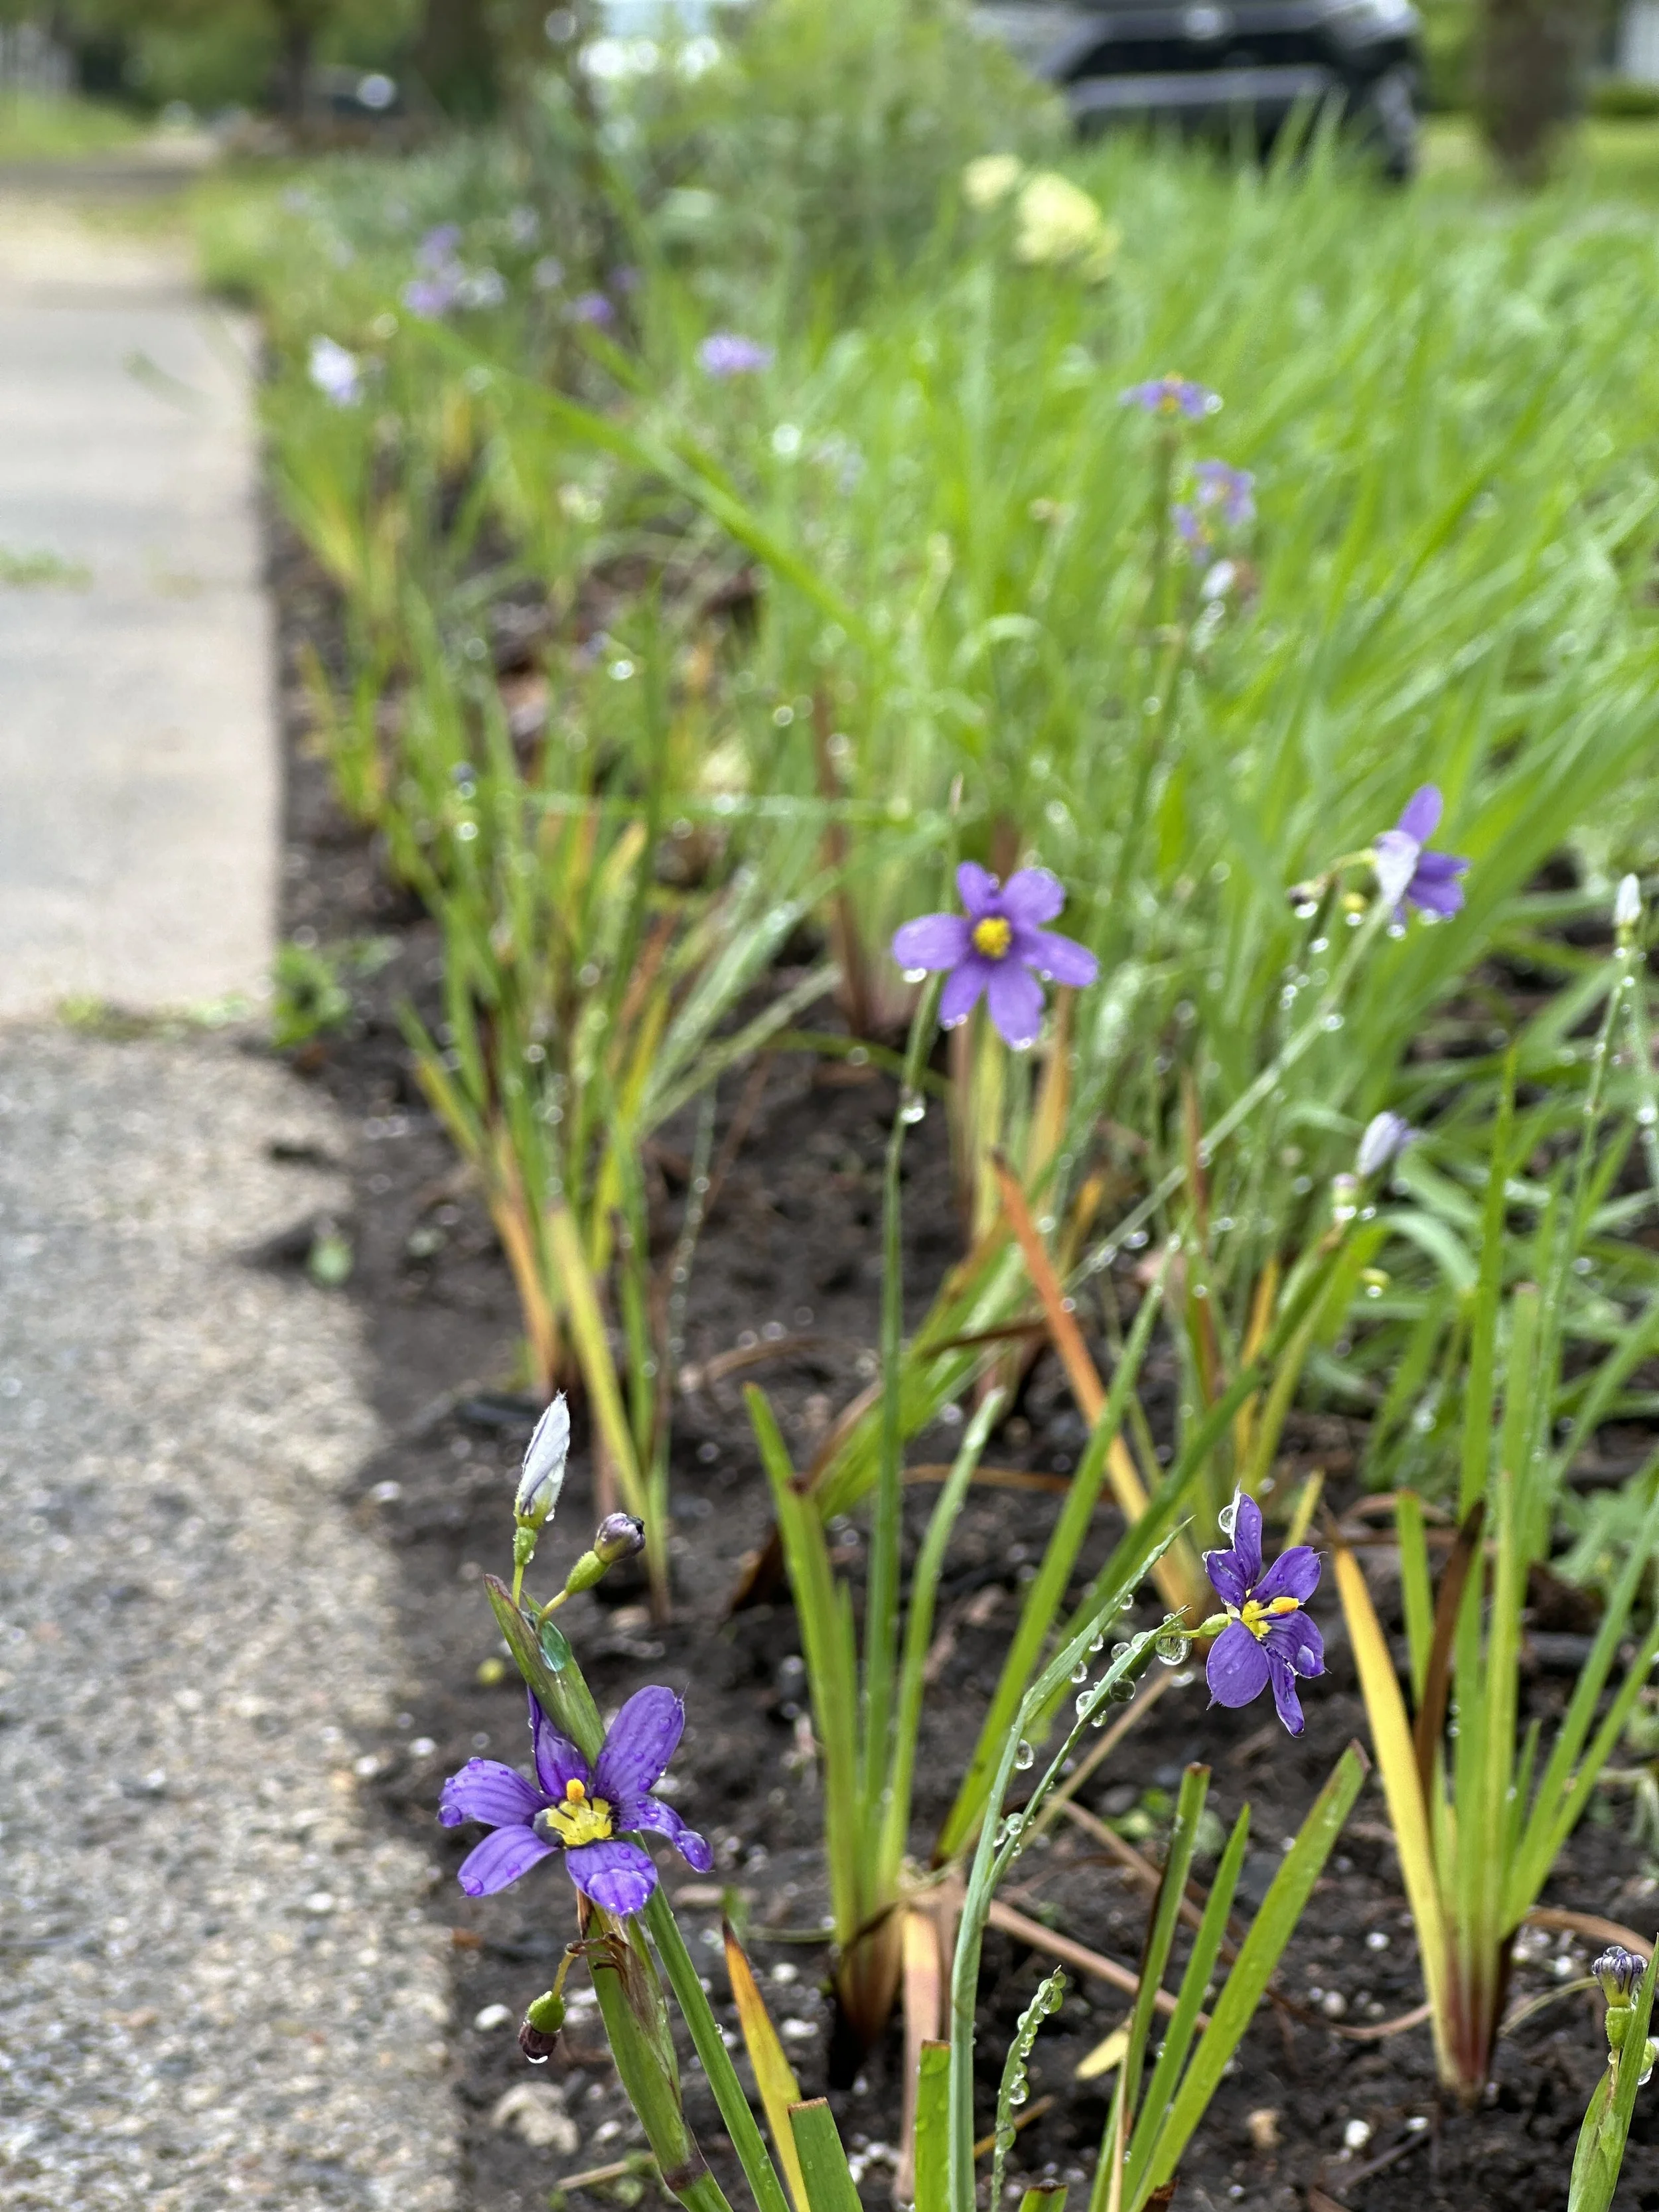
Looking down the sidewalk at the “mini hedge” of newly-planted Sisyrinchium ‘Lucerne’.
Embracing Spontaneous Flora
As the first things I planted five years ago have matured, they’ve begun to set seed. Birds come in and land on the new tree branches, now an open invitation that didn’t exist before, bringing their own “seed bank deposit” along for the ride. New seeds arrive by wind, by mammal, or by disturbance - seeds that had been resting and waiting below the old turf for who knows how many years for a chance in the light.
This is when things really begin to get exciting, because stuff will begin popping up where you least expect - and most enjoy.
The Bronze Fennel inside the Allium: love it.
The Aster within Asters: yes.
The Cephalaria and Echinops coming together: such a win.
So many moments I couldn’t predict and would never expect: infinite combinations, new recipes, new ideas emerging. This is when the stew is really cookin’.
All that said, some things are still a little too opportunistic and I’ve found myself editing their seedlings more often than not. That’s ok, because there’s still a story to learn here, a question to ask, and new plants to share. All good things.
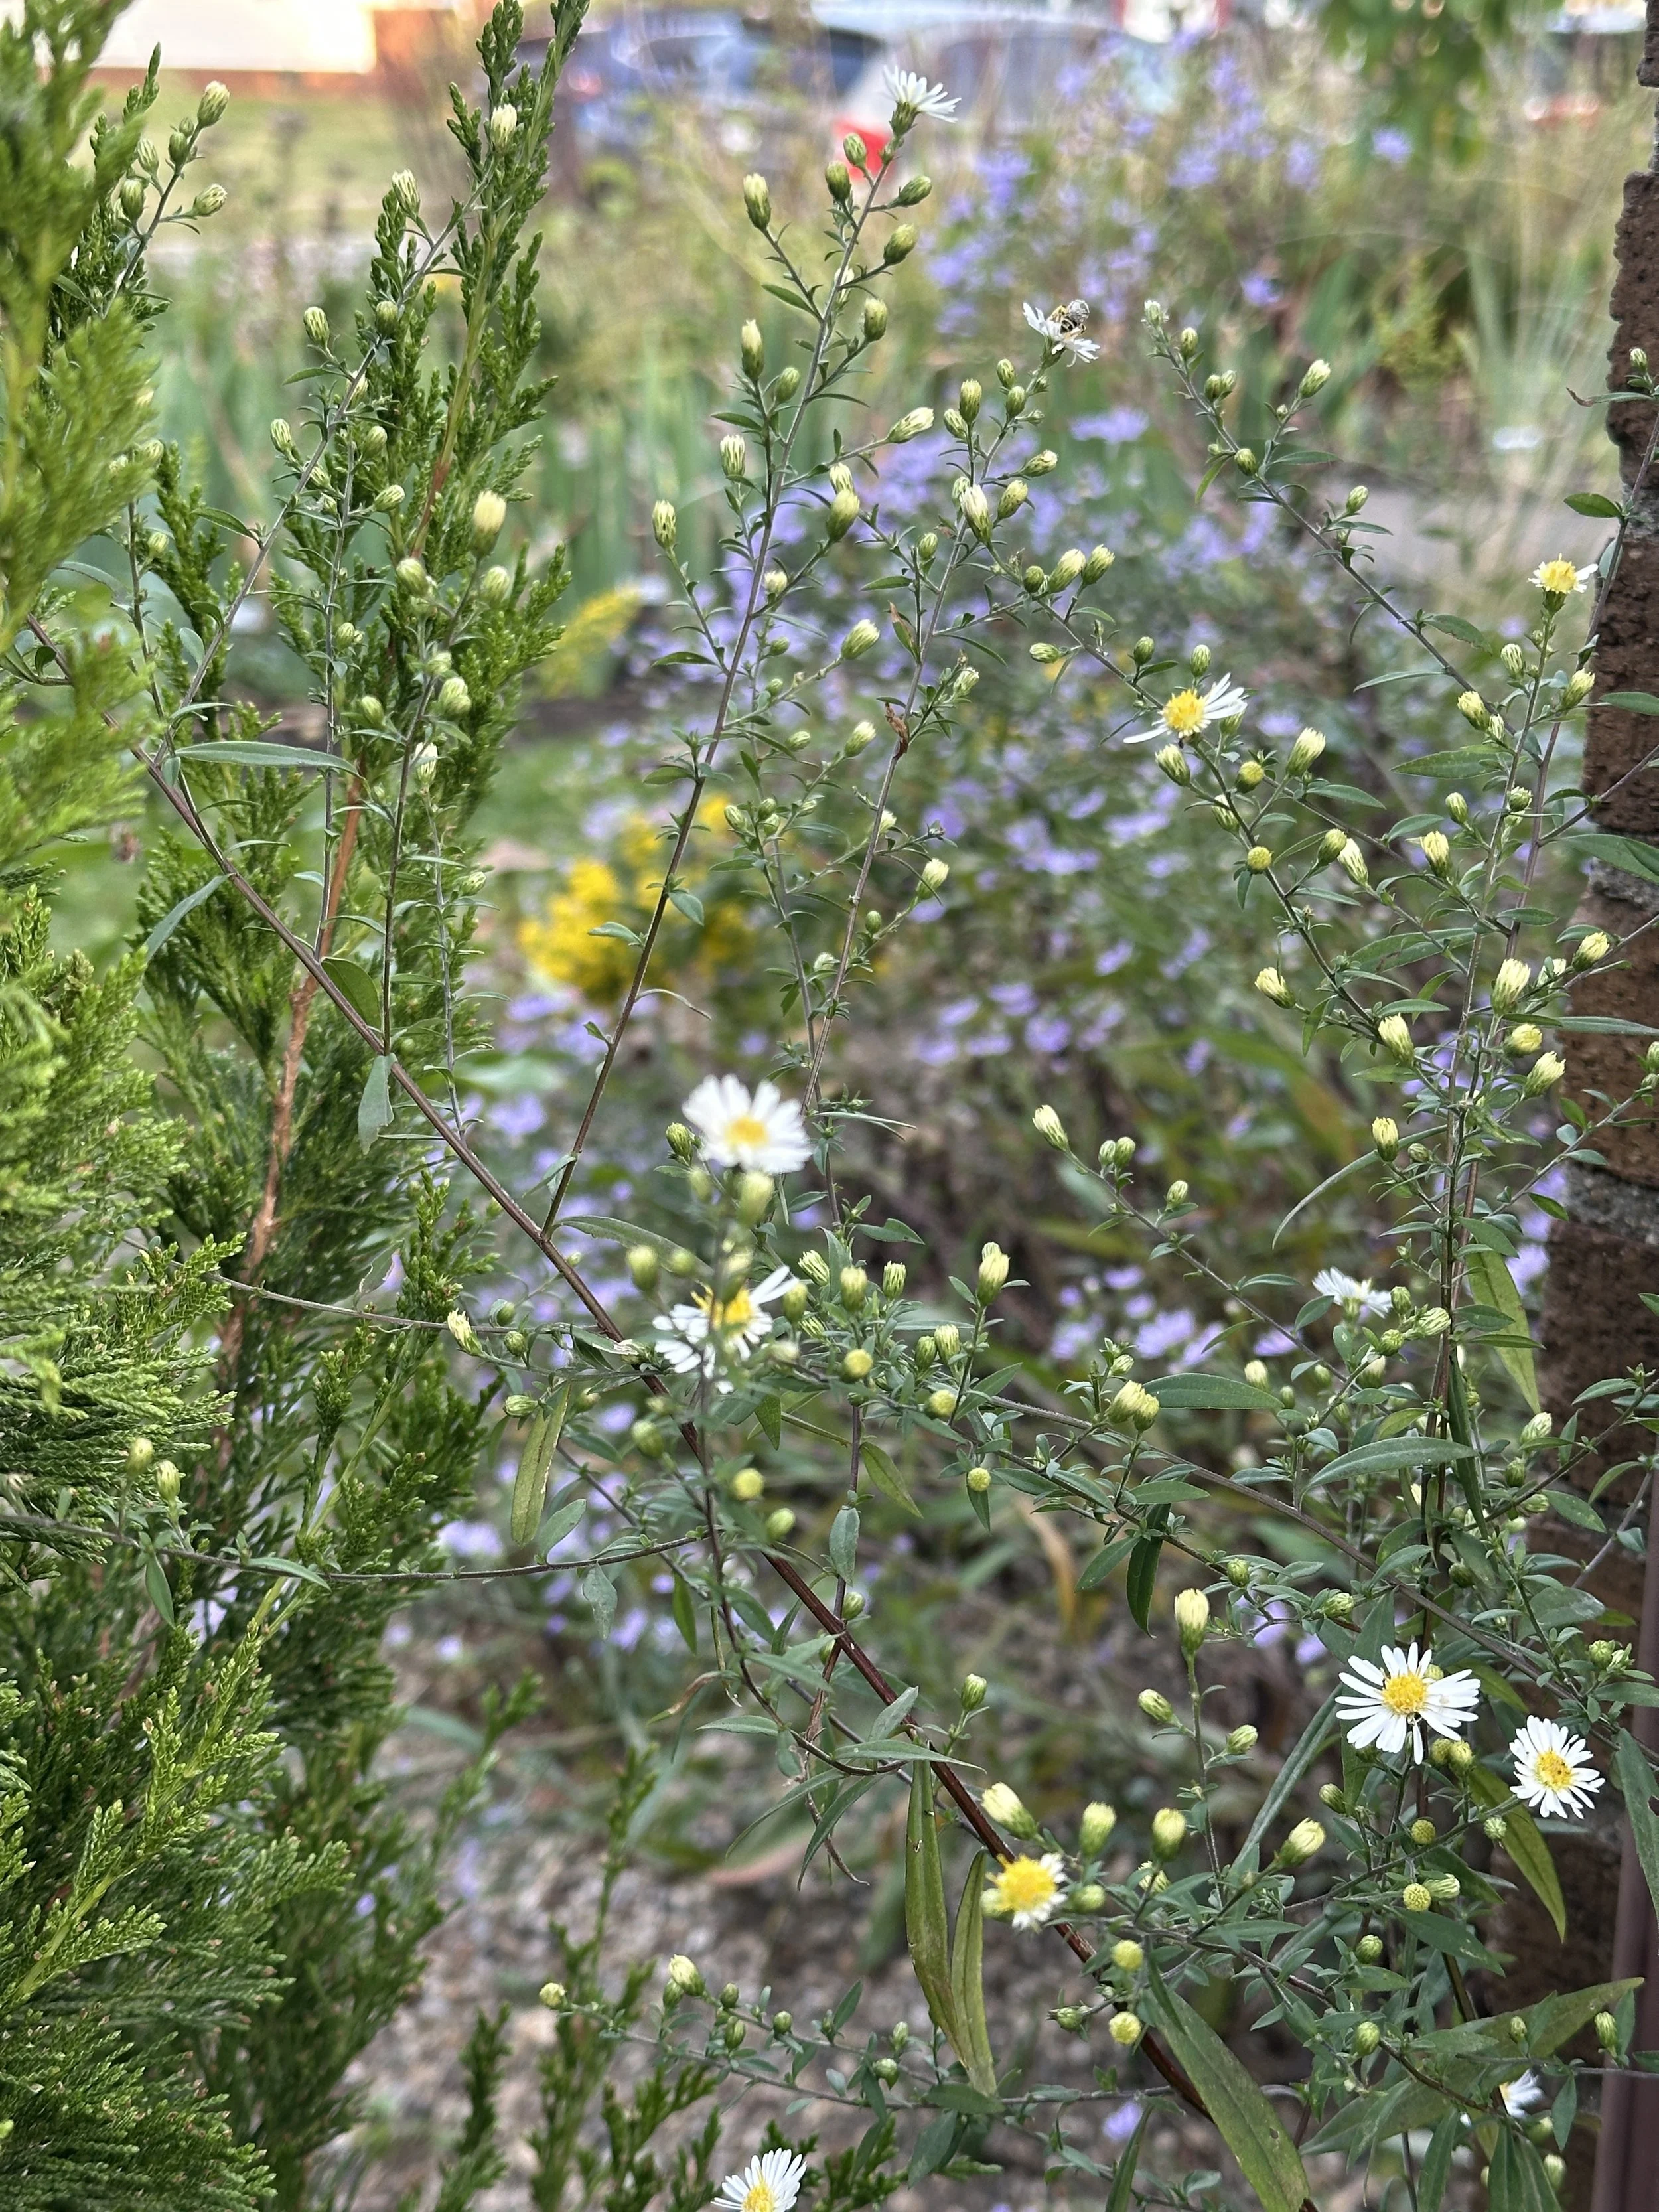
Asters layer with Juniper and Solidago in the autumn garden, some happy accidents indeed. This is the view from where we store the trash cans, by the way…
Thanks for joining me in the garden today.
I hope you enjoyed this voyage and look back, and I hope it’s inspired you on your own lawn conversion journey, no matter where you might be.
If nothing else, I hope sharing this today helps you feel more empowered and confident: even the “experts” are still learning and figuring things out - constantly. What matters most is that we share what we learn, because I believe more people deserve to experience this.
If you want to keep diving in and learning more, I’d love to see you at one of the Lawn Conversion Workshops this year. I’m focusing on planting design and management, and we’ll tackle these topics head-on and hands-on.
For everything I’ve learned, and all the plants I’ve ripped out, replanted, moved, fussed and fawned over, this project has brought nothing but joy.
It’s allowed me to connect with our neighbors more easily.
I’ve witnessed folks enjoying it even when I’m not out there to say hello.
Coming home to a cloud of Monarchs will never get old.
Watching (and hearing!) dozens of bumblebees bouncing between Penstemon and Echinacea is the most absurd and delightful thing to experience.
Watching the finches and cardinals perch on those same Echinacea for their morning feast of seeds a few months later fills my heart.
I’m so glad I did it, I’d do it all over again if given the chance (albeit a little wiser), and I’m so honored that we’re in a position to share this knowledge forward.
Happy planting, folks.
Ben | Botany & Co. Farmer & Founder